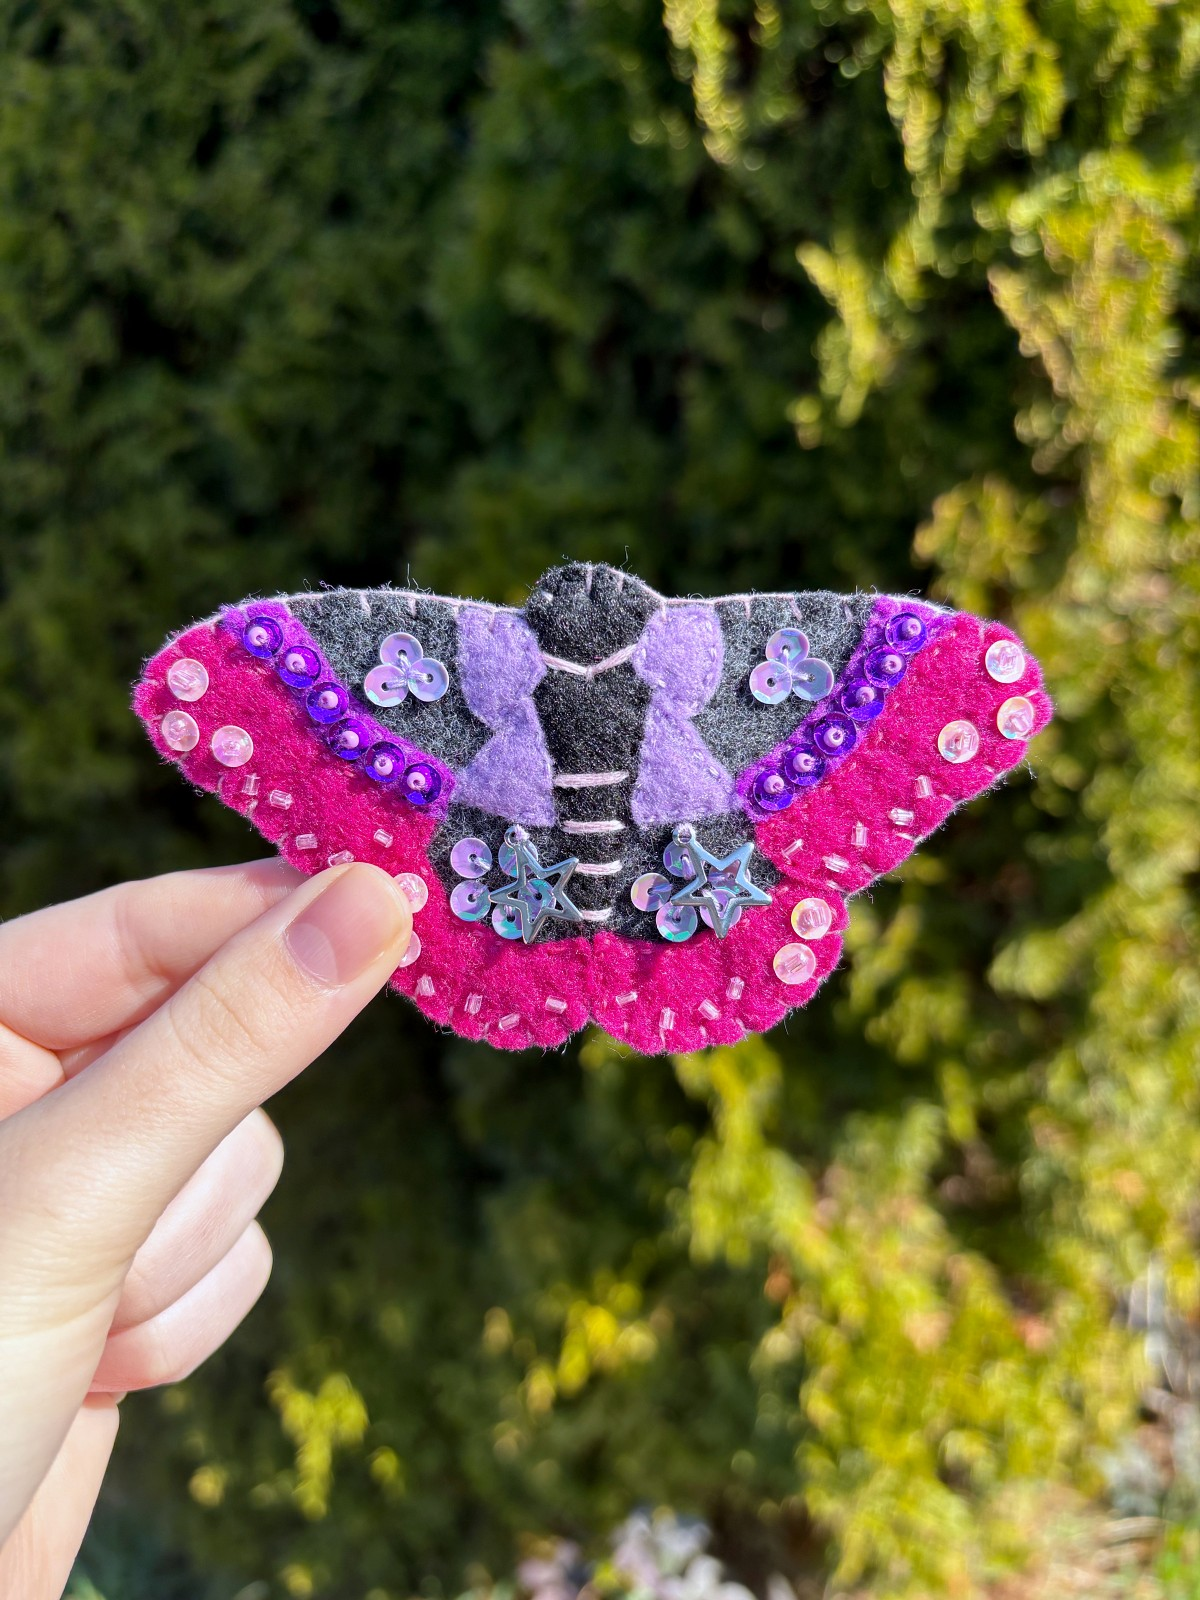
Moth Felt Ornament, Simple Sewing Project.
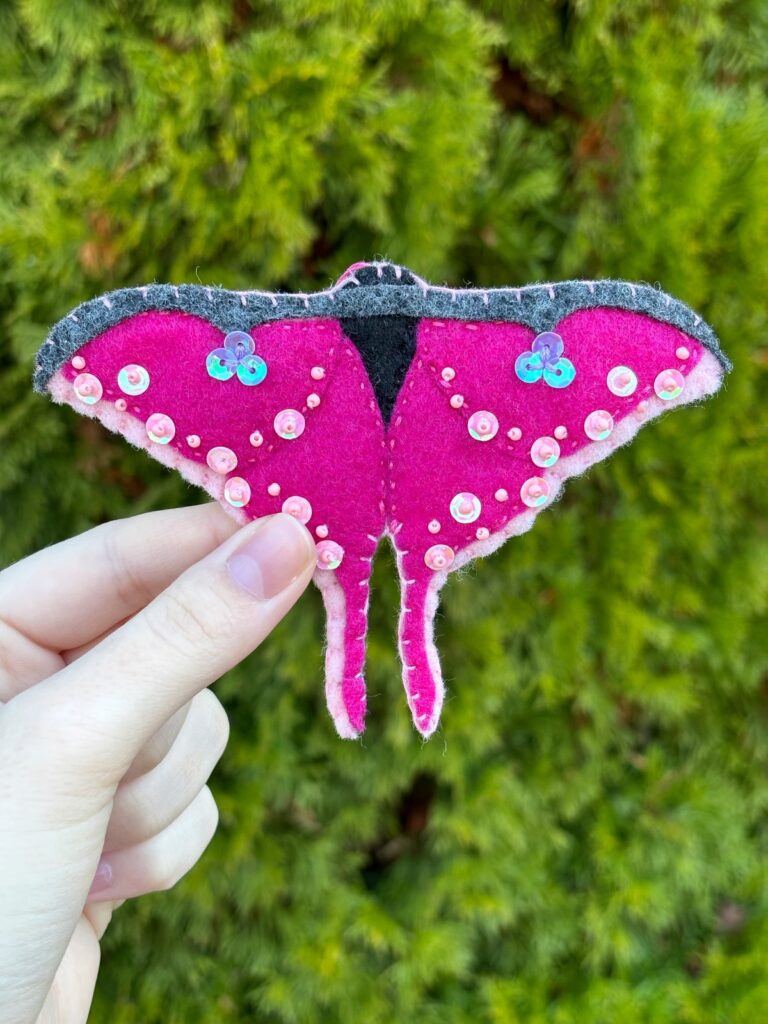
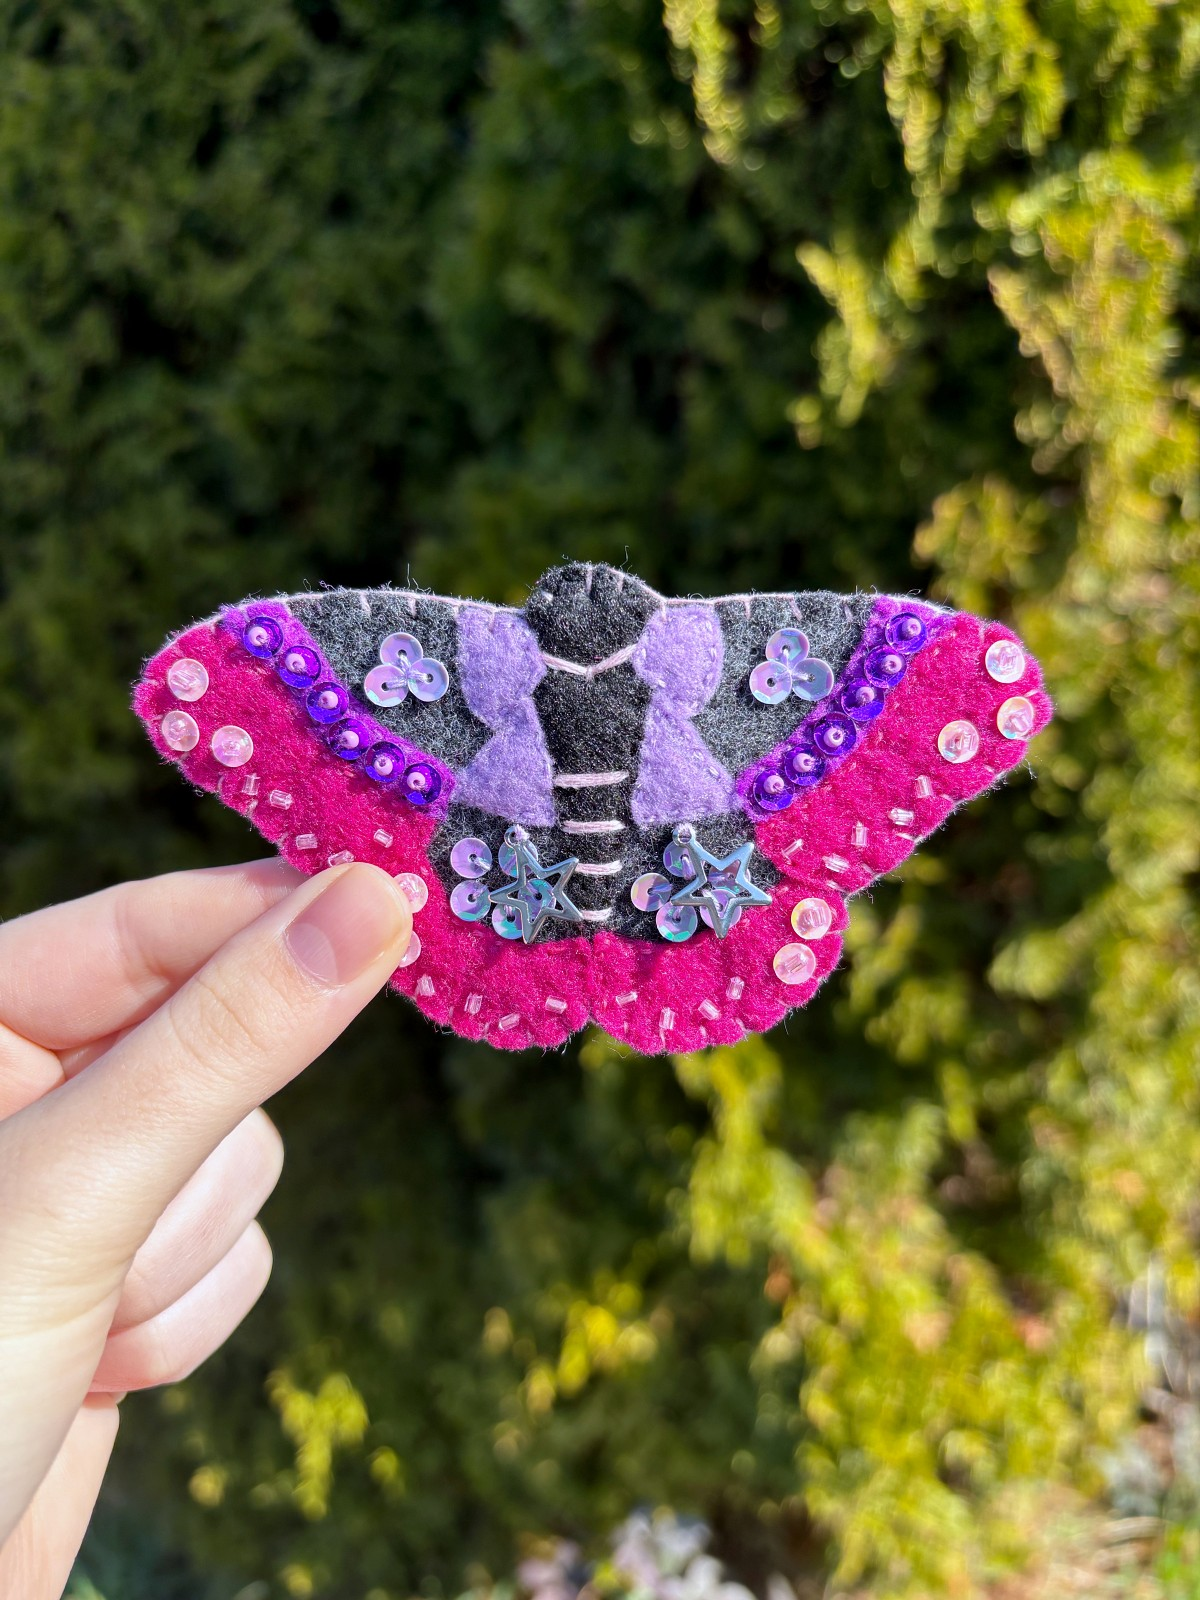
Follow along with our easy step by step instructions and Free PDF sewing pattern to make your own beautiful moth felt ornament. This cosmic moth ornament sparkles in the sun with its beaded and sequined details. With only a few simple materials, this felt ornament makes for the perfect weekend project. Make one and hang it on the wall, or make a hand full of moths and string them together for a fun whimsical garland.
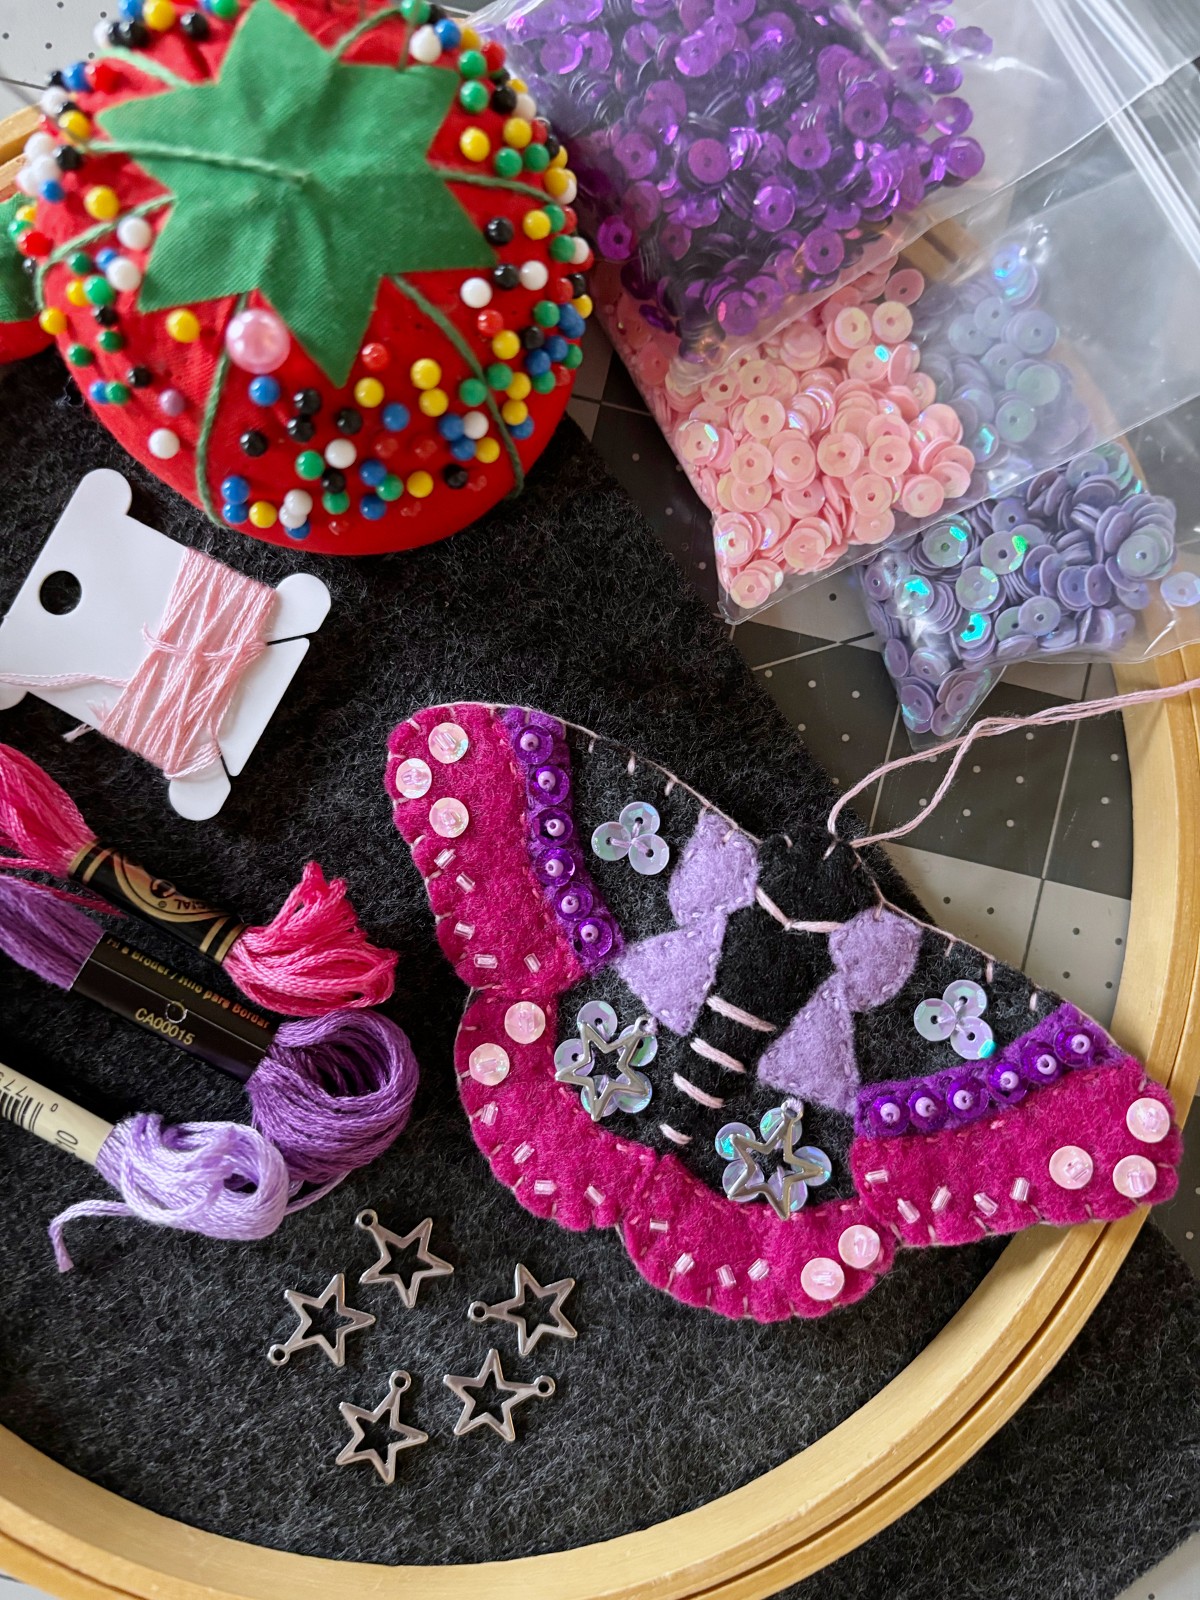
This moth felt ornament will make the perfect autumn decoration. When the weather starts to get cold we break out our box of fall decor. I’m not just talking pumpkins, but more whimsical decor like purple and orange floral weavings and a giant moth wall sculpture. We decided to make this cosmic pink and purple moth ornament to go with our colorful autumn aesthetic we have going on in our home. You can customize this project to your taste by picking any colors and charms you want. Grab the pattern at the end of this page and follow along with our step by step instructions. Let’s get crafting.
*This post contains affiliate links meaning I get a commission if you purchase through my links, at no extra cost to you.
Materials
- Felt sheets (gray, black, light purple, dark purple, and dark pink)
- Star charms
- Embroidery thread (light pink, dark pink, purple, light purple, and black)
- Tube beads 3mm (light pink)
- Seed beads (purple)
- Sequins 4mm (light pink, light purple, and dark purple)
- Sewing pins
- Embroidery thread wax (optional)
- Scissors
- Ball point pen
- Embroidery hoop
- Embroidery hoop holder (optional)
Instructions
Step 1
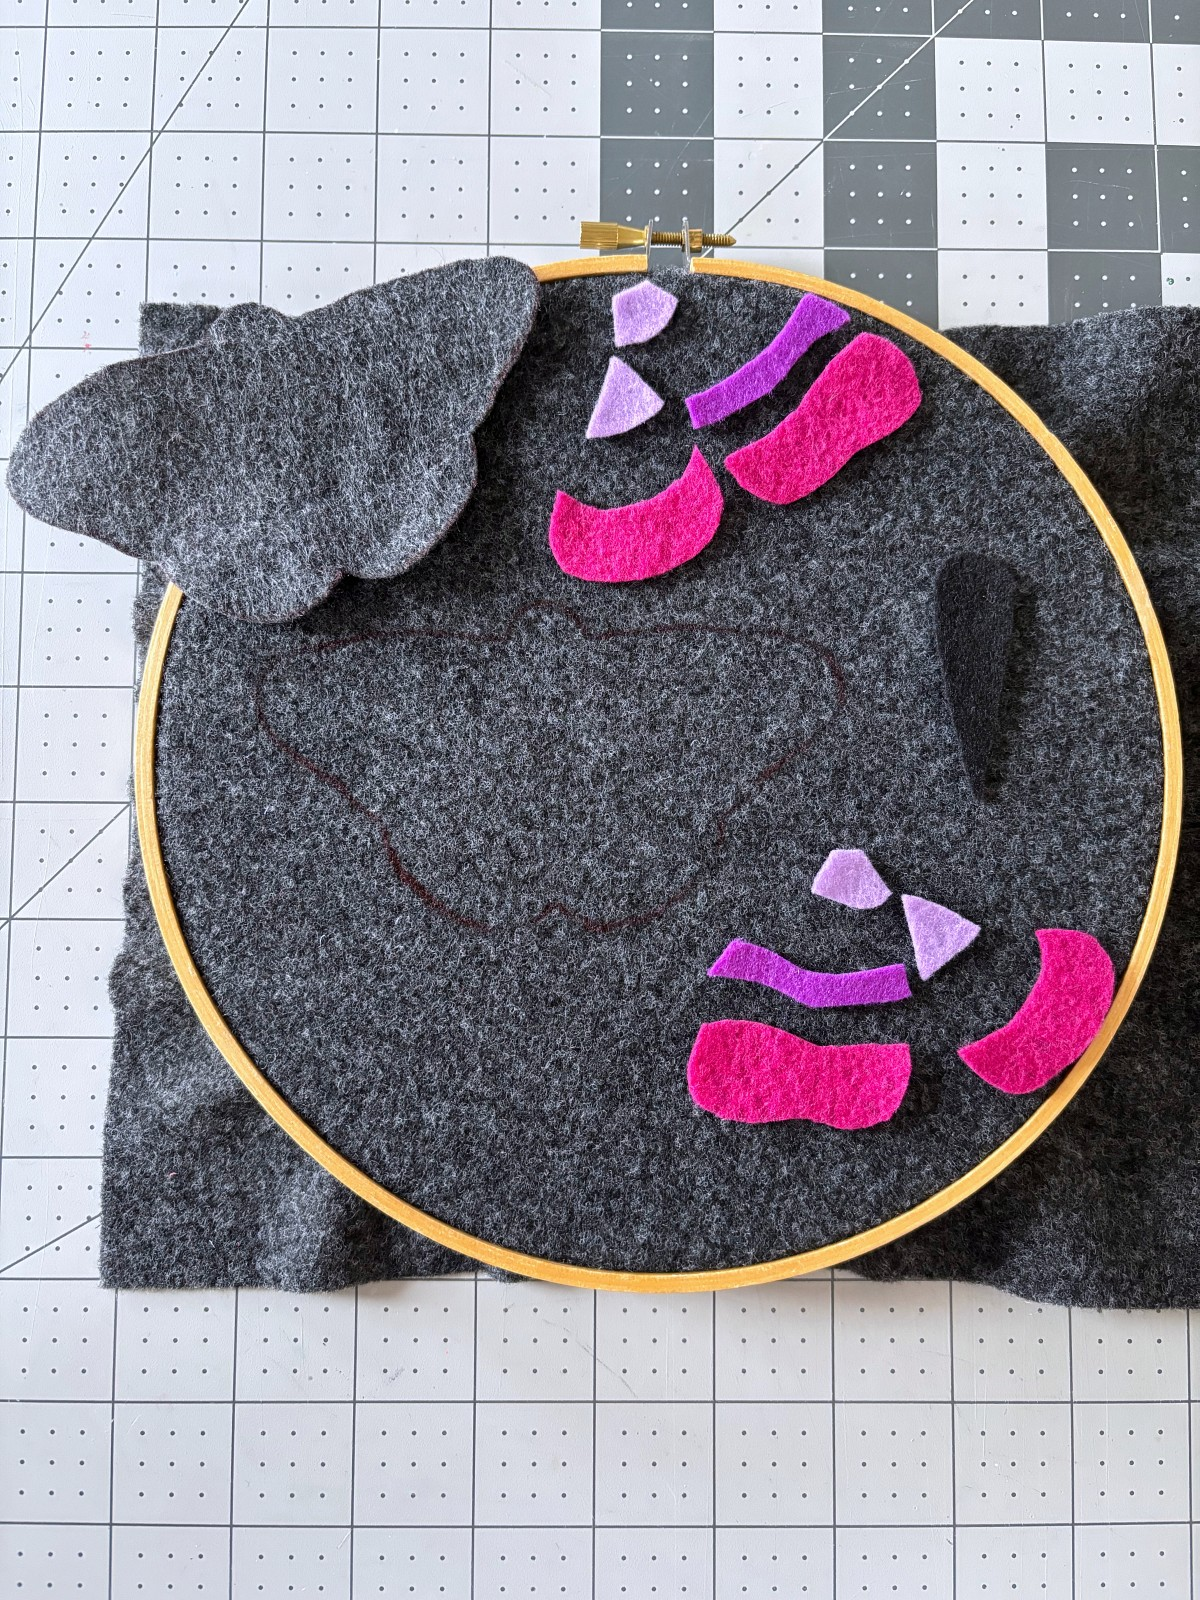
Trace the moth pattern pieces on the designated colors of felt. Make sure to leave enough space between the two gray moth base pieces so that one can be cut out, while the other can be placed in an embroidery hoop.
Cut out all moth pattern pieces except for the base in the embroidery hoop. This will be where we will sew all of the detail onto. An optional tool to use is an embroidery hoop holder. This makes adding the details easier without making your hand tired from trying to hold the hoop yourself.
Note: All sewing for this project will be done with three strands thick of embroidery thread.
Step 2
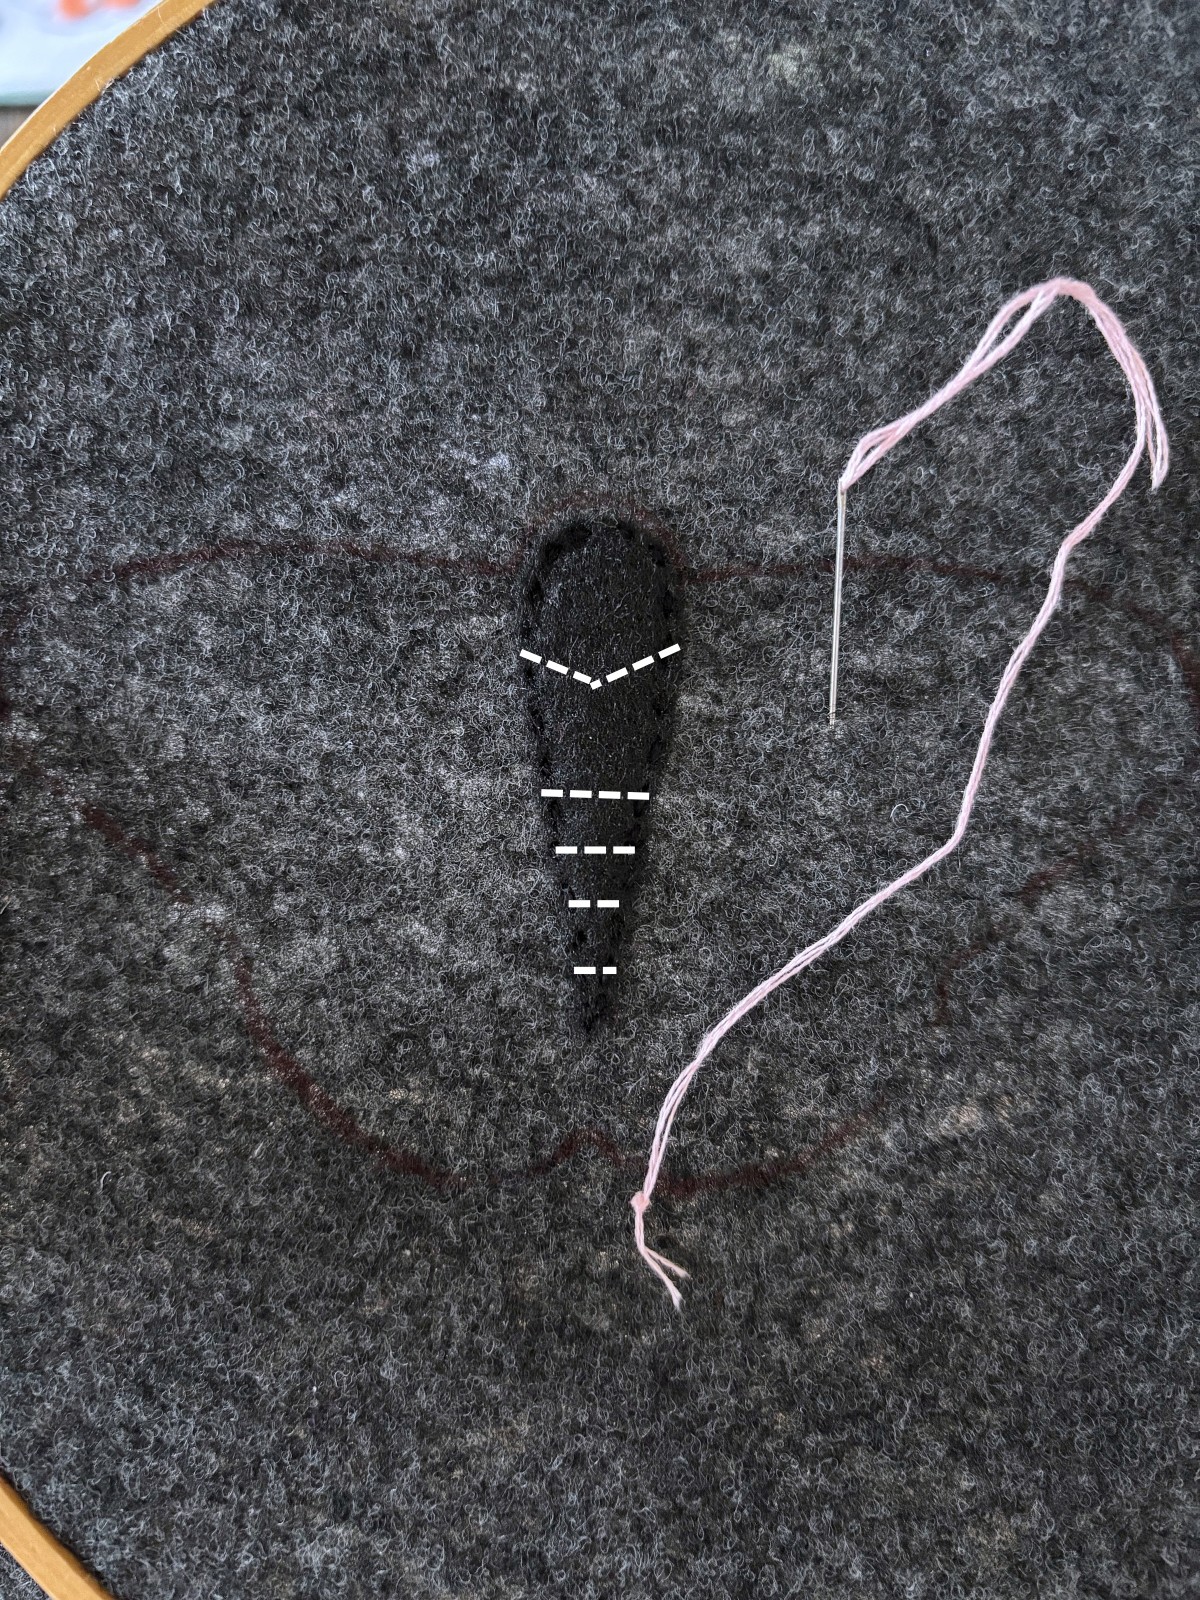
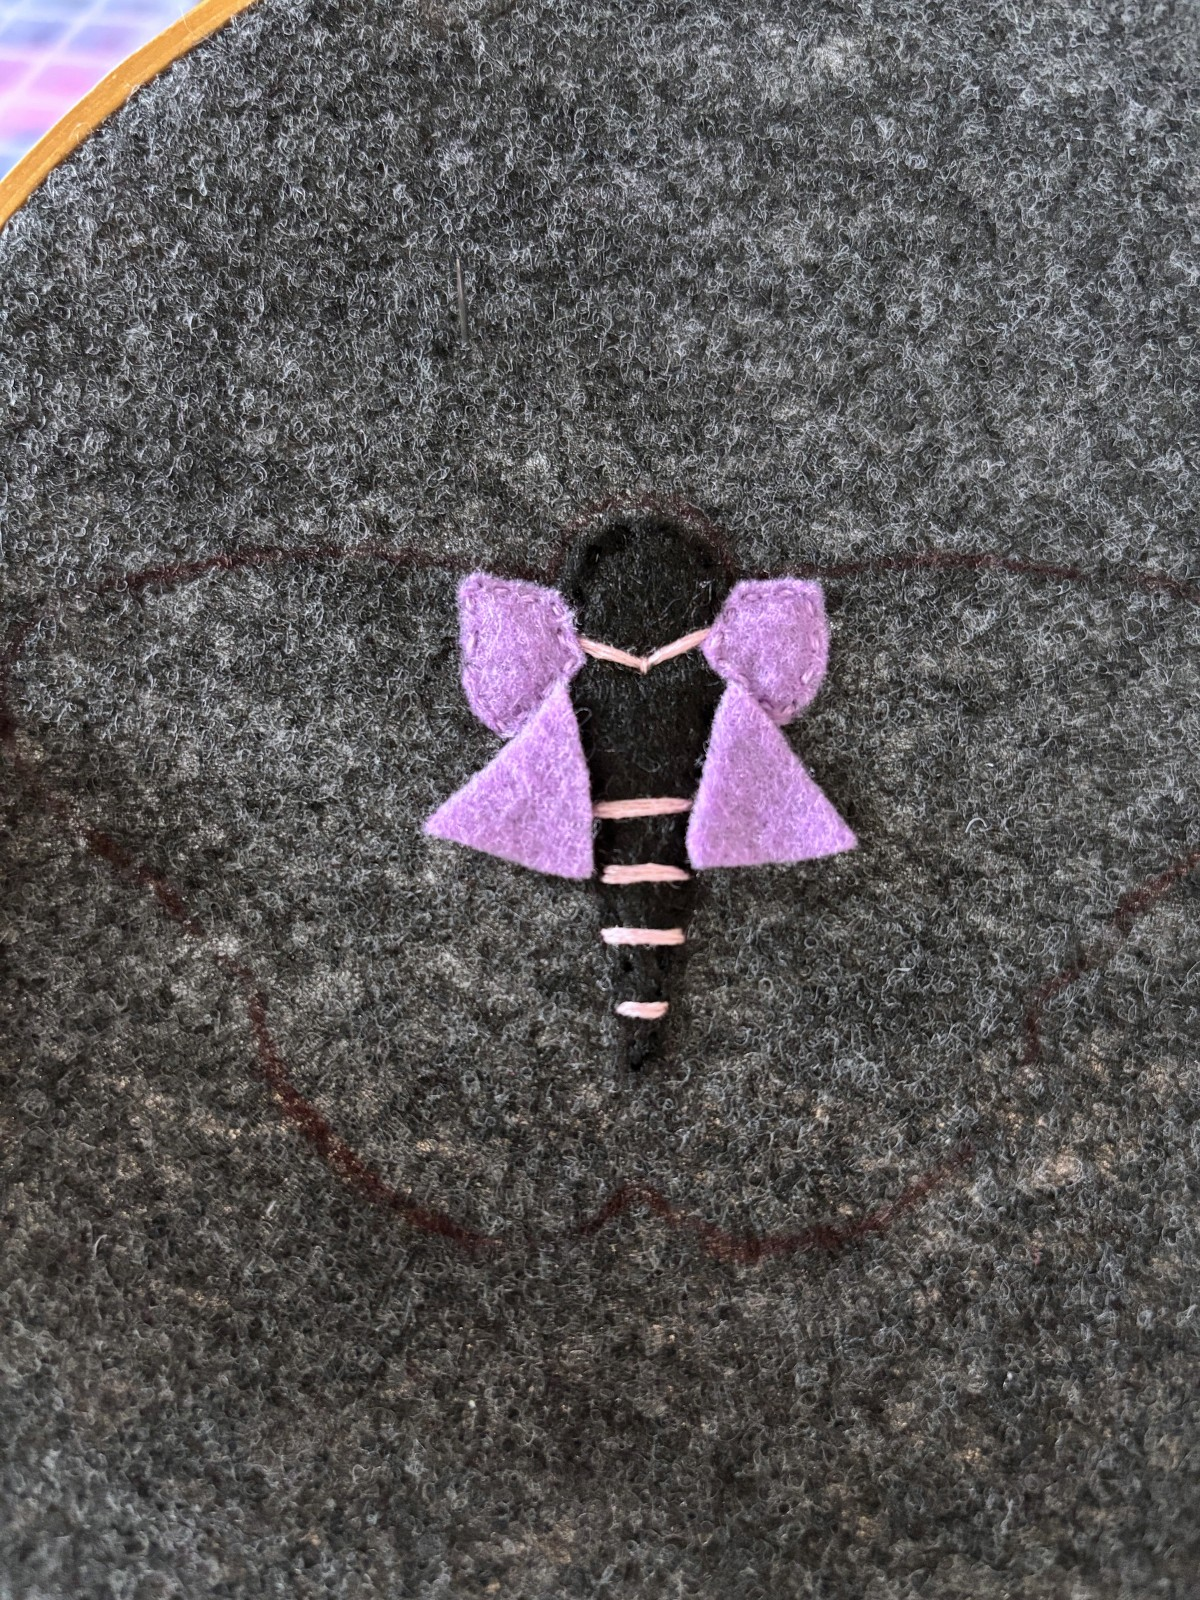
Adding the moth body to the ornament. Place the moth body on the gray felt base in the embroidery hoop. Sew a running stitch with black embroidery thread around the outside edge of the body to sew it in place.
Now, using light pink embroidery thread, sew on the pink embroidery details as indicated by the photo below. Use a fly stitch for the top V pointed line, and a simple straight stitch for the lower four body lines. I doubled up my thread for these details, but it’s up to you whether you want the lines to be thicker or thinner.
Note: when sewing with embroidery thread, I find that using embroidery thread wax helps to keep the thread straight and more manageable. I like to use it in all of my sewing projects that involve embroidery thread to help prevent the thread from knotting itself, but this is an optional tool for this project.
Step 3
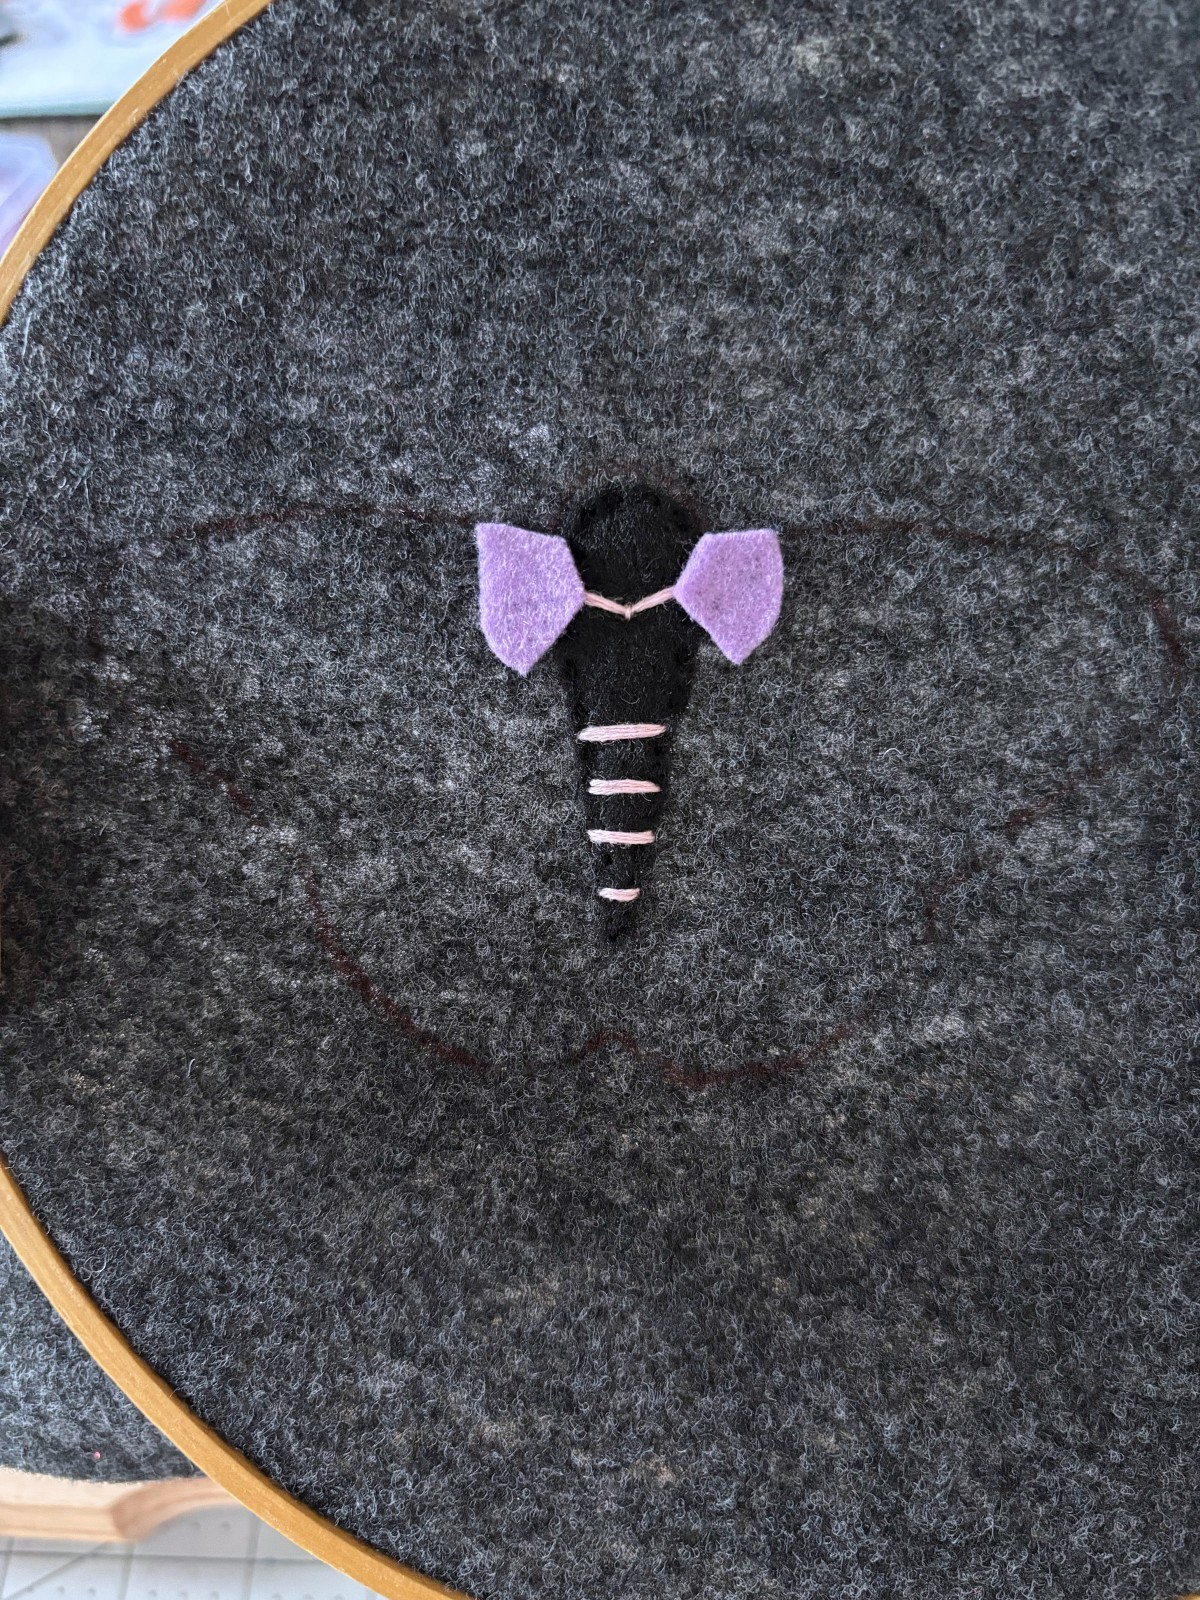
Now we can start adding the light purple details to our moth felt ornament. Start by placing the top wing pieces on the moth base. You can pin these in place to help keep them lined up with the body. Using light purple embroidery thread, sew a running stitch around the perimeter to secure them to the base.
Next, place the light purple lower wing pieces. Using a running stitch, sew around the perimeter of these pieces to secure them.
Step 4
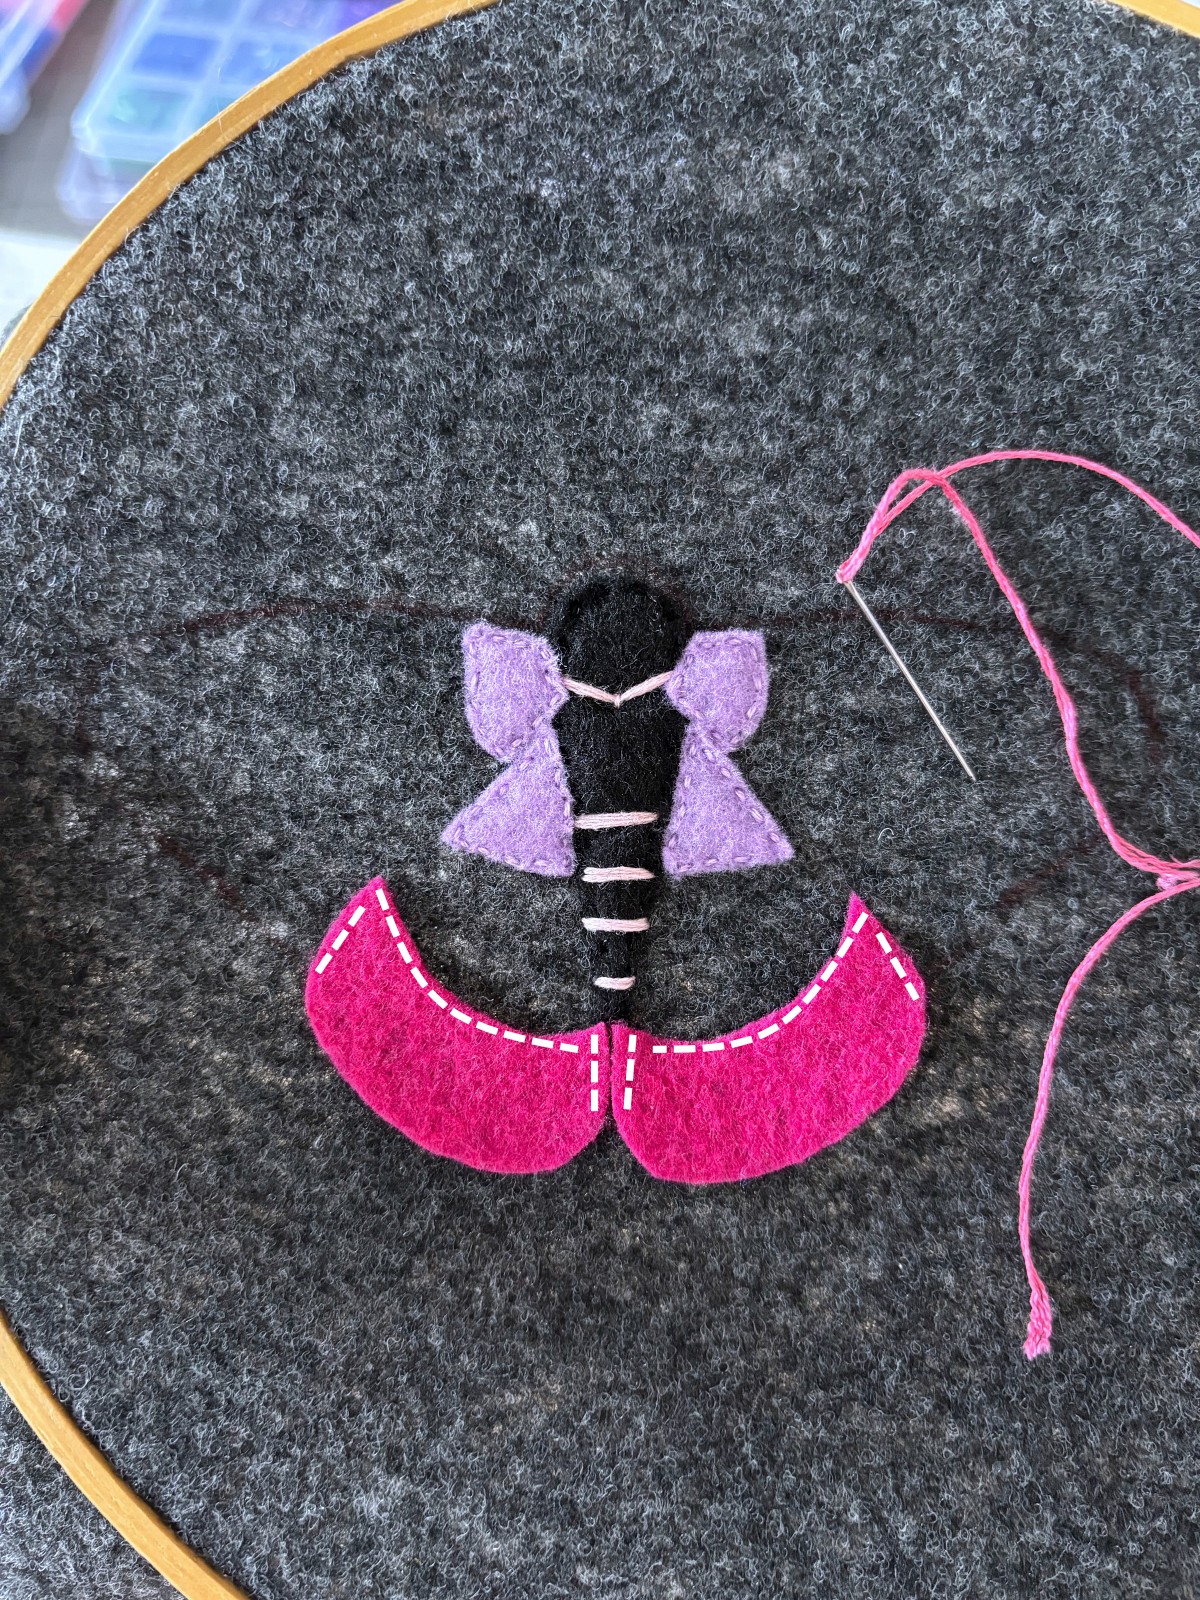
Lets continue creating the wings of the moth by adding the dark pink details. Start by placing the left and right bottom wing pieces and pin in place. Using dark pink embroidery thread, sew a running stitch along the indicated white dashed lines pictured below.
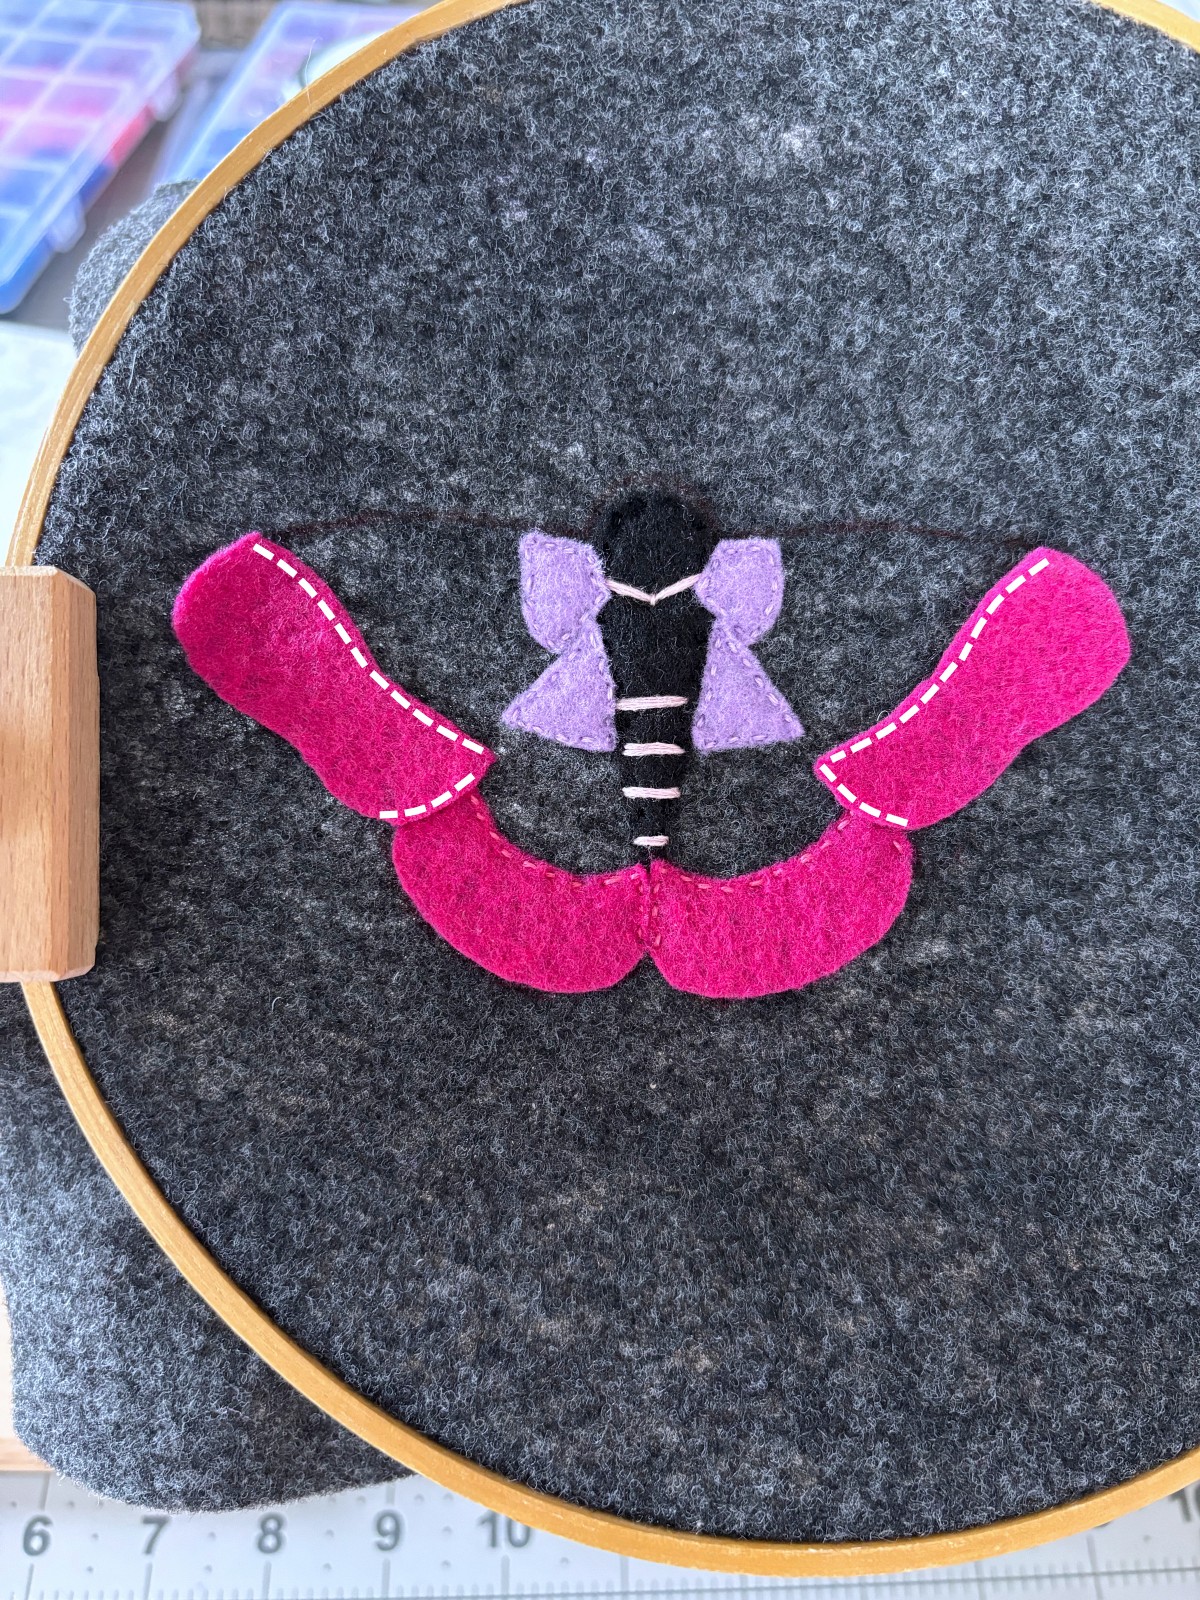
Next, place the upper wing details as shown and pin in place. Sew a running stitch along the indicated white dashed lines shown in the picture below.
Step 5
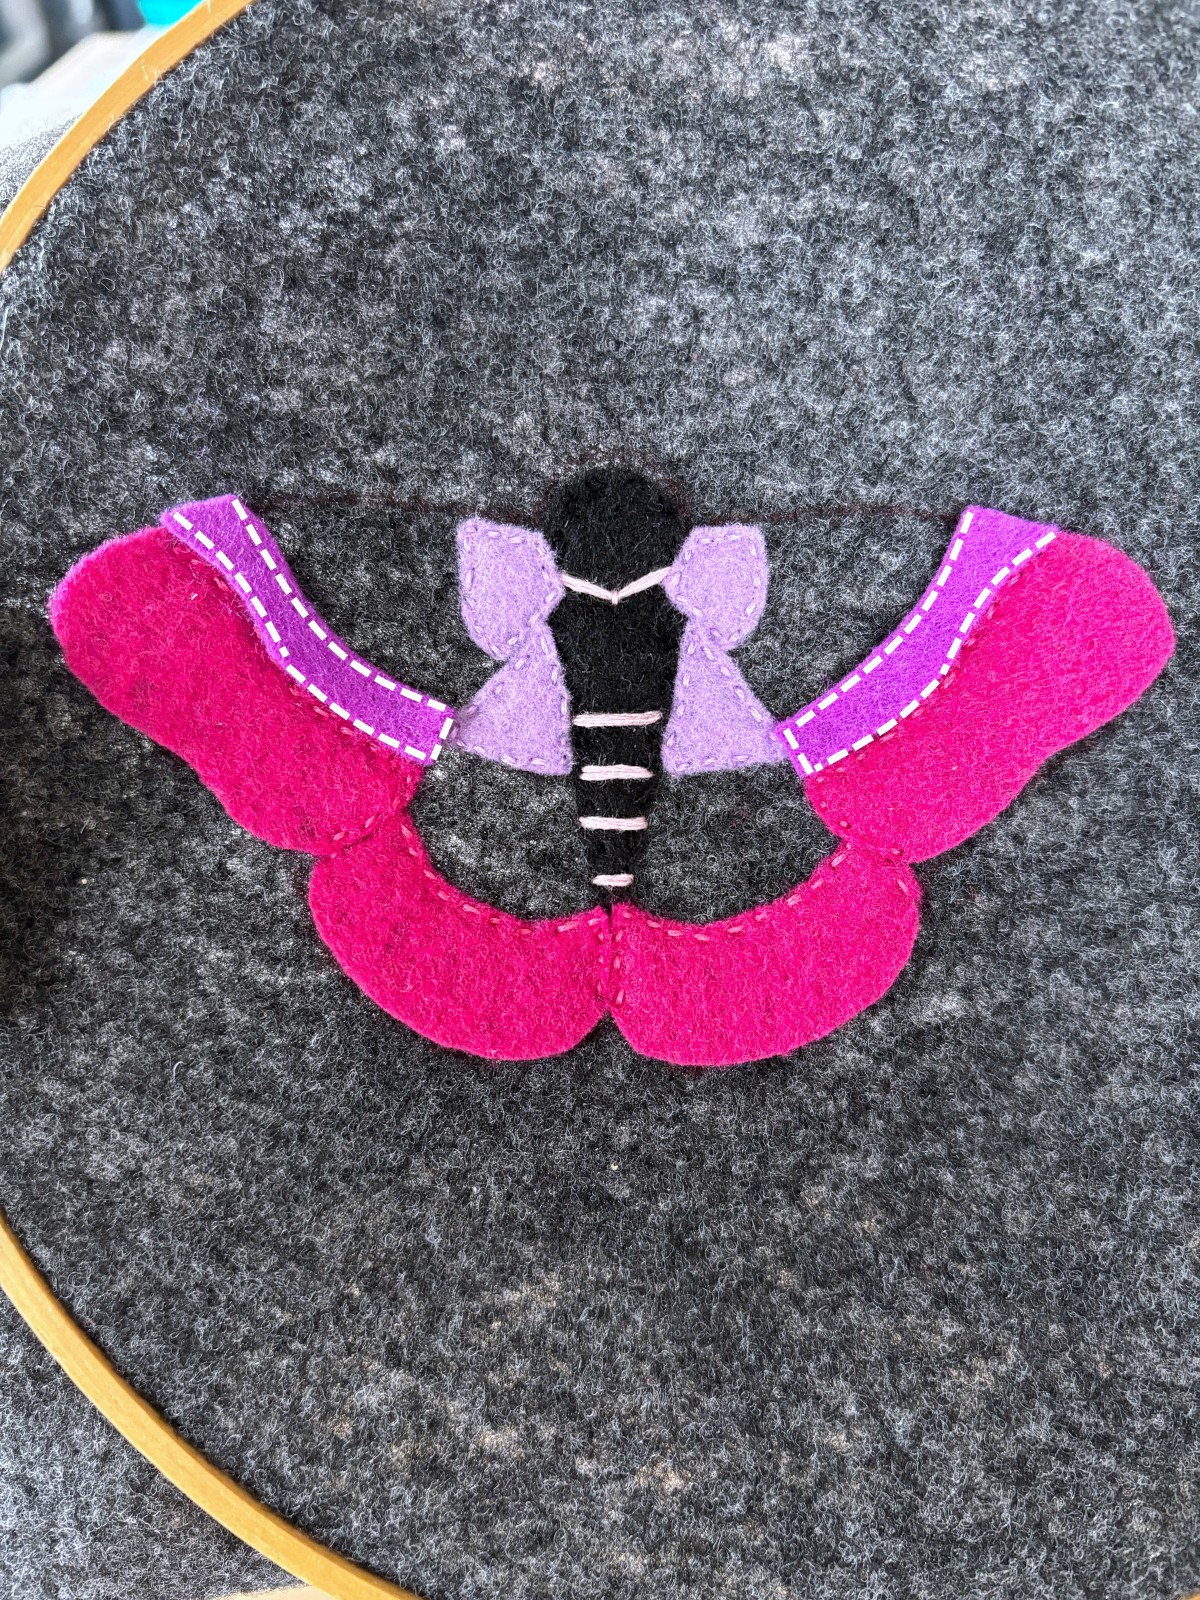
Now let’s add the final felt wing pieces. Take the dark purple top wing pieces and pin them in place. Using dark purple embroidery thread, sew a running stitch along the white dashed lines pictured below.
Step 6
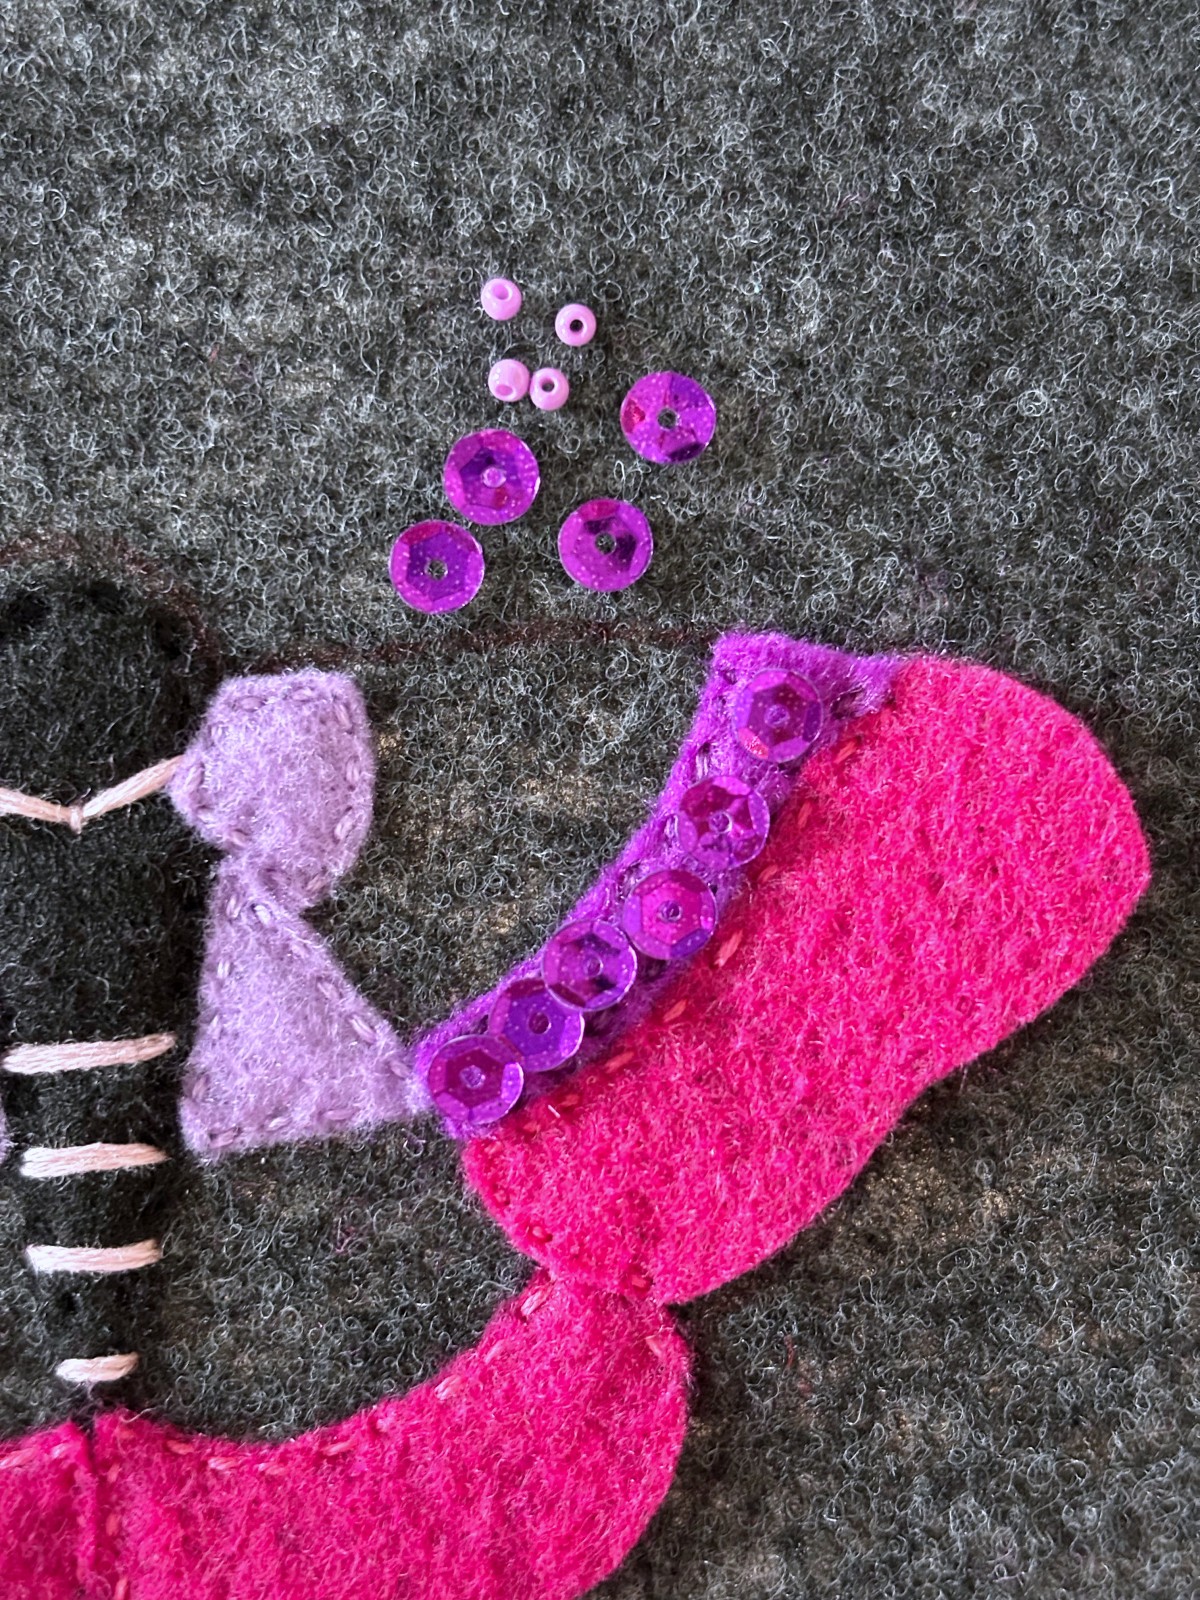
Time to add the sequins and bead embellishments to our moth ornament. Let’s start with adding the dark purple sequins and seed beads to the top wings. As shown in the picture below, I chose to use six dark purple sequins and seed beads on each upper wing.
Let’s sew each dark purple sequins onto the line of dark purple felt. Sew up through the center of the sequin, thread the needle through a purple seed bead, and sew back through the center of the same sequin to secure it in place. Tie a knot on the back side of the ornament and repeat for the remaining sequins.
Step 7
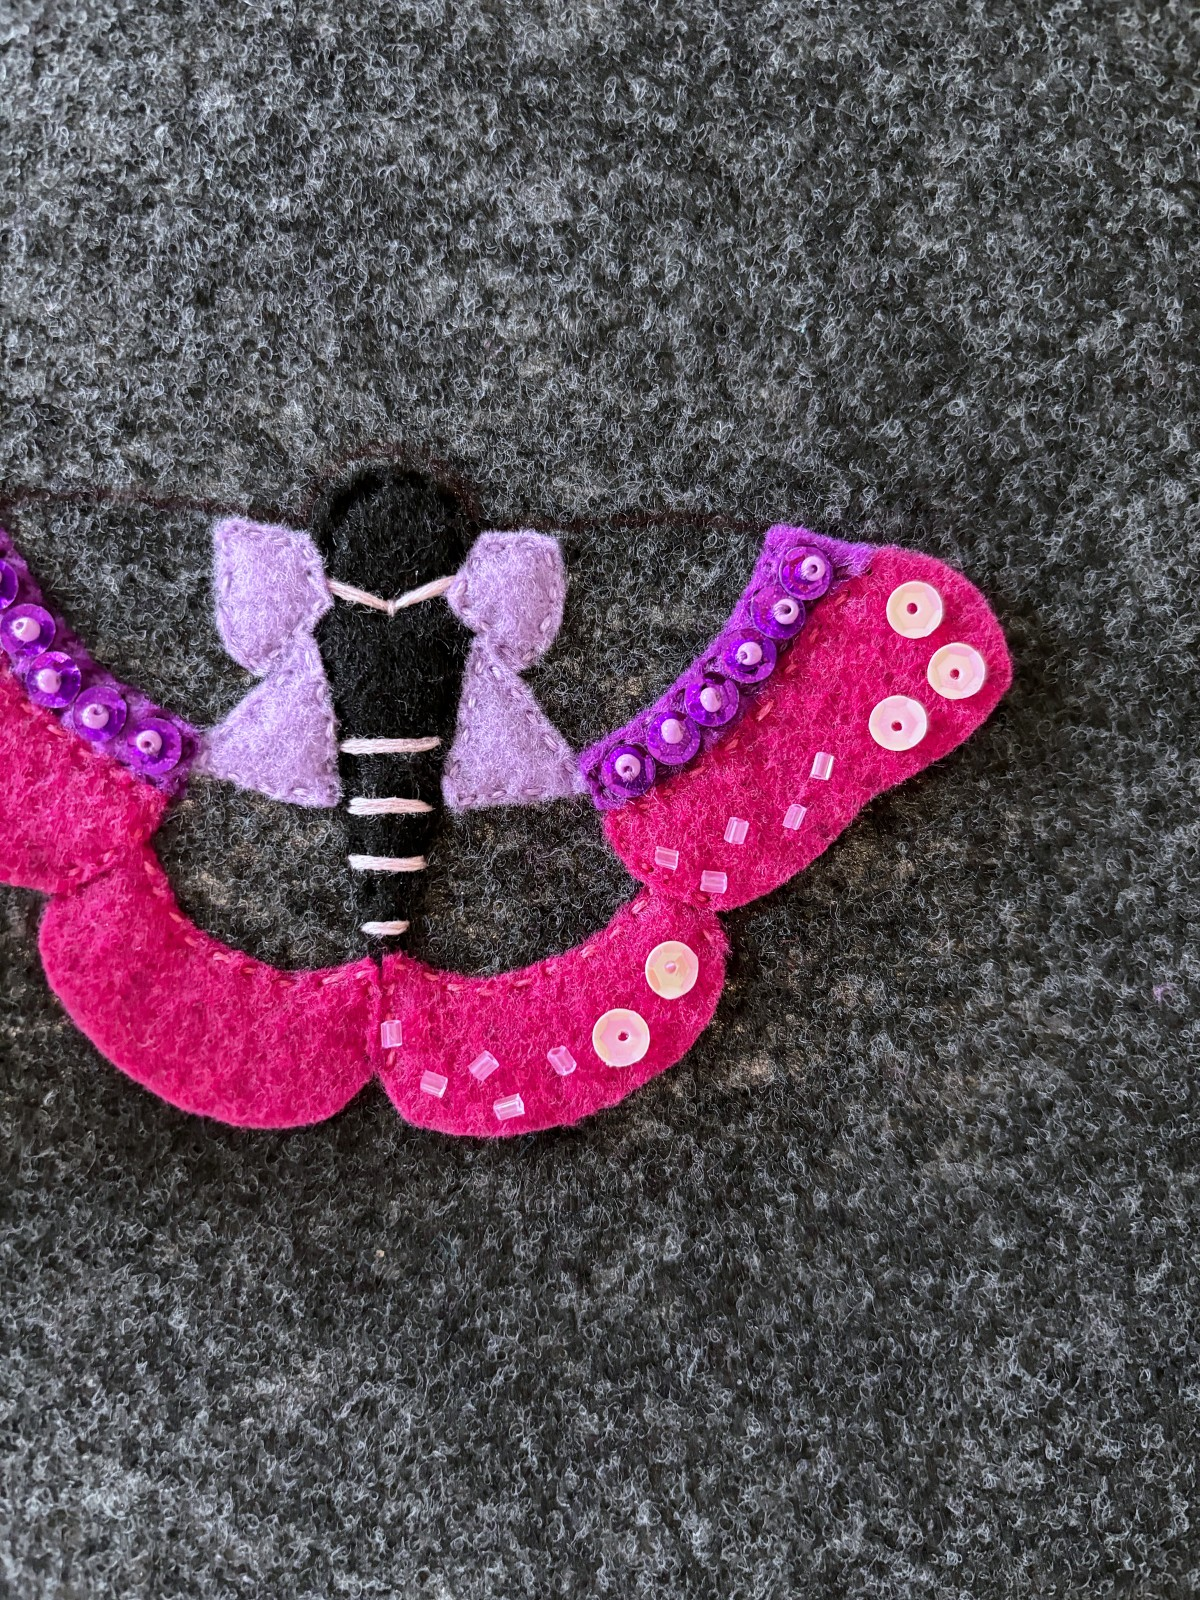
For the beaded and sequined details on the dark pink upper and lower wing details, follow along with my placement as shown in the picture below. We will use a similar technique as we did for attaching the dark purple sequins, but instead of a seed bead, we will be using a tube bead and light pink embroidery thread.
To secure the sequins, sew up through the center of the light pink sequins, thread the needle through a pink tube bead and back down through the center of the sequins. Tack sew the rest of the tube beads. Tie a knot after every bead to secure it tightly in place. Repeat the pattern on the other side of the moth.
Step 8
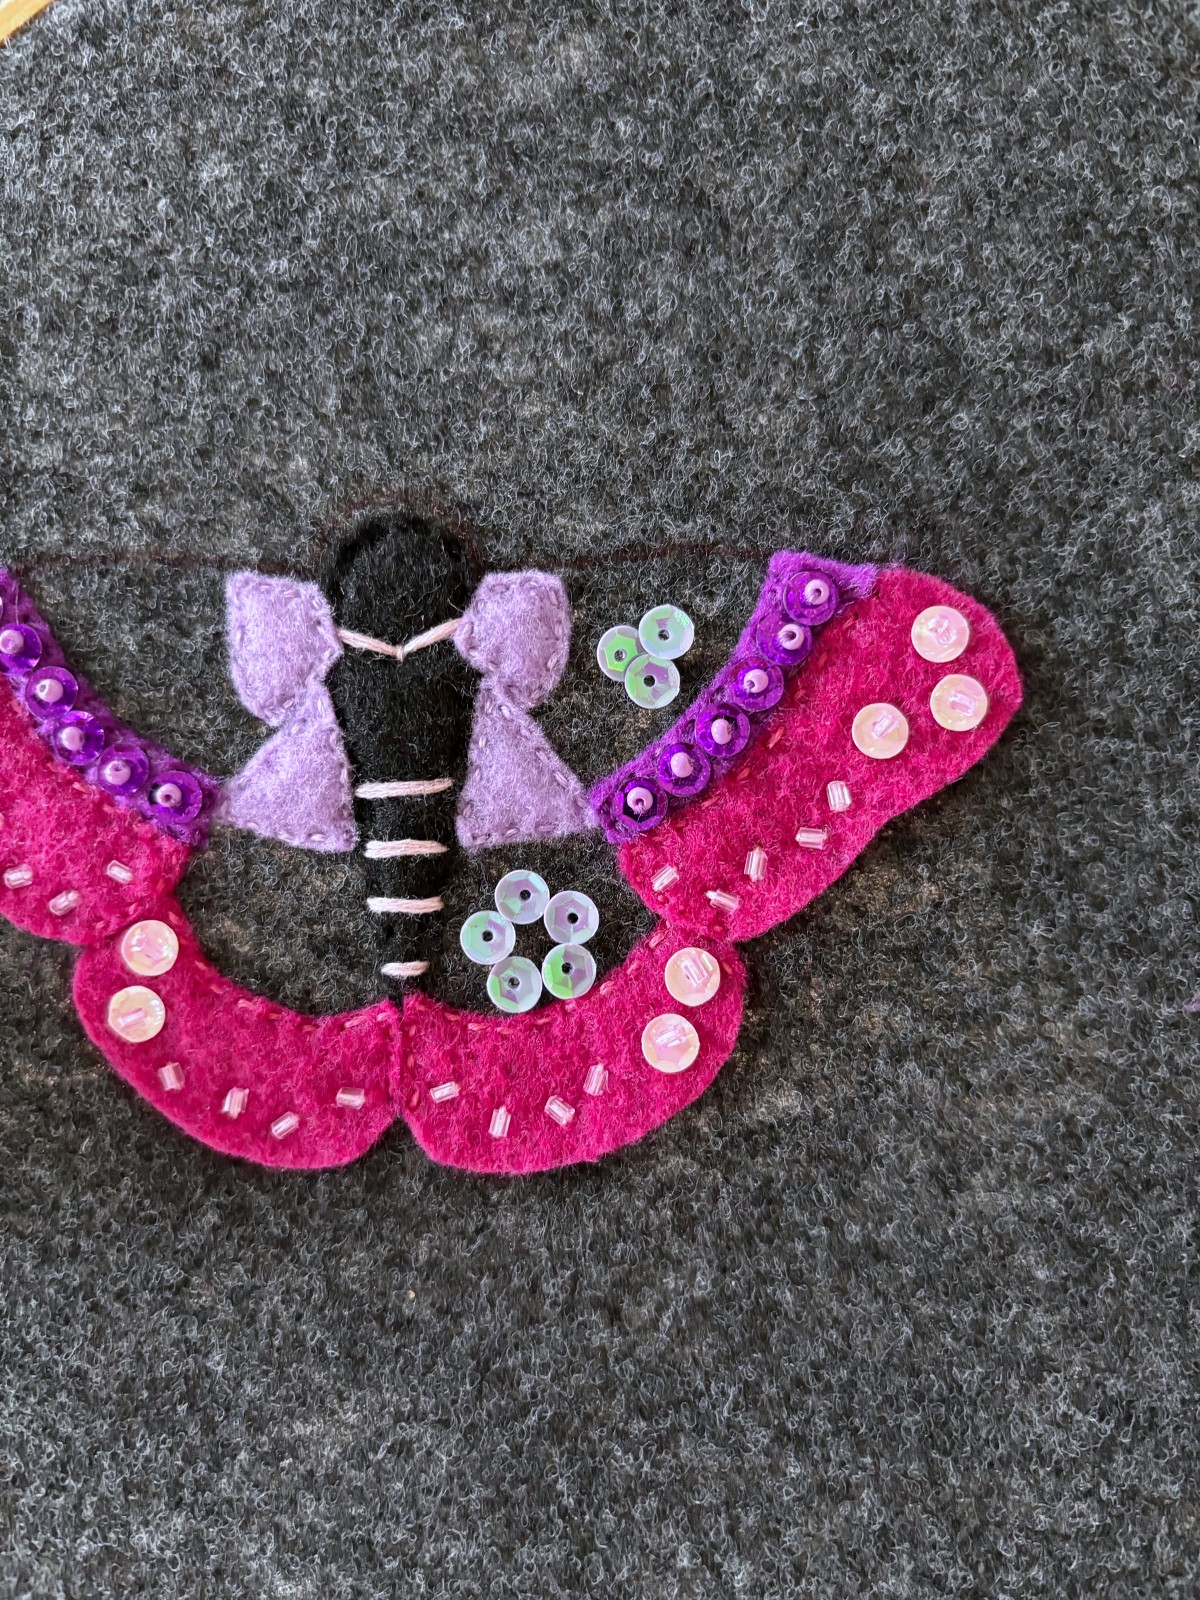
Next, let’s add the light purple sequins details onto the upper and lower wings. As shown in the picture below. We will be sewing three sequins to each upper wing, and five sequins, arranged in the shape of a star, to each lower wing. Use light purple embroidery thread to attach the sequins.
For the upper wings, start with any one of the three sequins. Sew up through the center and then down right at the edge of the sequin, towards the center of the pile. Repeat for the remaining two sequins, sewing back down in the same center point of the first sequin.
Similarly, to attach the lower wing sequins, sew up through the center of the sequins, and back down at the edge on the side that is pointing towards the center of the star shape.
Step 9
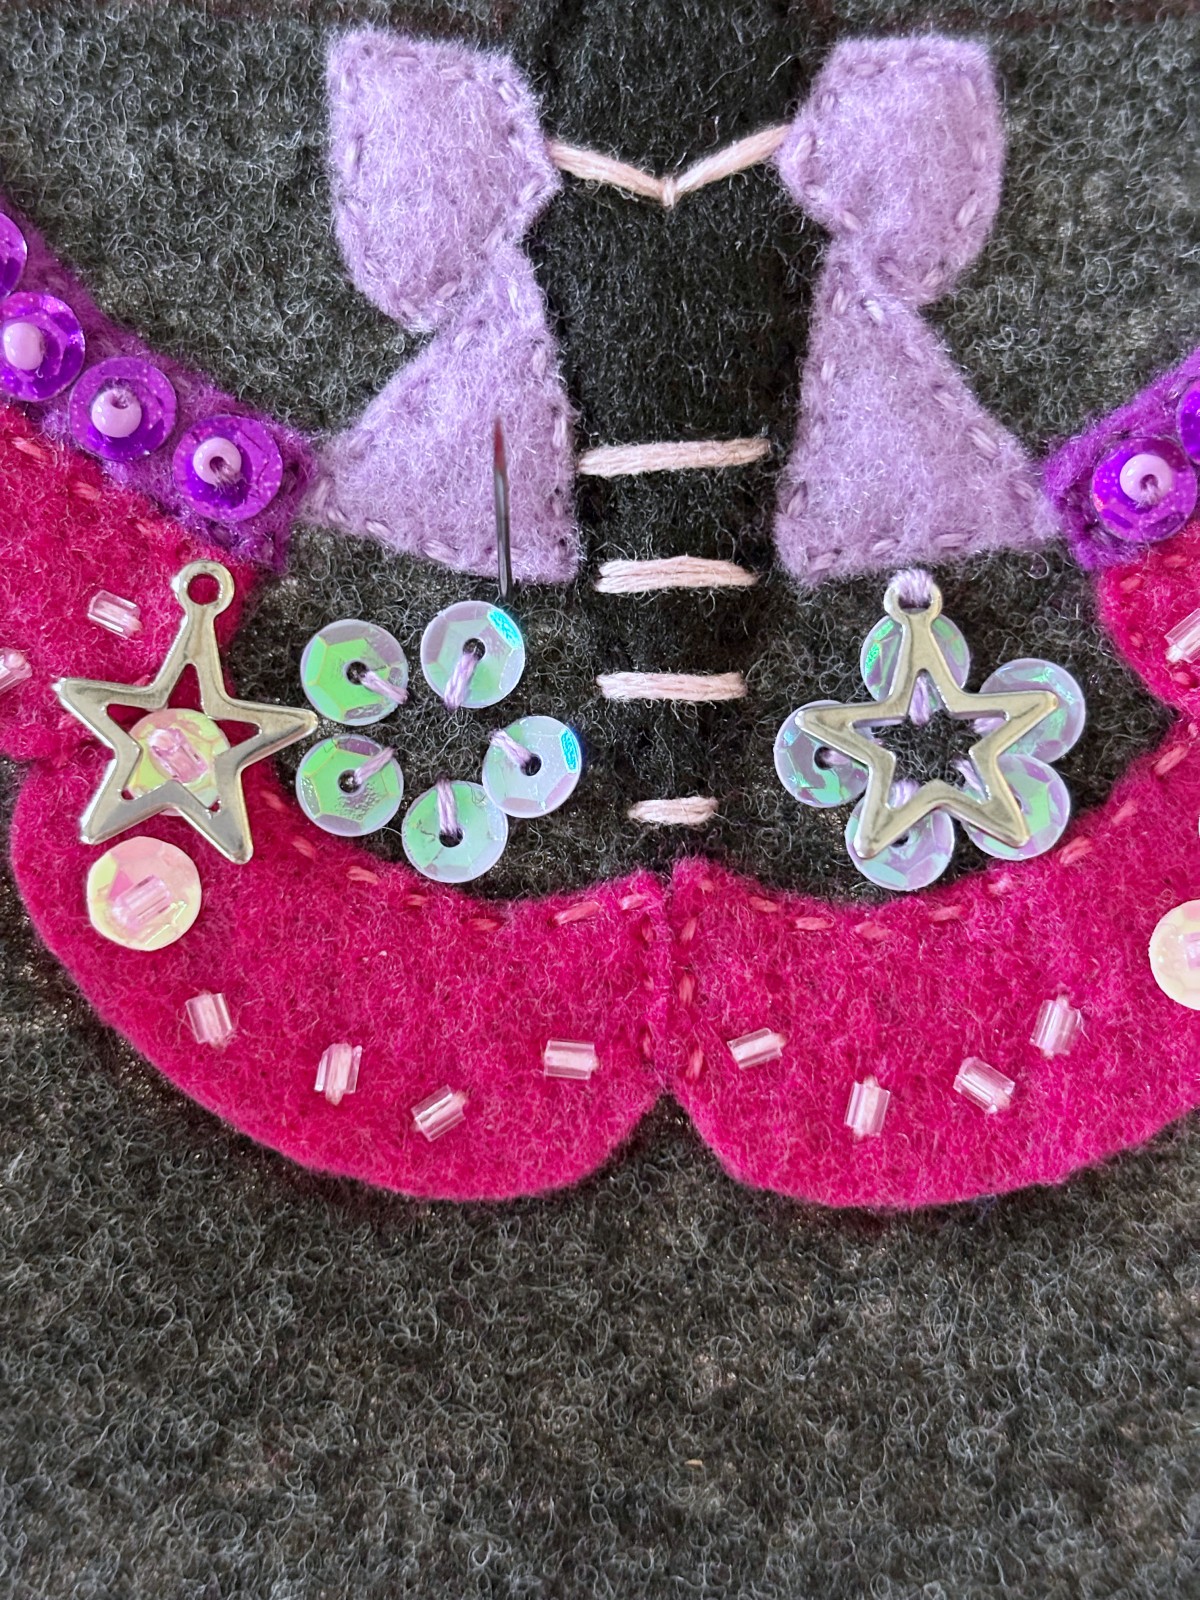
With the sequins details all sewn onto the wings of the moth ornament, it is time to add the star charms. With light purple embroidery thread, tack sew the star charms onto the lower wings so that the star aligns with the sequins as shown below.
Step 10
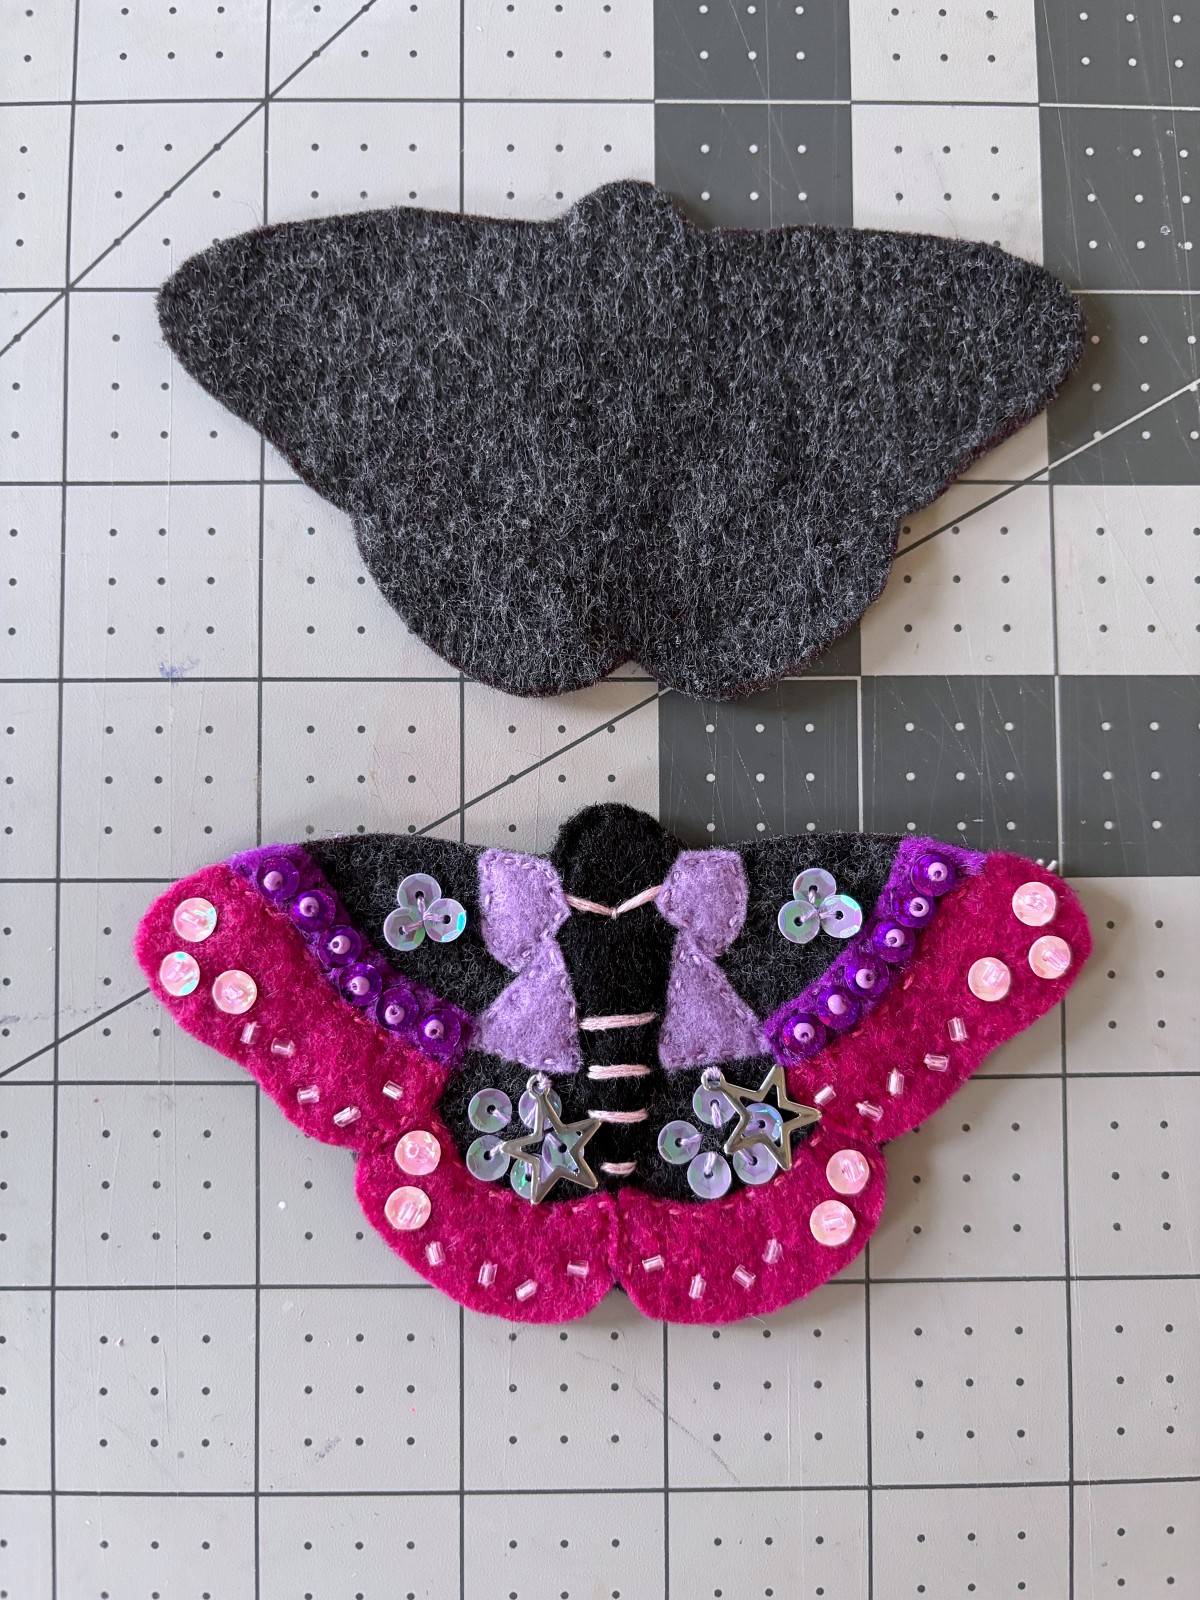
You did it! Good job. All of the beautiful moth wing embellishments are complete. You can now take the felt out of the embroidery hoop and cut out the moth base. Place the two gray base pieces on top of each other and pin them together. This will hide all of the embroidery thread knots on the back side of the moth and help to create a nice finished look.
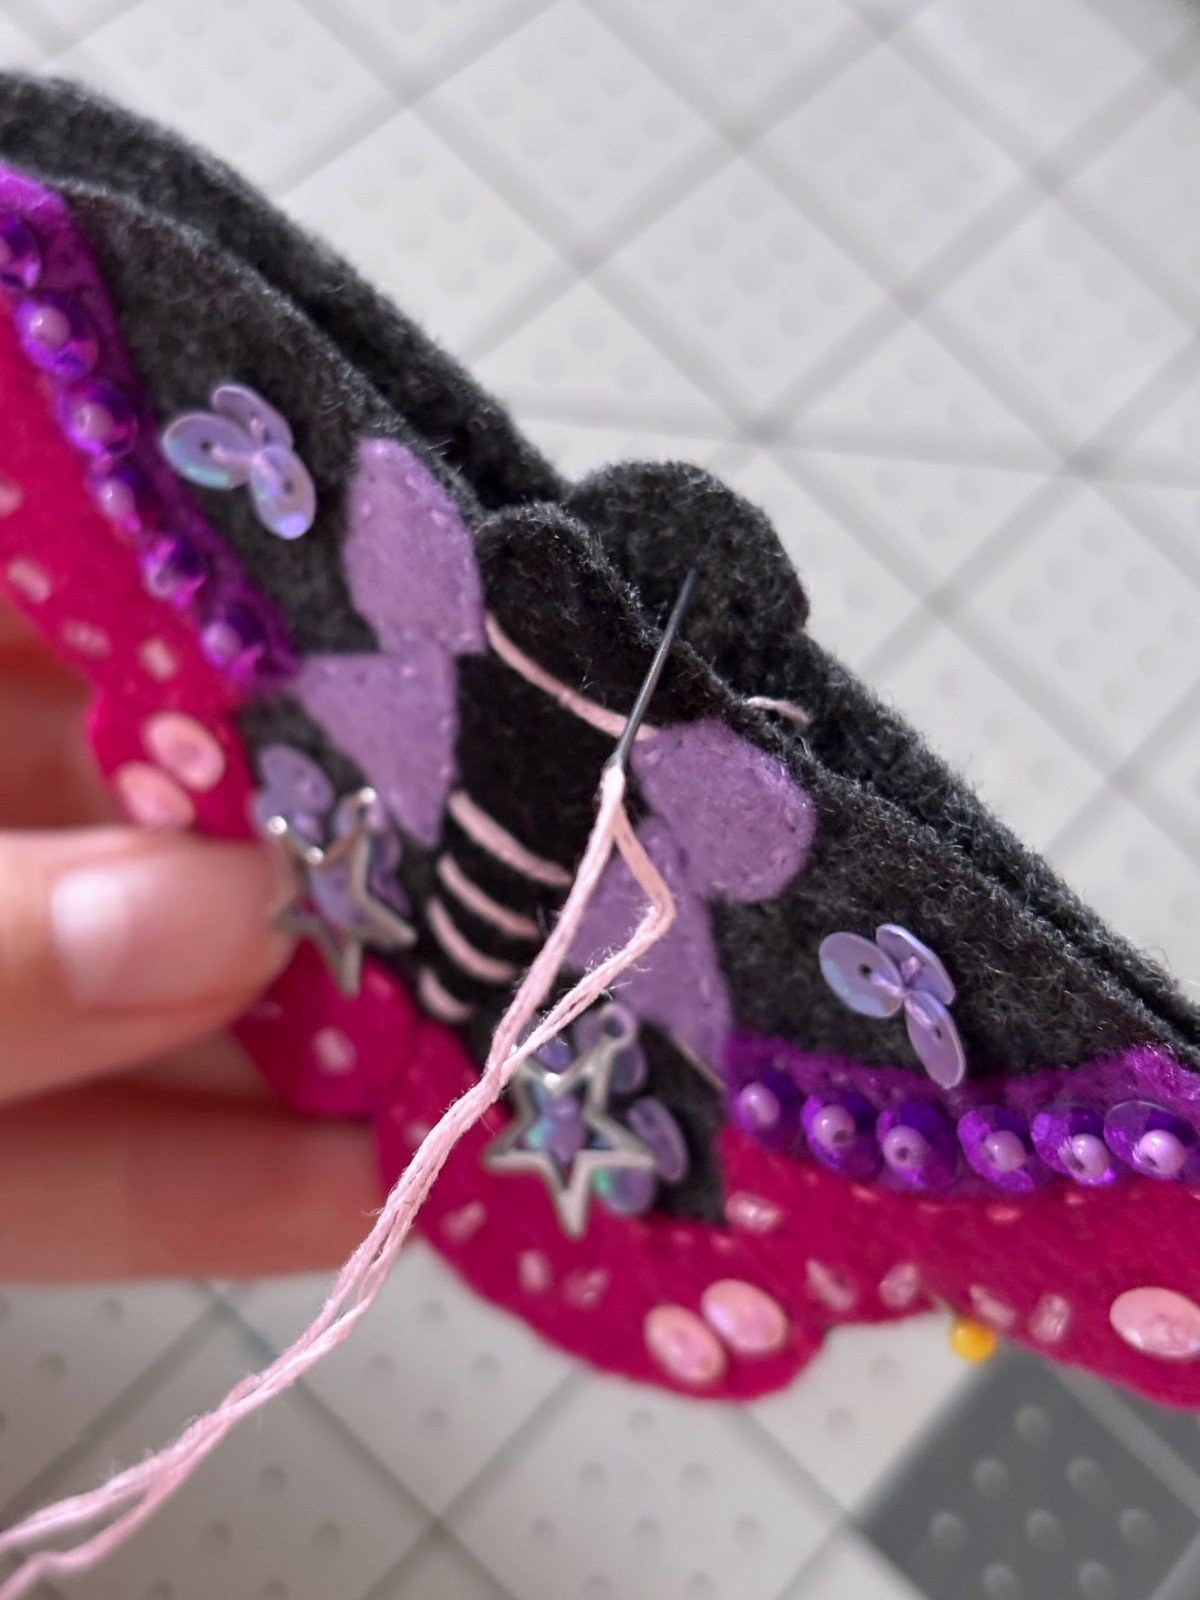
Using light pink embroidery thread, sew a blanket stitch around the perimeter of the entire moth ornament. Start at the top of the moth’s head and make sure to hide the initial knot between the two layers of felt.
Step 11
Celebrate and give yourself a round of applause. You just made a beautiful cosmic moth felt ornament. The only thing left to do is add a string to hang it by. Take some embroidery thread and thread it through the top blanket stitch, tie the ends together and you have a little hoop to hang the moth by. Alternatively, you could turn this moth ornament into a keychain by looping a jump ring through the top blanket stitch and adding some keychain hardware.
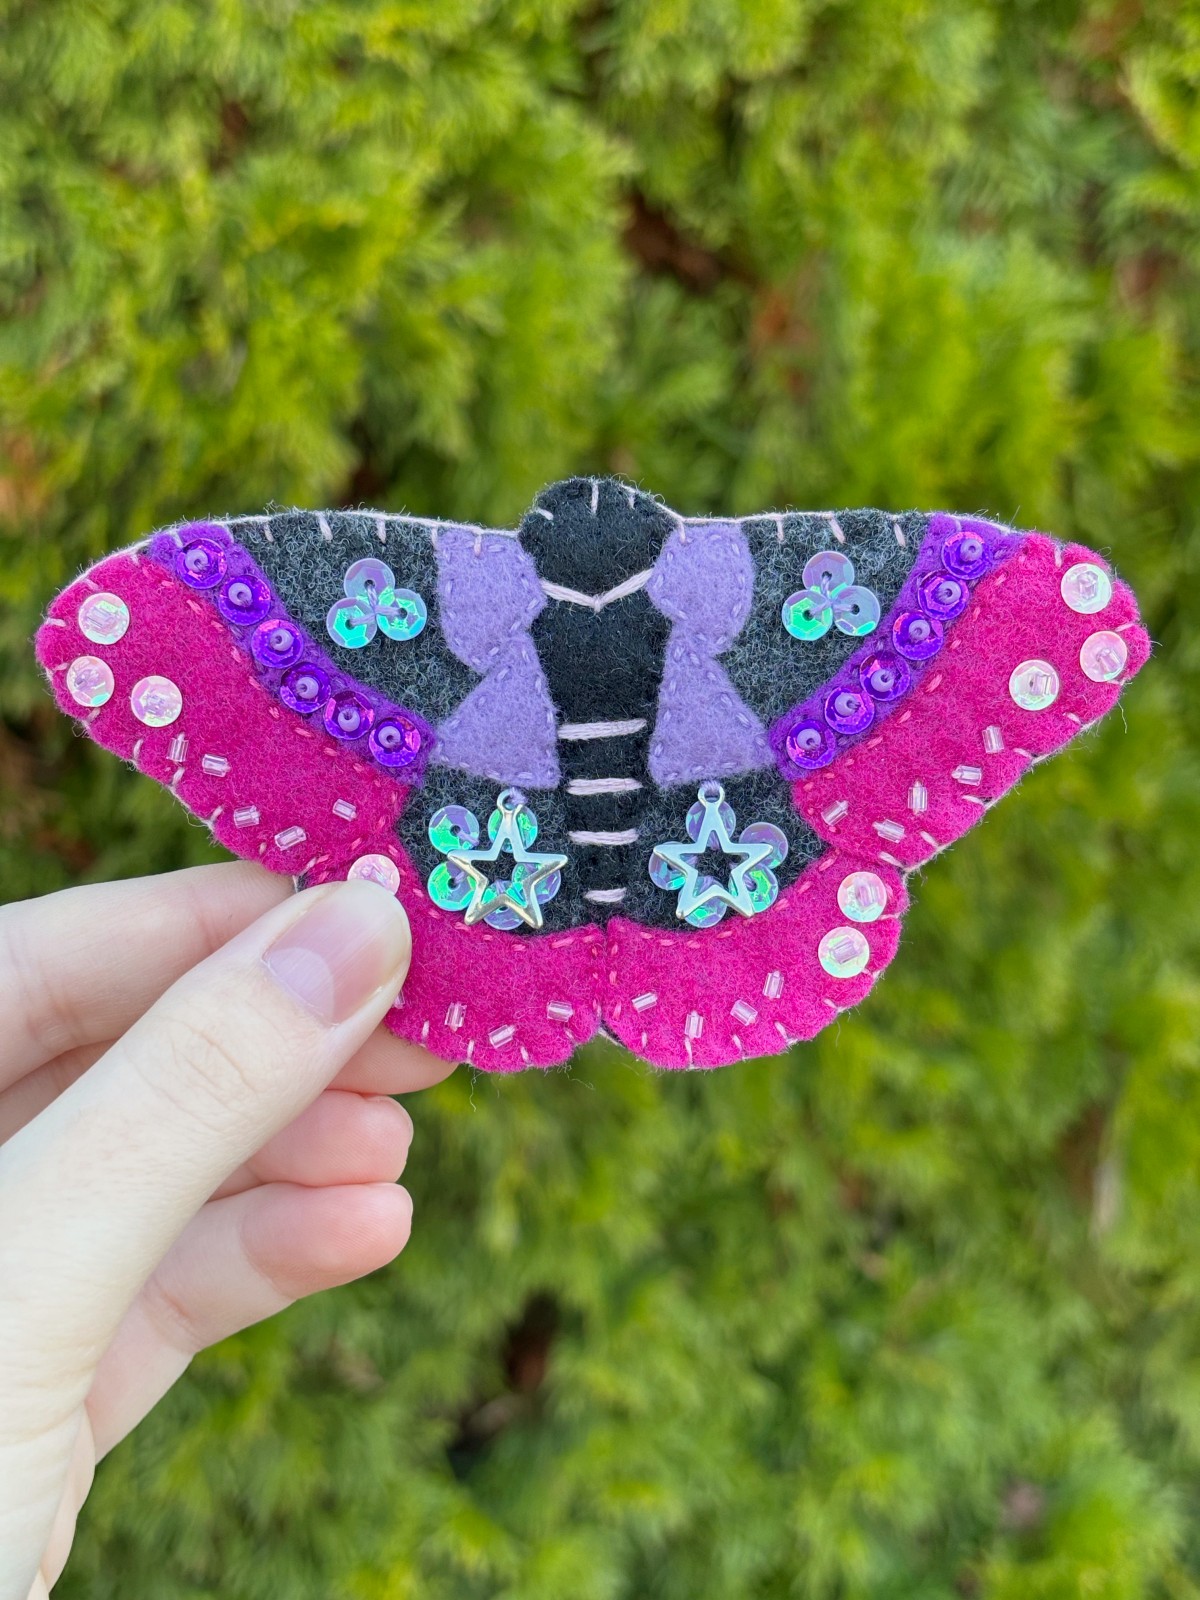
Thank you so much for visiting our crafty corner of the internet. We have lots of other fun DIY projects on here, so check them out if you want some more free sewing patterns or inspiration. If you completed this project, we would love to see it. Tag us on instagram @mirrortwins.studio and we will share your moth felt ornament to our story. We can’t wait to see what you come up with. Happy crafting.