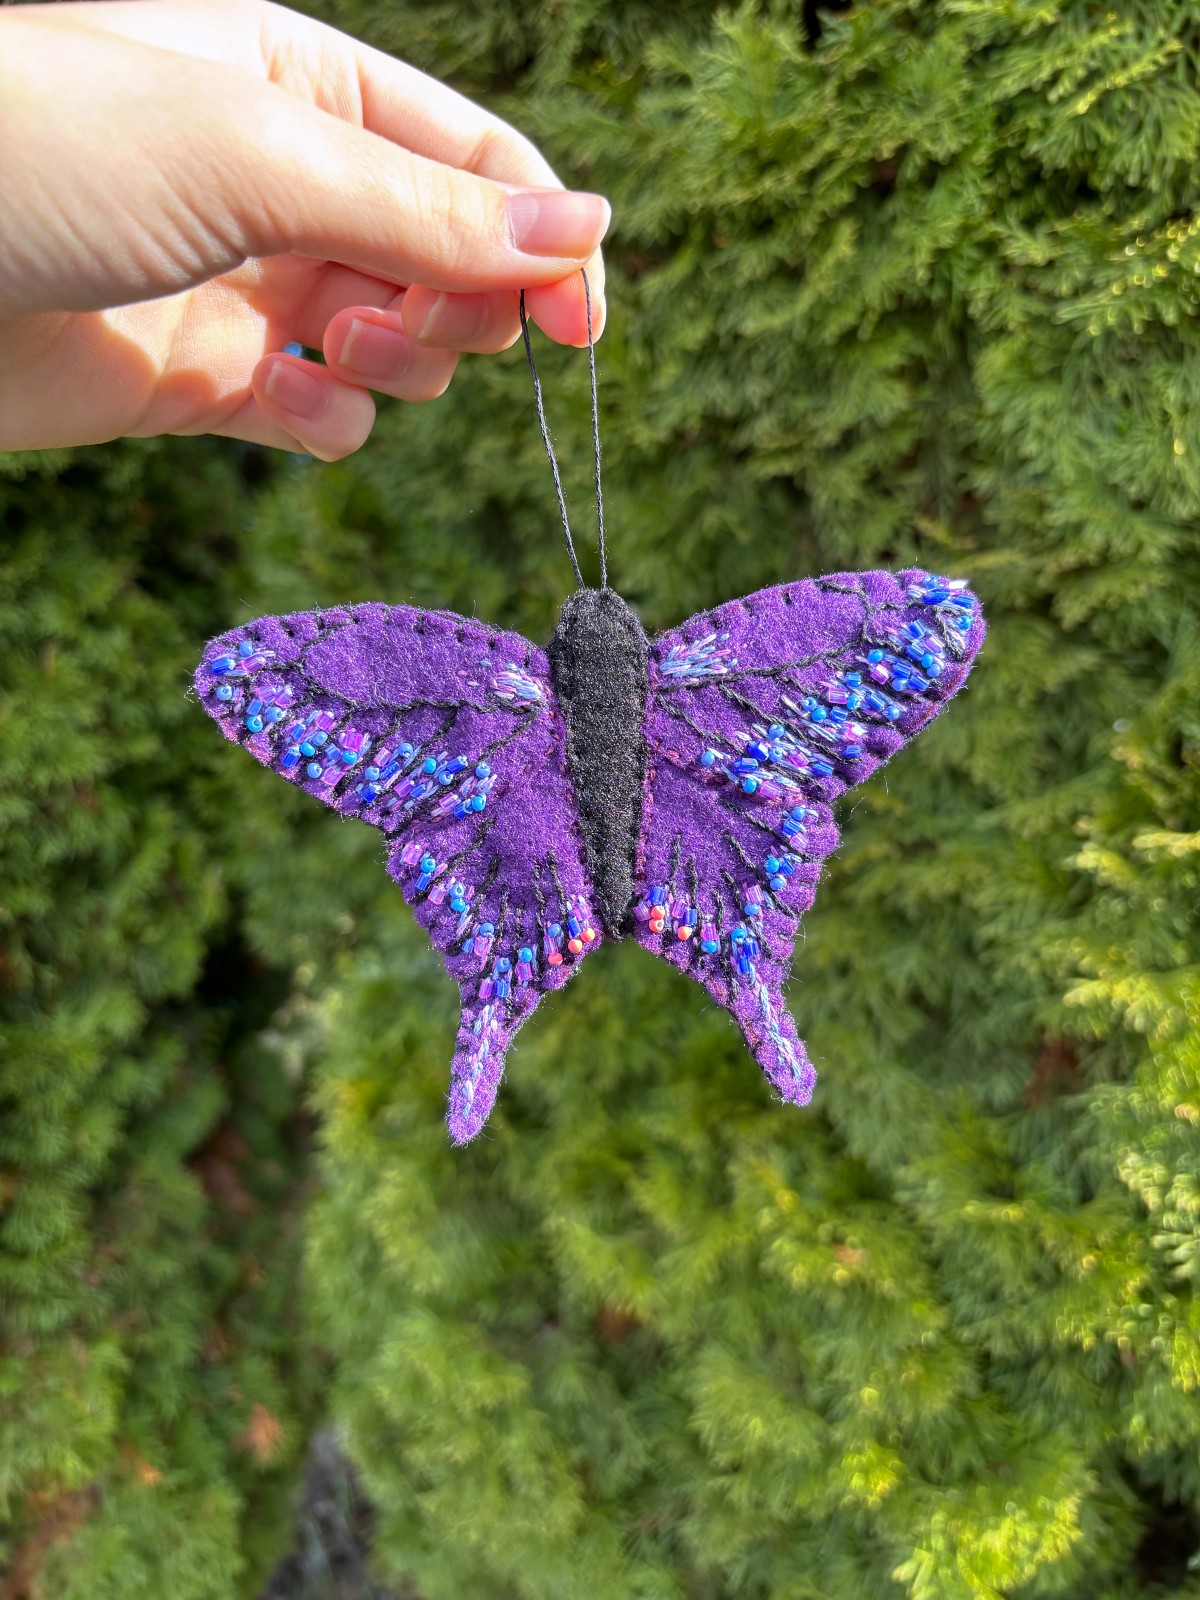
Purple Butterfly Ornament DIY Hand-sewn Project
Follow along with our easy sewing tutorial to make this beautiful purple butterfly ornament with sparkling beads and lovely embroidered details.
If you are looking for an easy weekend sewing craft, then you found one. With spring in full bloom, the butterflies have finally started to appear in our garden. We thought to ourselves, what would make a better sewing craft right now if not a beautiful purple butterfly ornament.
This felt butterfly ornament is easy to sew and sparkles in the sun with its glass beaded details. This was such a fun DIY sewing craft to make and we are so excited to share it with in this easy to follow step by step tutorial. There is a Free PDF of the butterfly pattern to download at the bottom of the page. Feel free to experiment and add your own flair to this project by choosing your favorite colors and beads, or simply follow along with our suggestions. Either way, make sure to have fun along the way. Good luck and happy crafting.
*This post contains affiliate links meaning I get a commission if you purchase through my links, at no extra cost to you.*
Materials
- Purple Felt (1 sheet)
- Black Felt (1 sheet)
- Purple embroidery thread in 3 colors (light, medium, dark)
- Black embroidery thread
- Seed beads (2 colors of purple, as well as 1 coral color)
- Glass tube beads 3mm (2 colors of purple)
- Sewing needle
- Ballpoint pen (for outlining the pattern onto felt)
- Scissors
- 5 inch Embroidery hoop
- Embroidery thread wax (optional)
Instructions
Step 1
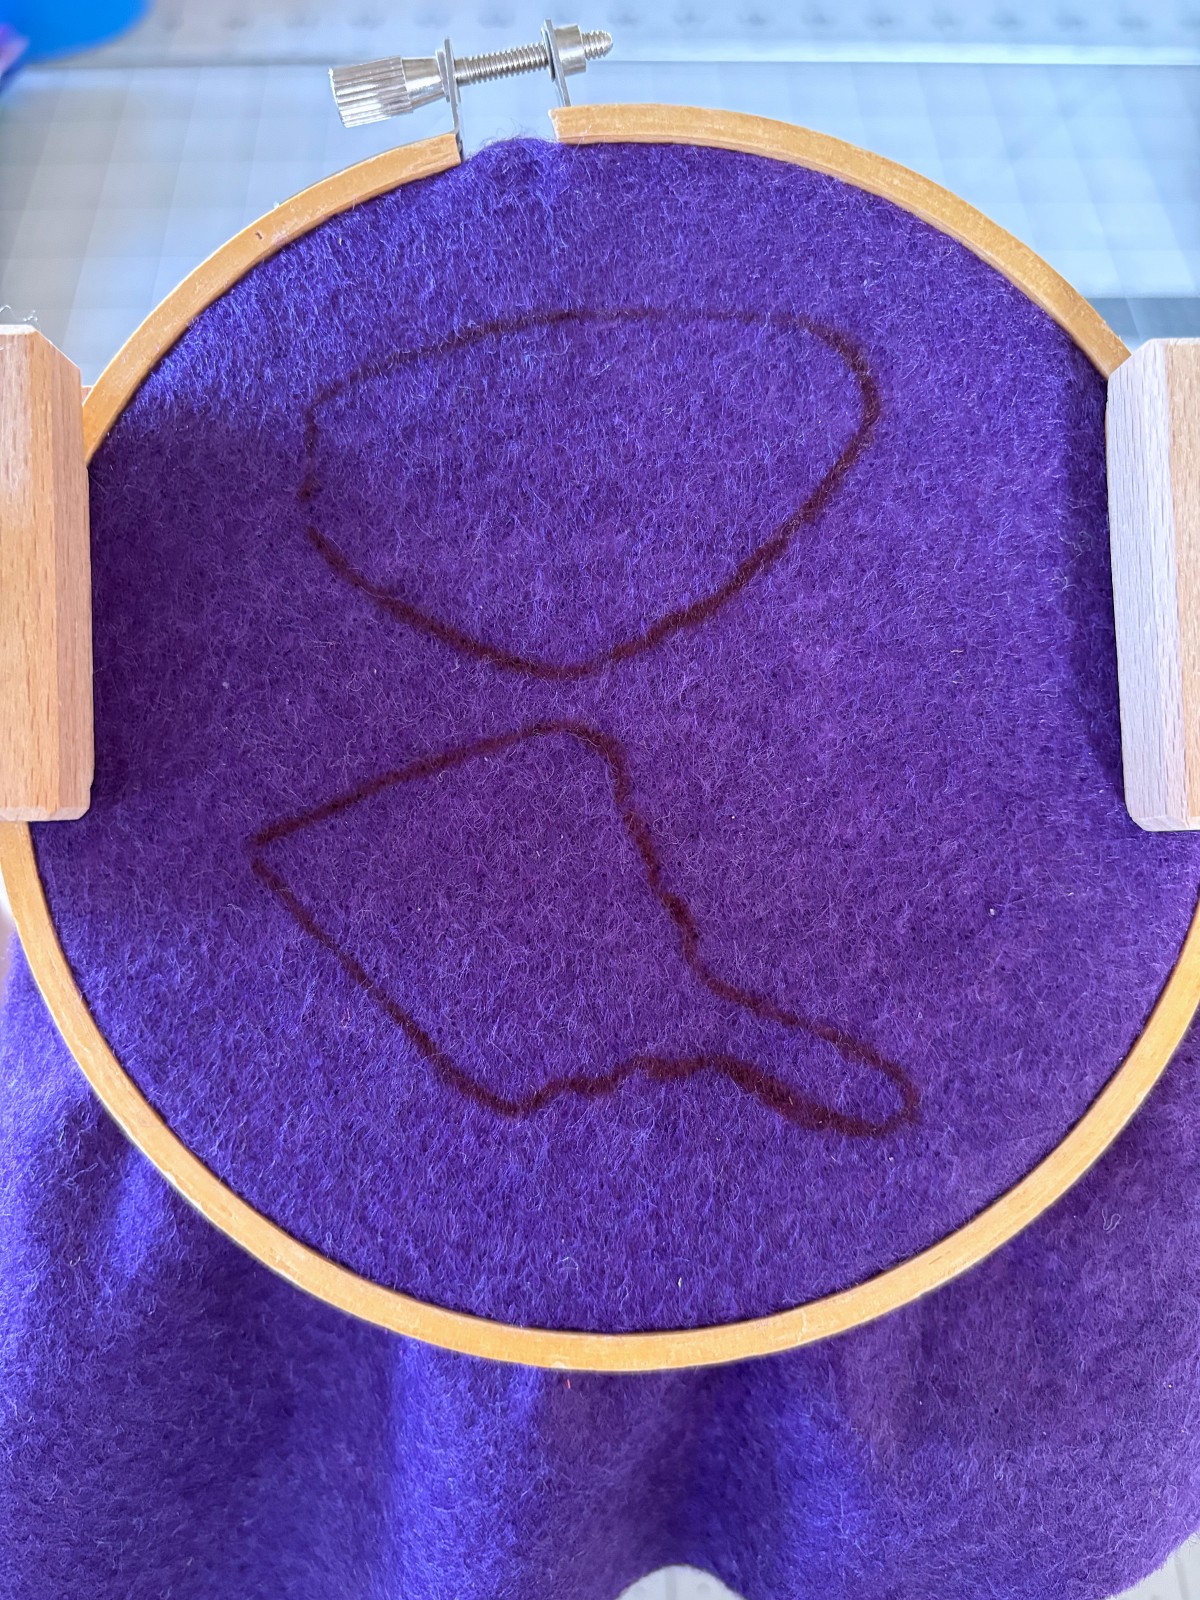
Cut out paper pattern pieces and trace them onto the designated colors of felt with a ball point pen.
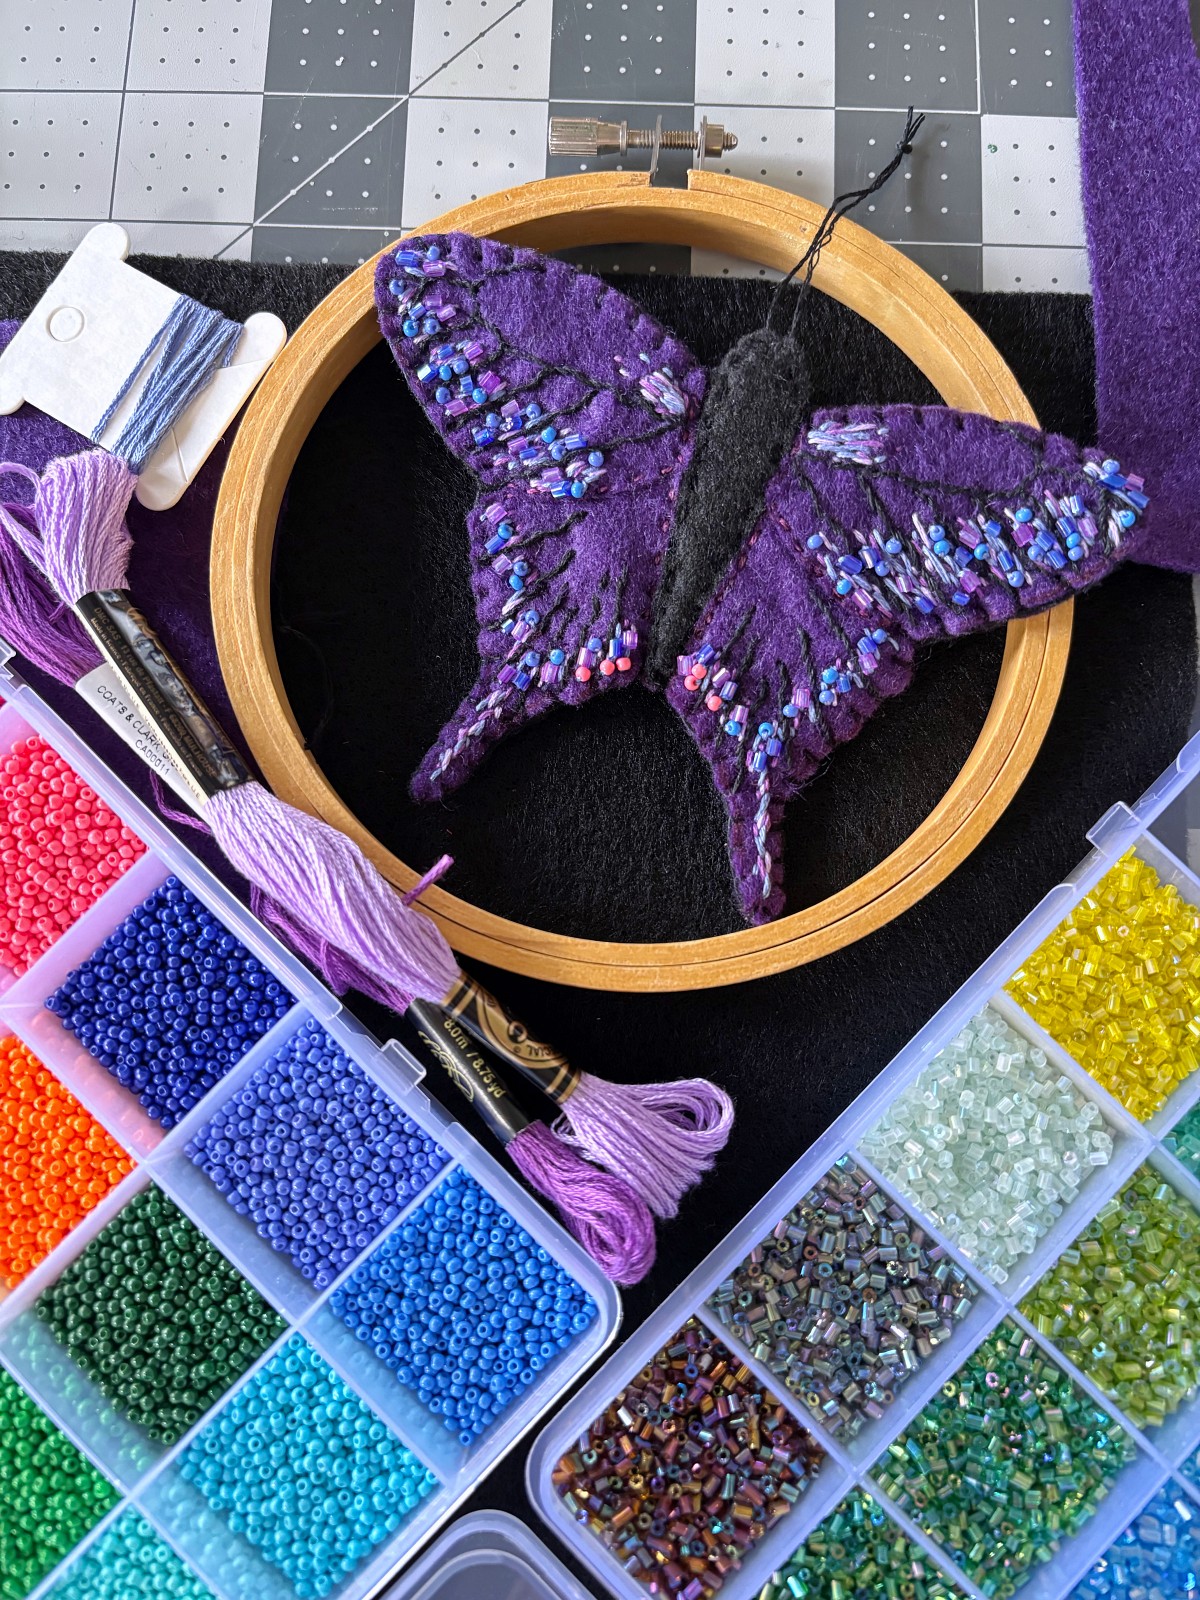
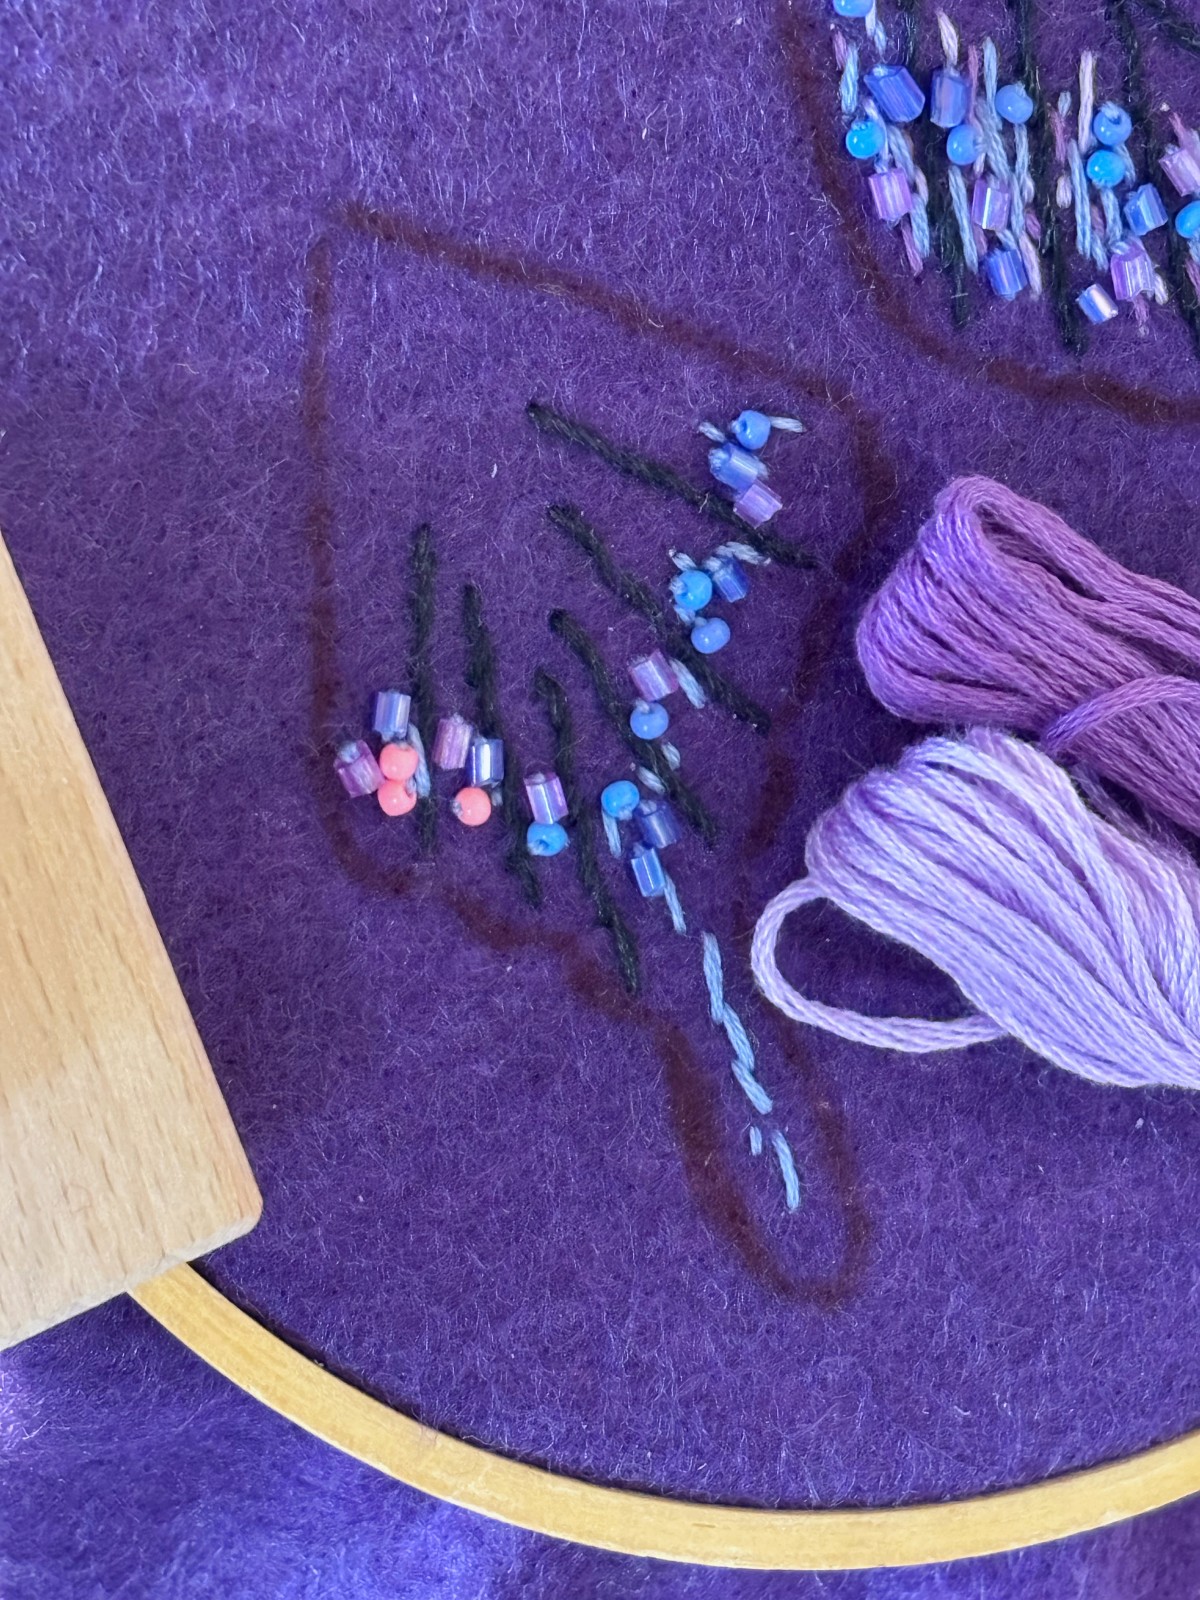
Note: Make sure to trace both top and bottom wing pieces for each side, left and right, onto the purple felt in a position where each will fit within a small embroidery hoop. As seen in the picture below, both the right top wing as well as the right bottom wing are traced together and fit within the hoop. I like using an embroidery hoop holder, as it saves my hands from a lot of strain while sewing.
Step 2
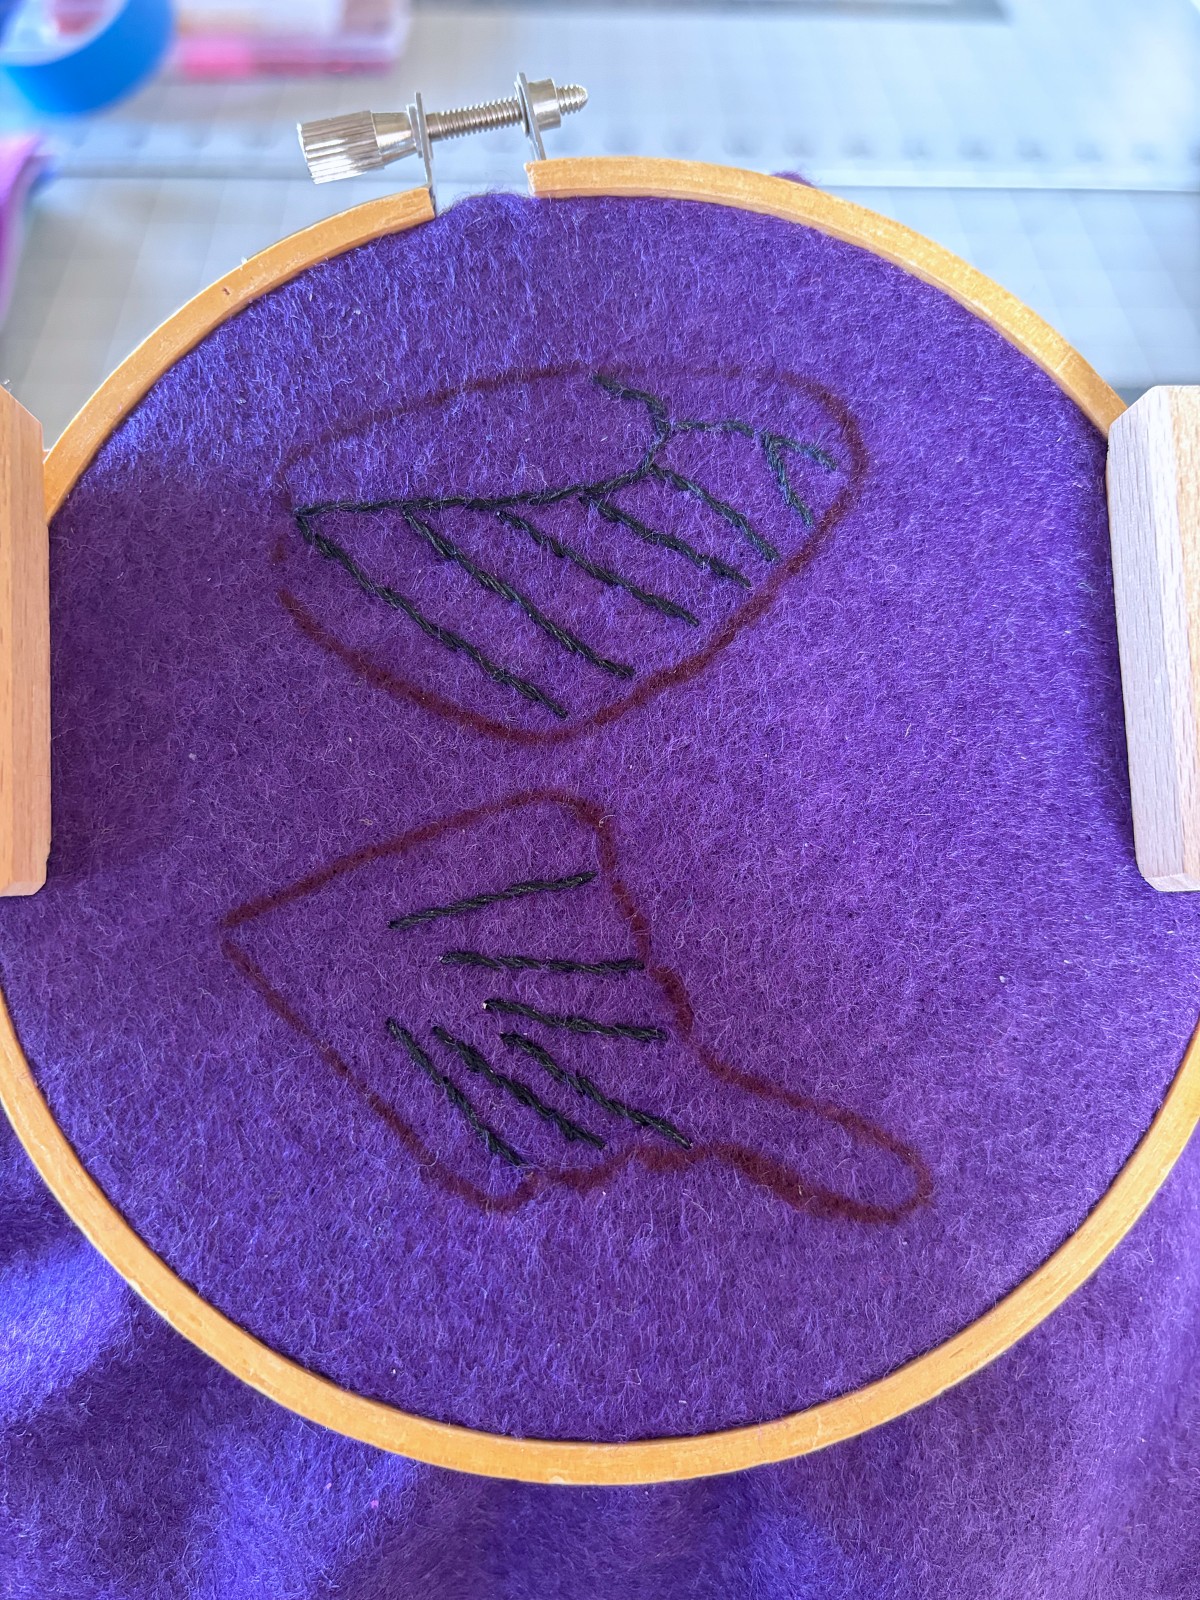
Add black embroidery lines to the right top and bottom wings using a running stitch for the foundation of the line, and a whipped backstitch to finish each line. Optional, you may choose to draw out the lines with a ballpoint pen to follow along while sewing.
Note: All stitches made throughout this project will use three strands of embroidery thread. It is optional, but I like to use embroidery thread wax to help keep the thread smooth and less likely to knot.
Step 3
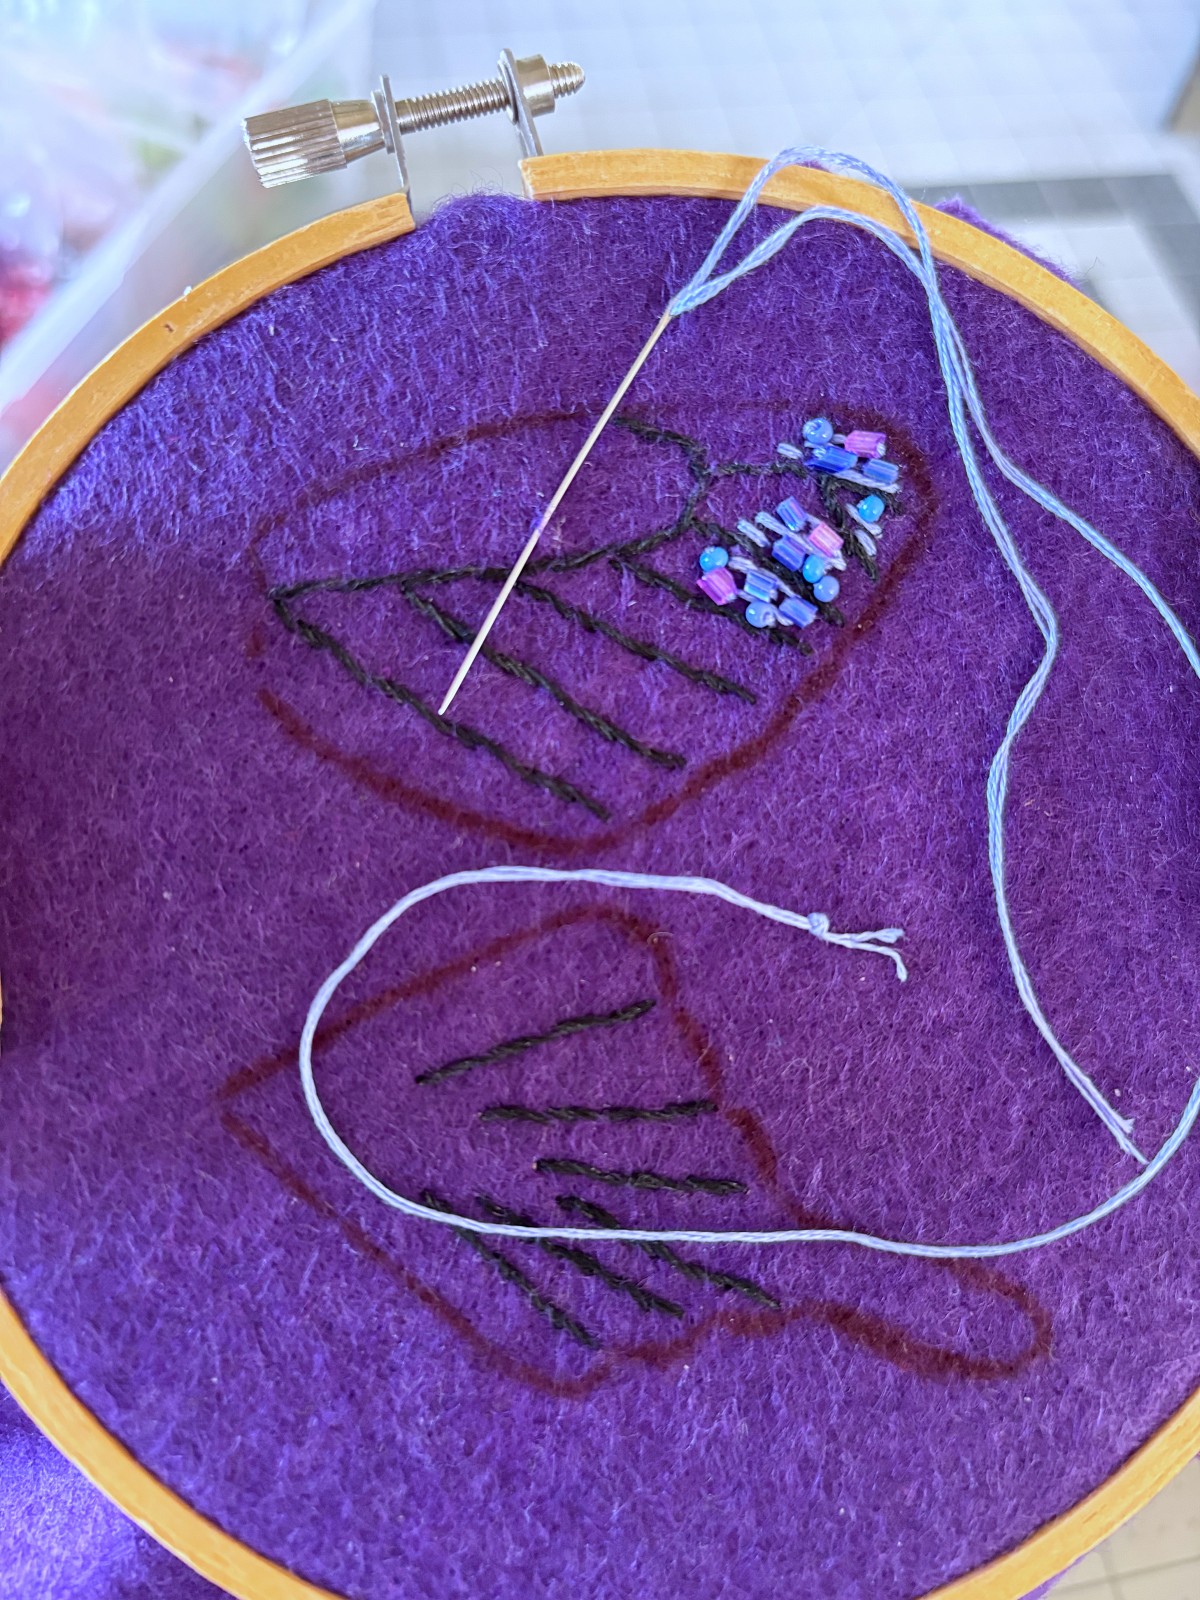
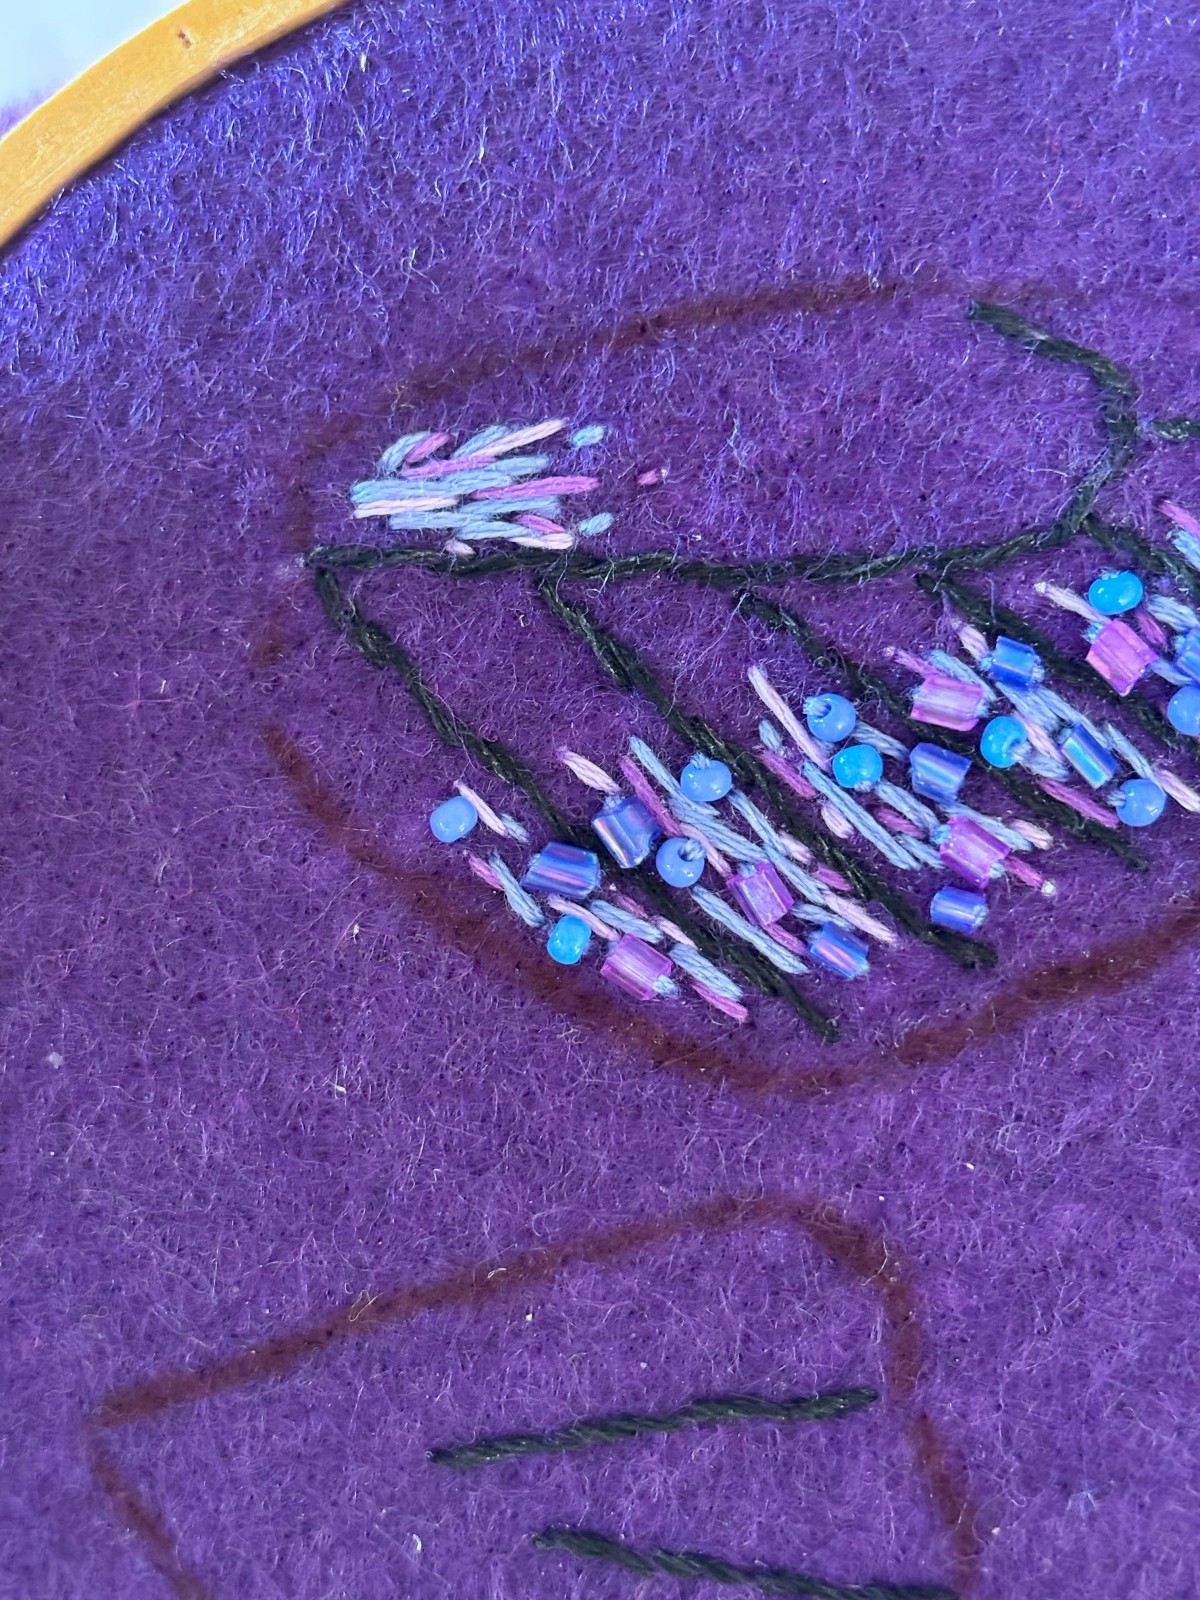
Add purple embroidery and beaded details to the top butterfly wing between the embroidered black lines. With purple embroidery thread, start sewing on the glass tube beads and seed beads in each section. Make sure to include embroidered lines of the purple thread between each section of the wing as well, while adding the beads. I chose to use two different colors of purple for both the tube beads and seed beads to add more visual interest.
Step 4
Now you can add additional embroidered stitches of a darker purple embroidery thread as well as a lighter purple embroidery thread to the beaded sections of the wing.

Step 5
Add embroidered stitches sporadically to the upper section of the top butterfly wing with all three colors of embroidery thread.
Step 6
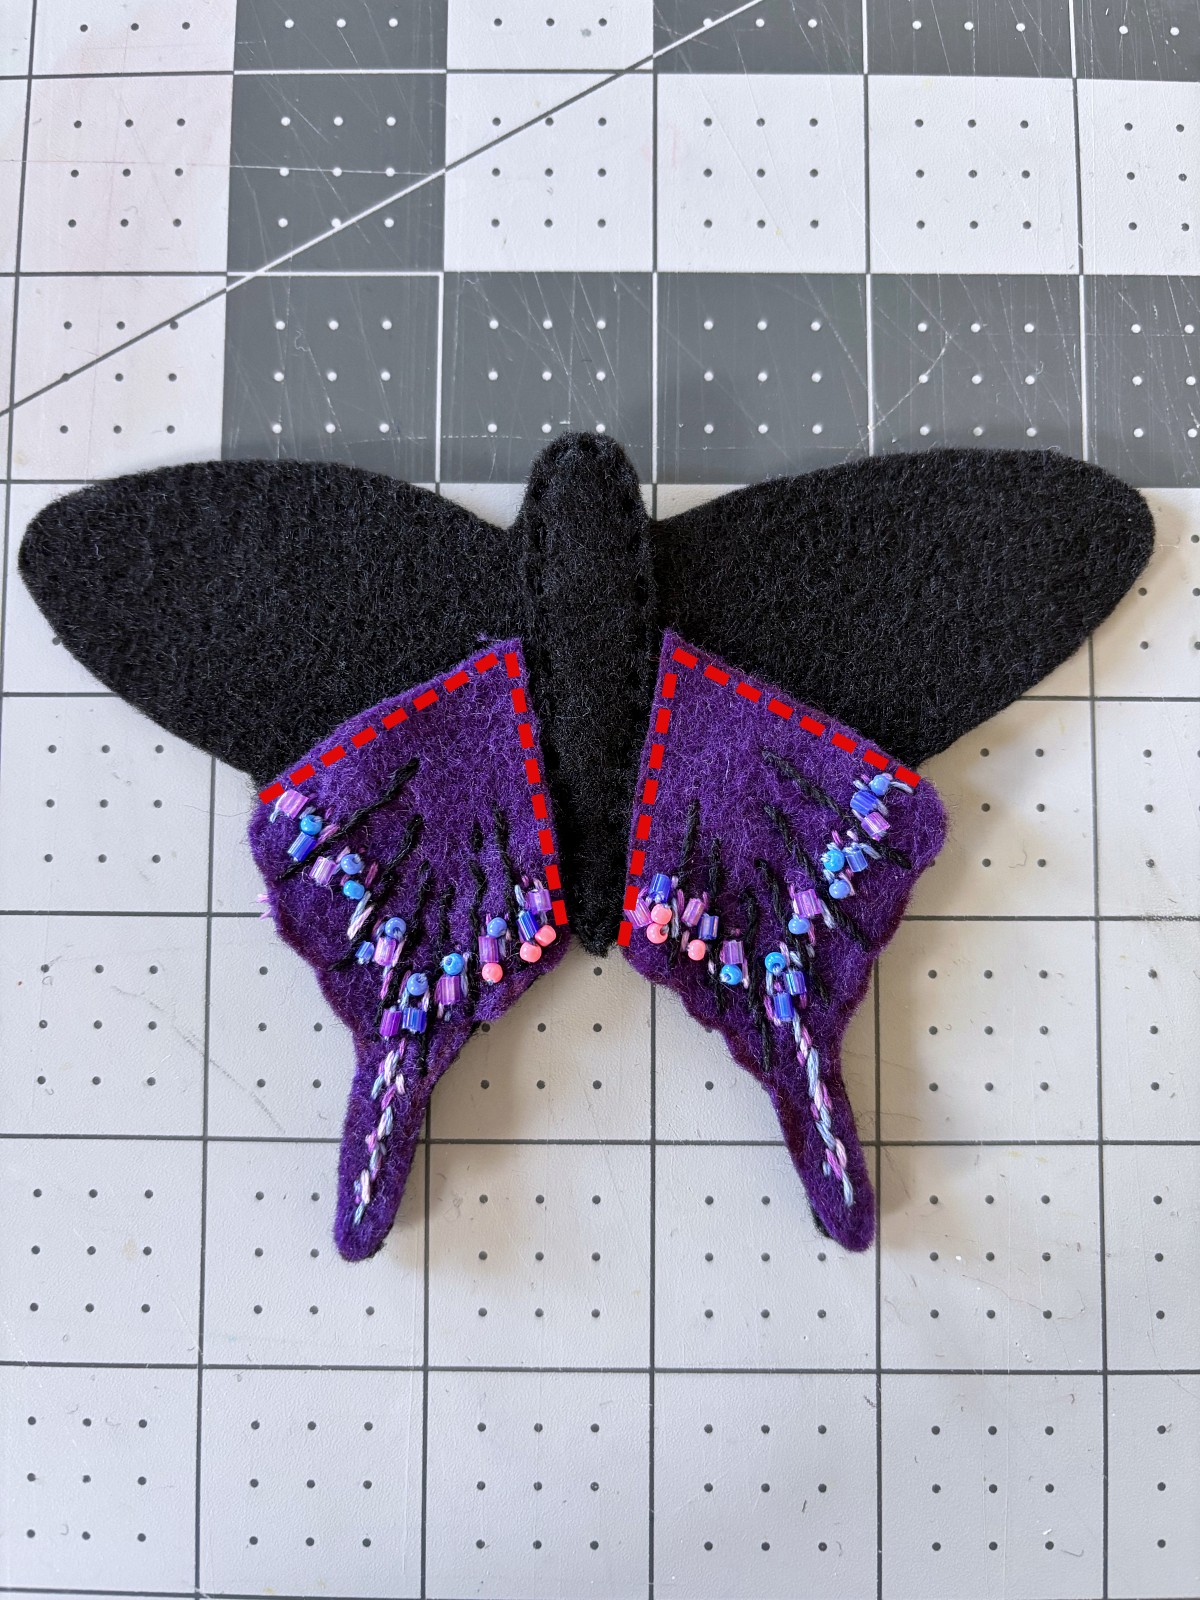
Repeat steps 3-5 to the bottom wing with the addition of three coral colored seed beads within the last two inner sections of the wing, where the wing will meet the butterfly body.
Step 7
Repeat steps 2-6 for the left top and bottom wings.
Step 8
Cut out all felt pieces.
Step 9
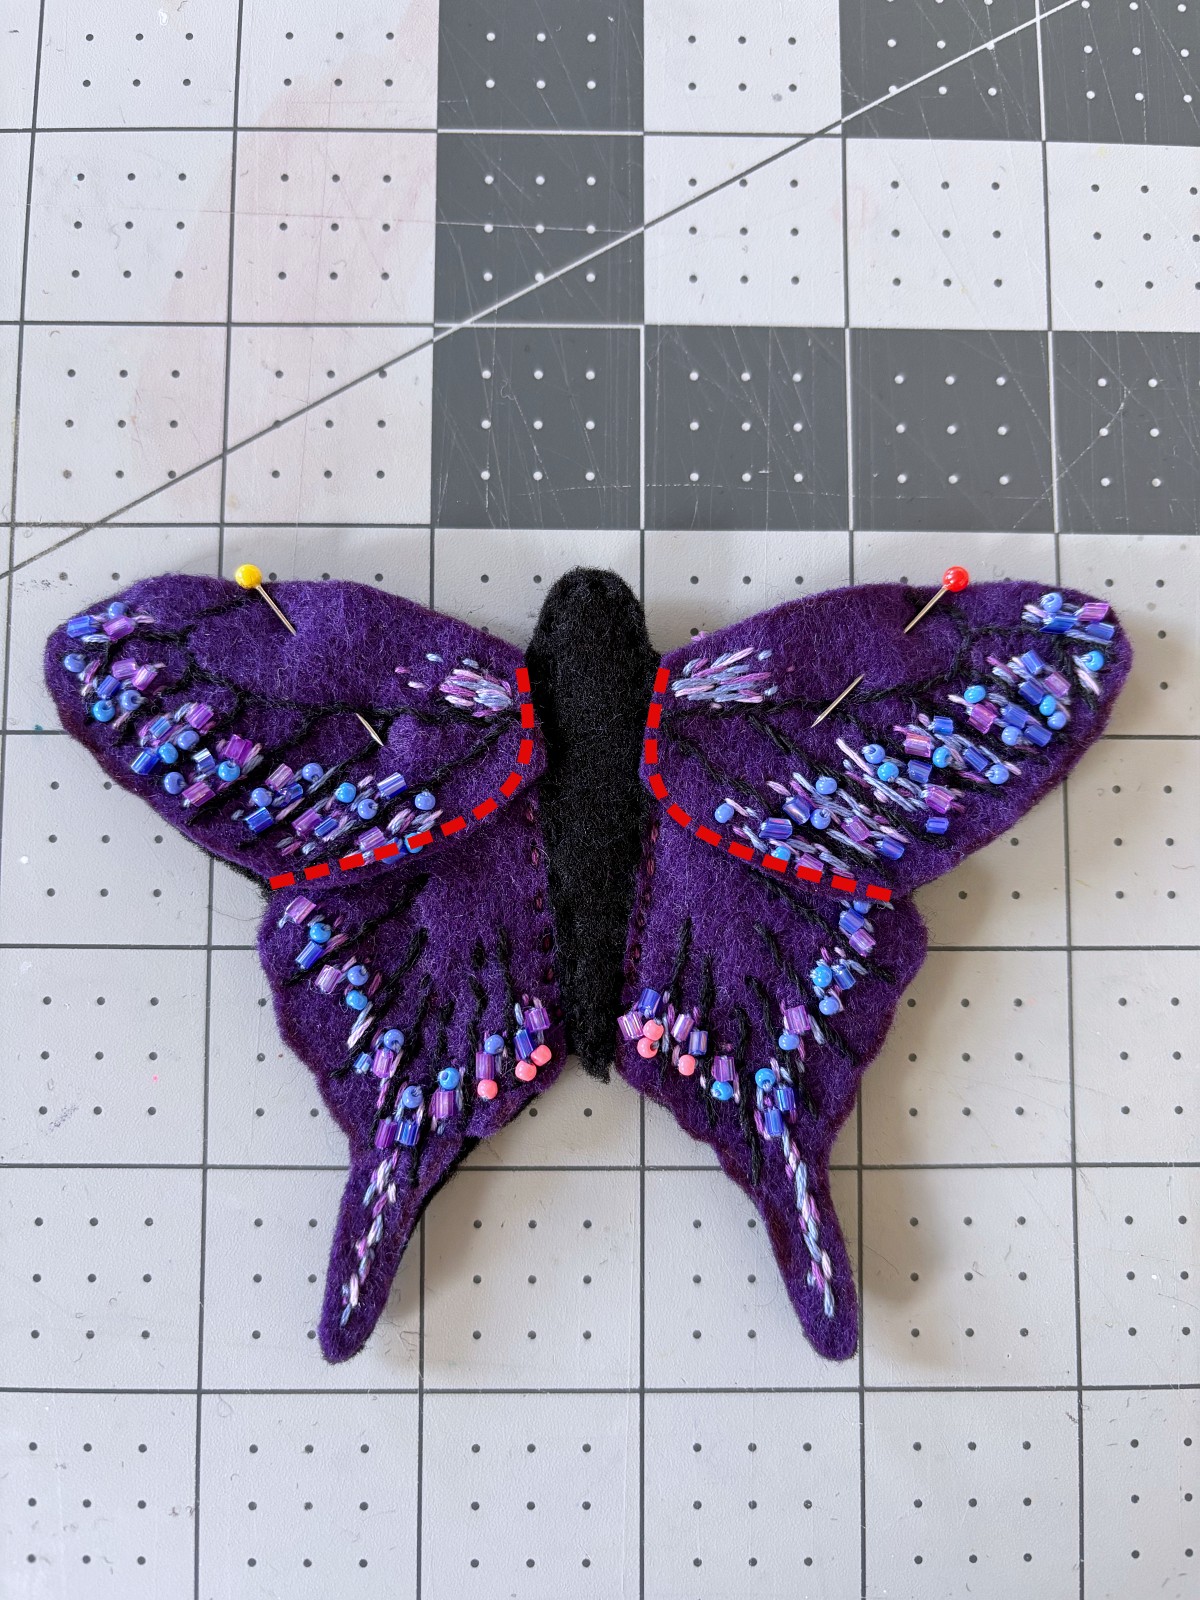
Place the butterfly body on top of the black butterfly base and sew a running stitch around the perimeter of the body with black embroidery thread.


Step 10
Line up the bottom butterfly wings and pin in place on the black butterfly base. Using purple embroidery thread, sew a running stitch along the inside perimeter of the wings.
Step 11
Line up the top butterfly wings and pin in place on the black butterfly base. Using purple embroidery thread, sew a running stitch along the inside perimeter of the wings.
Step 12
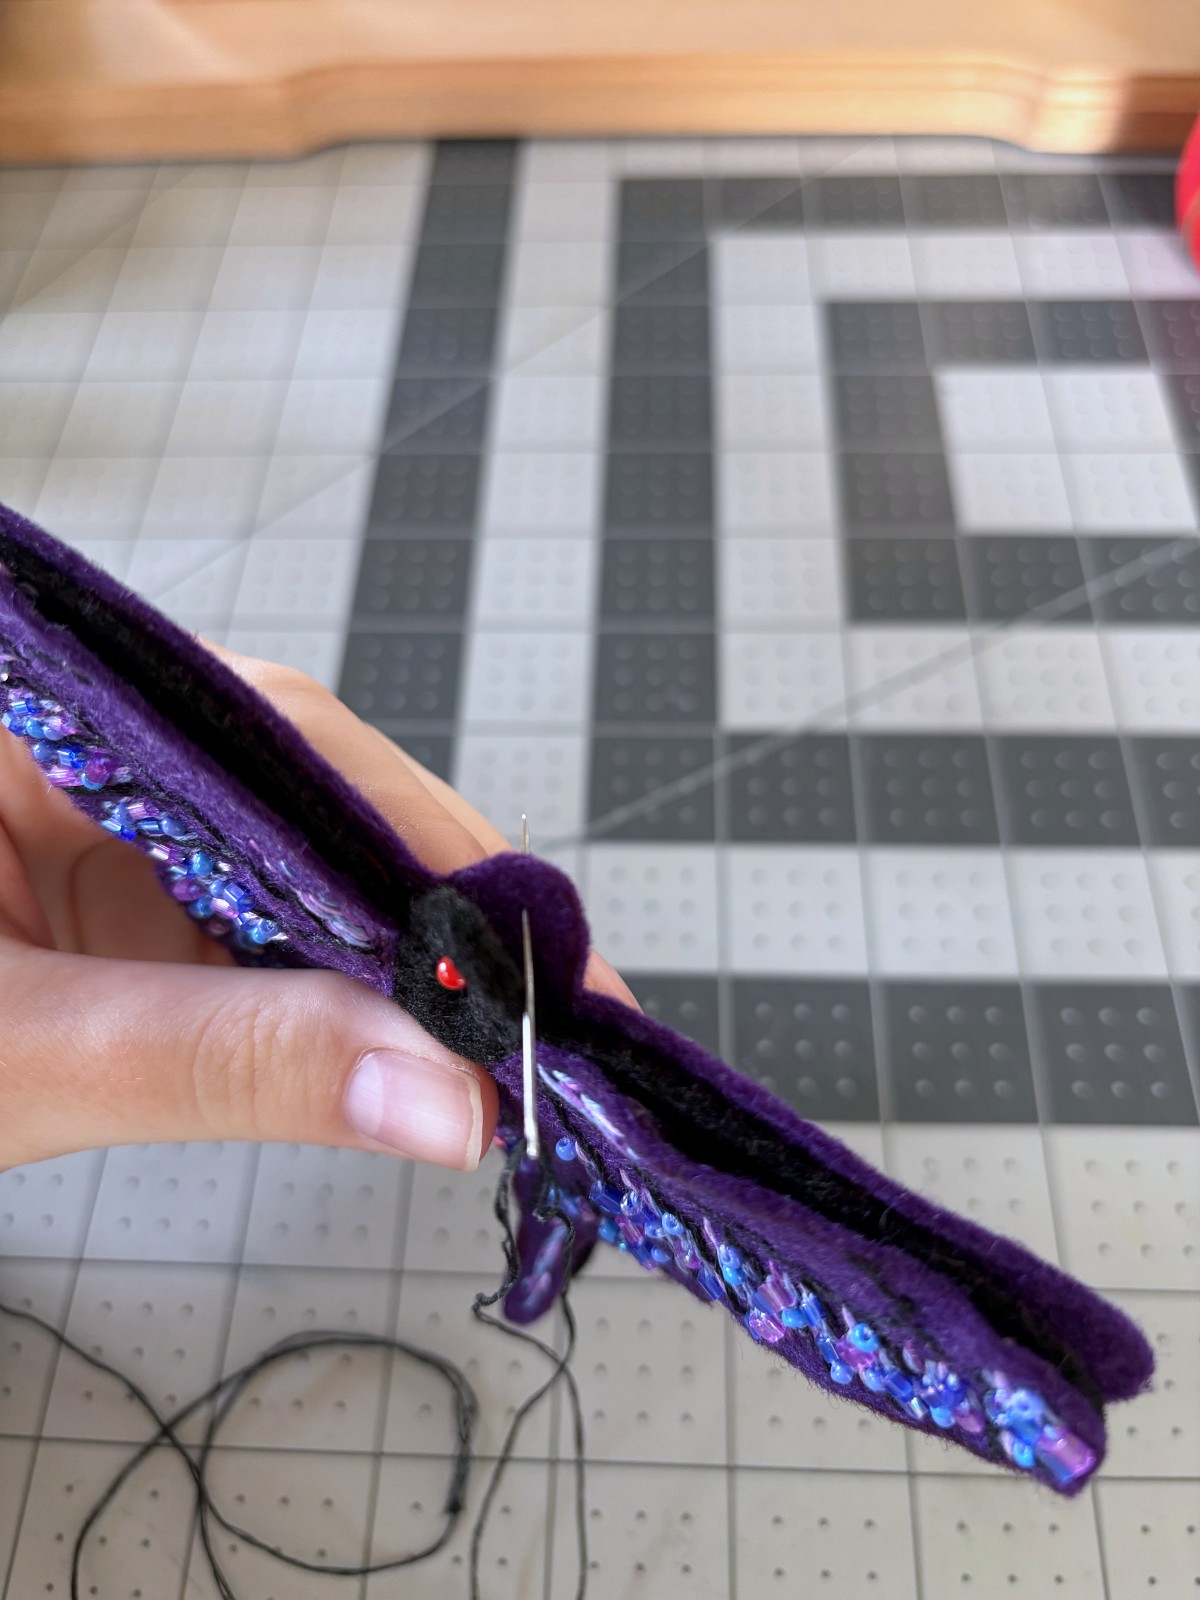
Line up the black butterfly base on top of the purple butterfly base and pin in place. This piece will hide all of the sewing and knots that are on the back of the black base and create a more finished look.
Step 13
Using black embroidery thread, sew a blanket stitch around the entire perimeter of the two butterfly bases, starting at the top of the butterfly head.
Note: Make sure to start the stitch by hiding the knot in between the two base layers.
Step 14
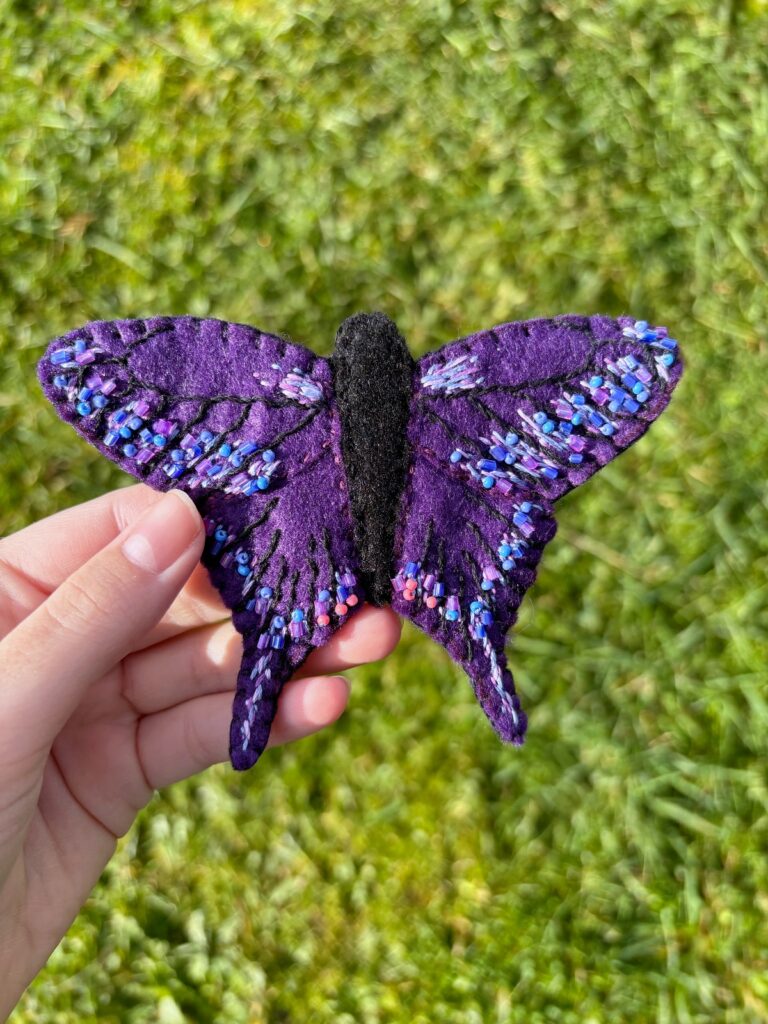
Celebrate! You have just created an adorable butterfly ornament. You can now hang it by sewing a string through the top line of the blanket stitch.
Thank you for following along with our Purple Butterfly Ornament sewing tutorial. If you completed this project, we would love to see it. Tag us on instagram @mirrortwins.studio so we can see and share your creations to our story.