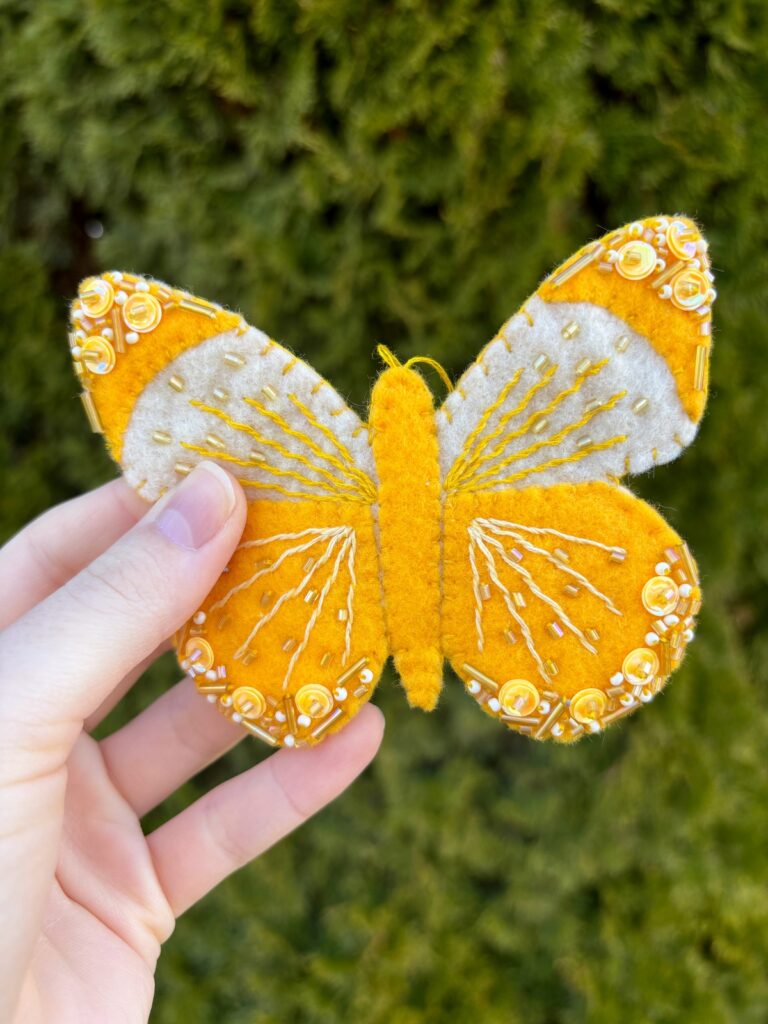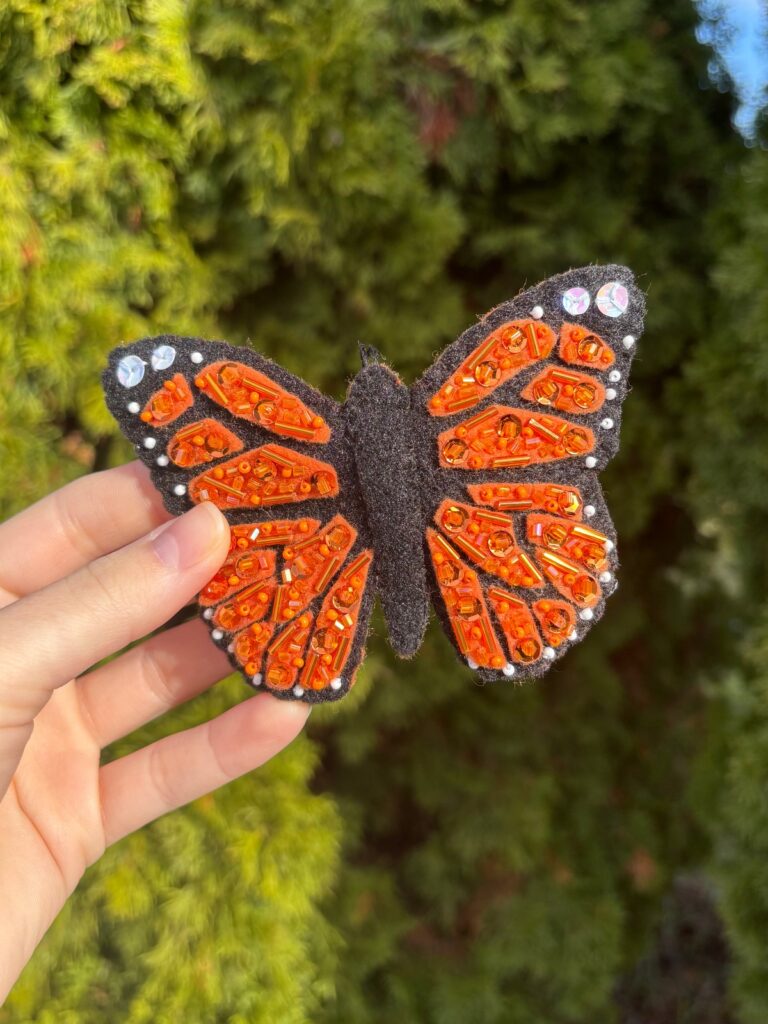
Simple Felt Butterfly Ornament. Hand-sewn DIY Craft Idea
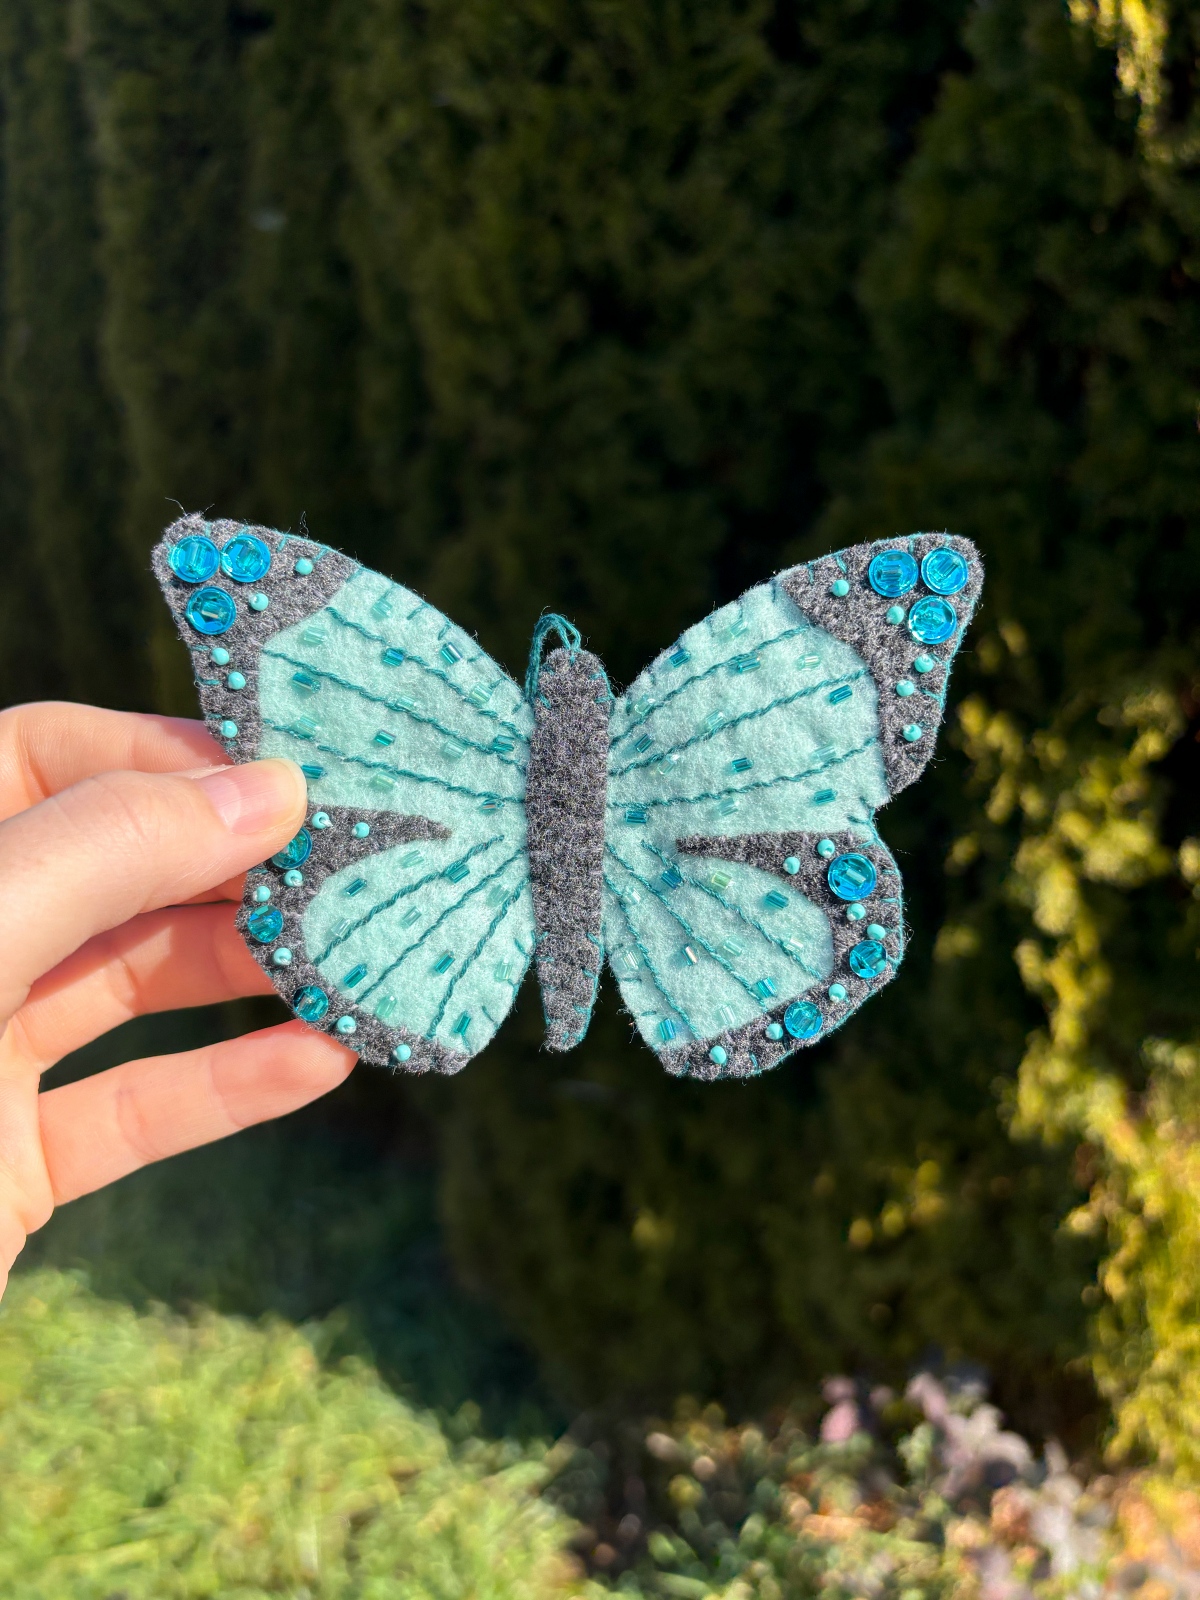
Follow along with our step by step tutorial to create this beautiful felt butterfly ornament. It’s the perfect simple hand-sewn felt project and can be used as an ornament, wall decor, or bag accessory. This teal butterfly would make a lovely gift or keep it for yourself to enjoy.
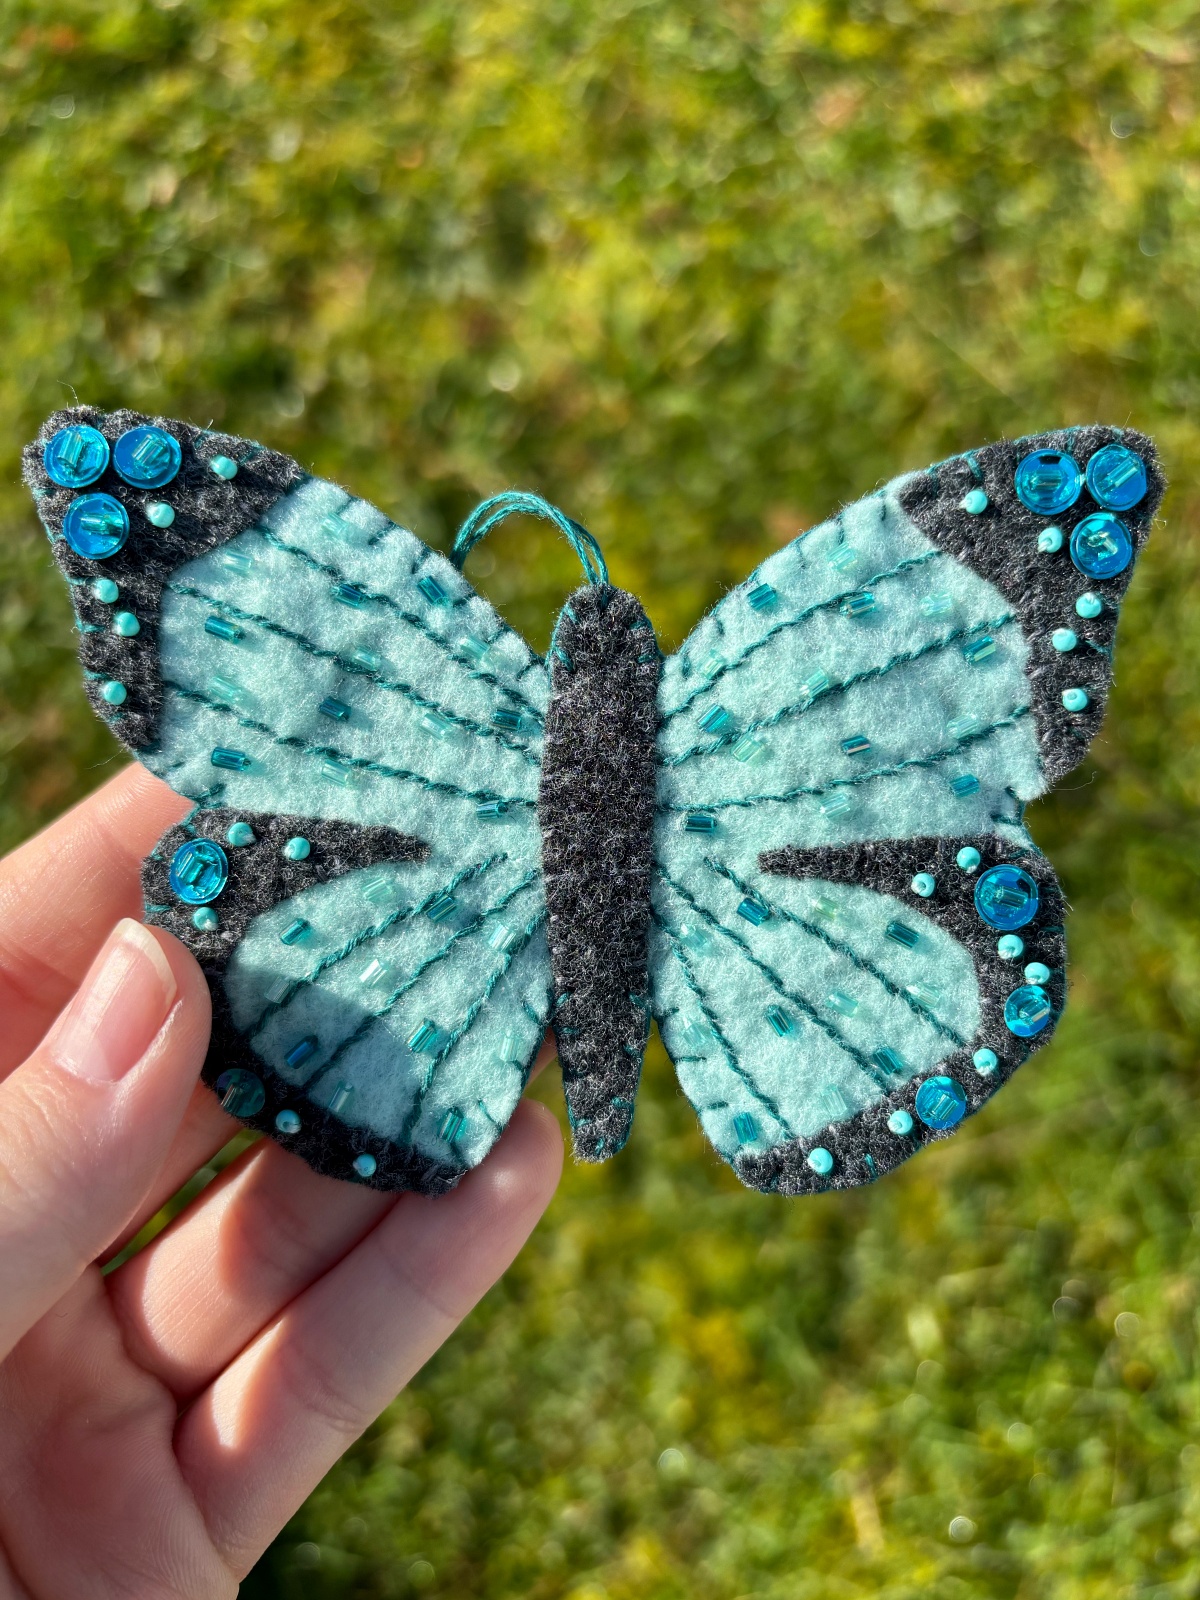
Nature is the best inspiration and what is more beautiful in nature than butterflies! Today we will share our process of creating this simple felt butterfly ornament and all the materials you would need to make one yourself. This project includes easy embroidery, bead, and sequin details hand-sewn onto the wings. Any of the colors can be replaced to match your own personal preference, the options are endless. We hope you enjoy this project and get inspired to make your own. We have provided a Free PDF printable pattern at the bottom of the page for you to download.
*This post contains affiliate links meaning I get a commission if you purchase through my links, at no extra cost to you.
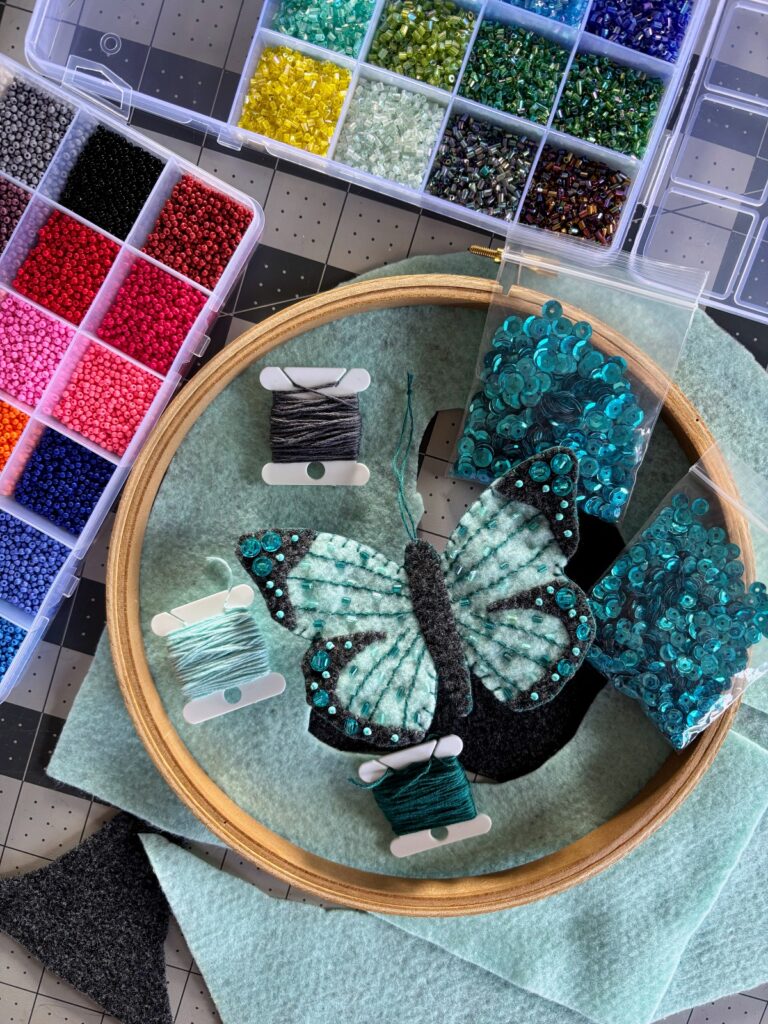
Materials
- Scissors
- Sewing pins
- Sewing needles
- 8 inch embroidery hoop
- Embroidery hoop holder (optional)
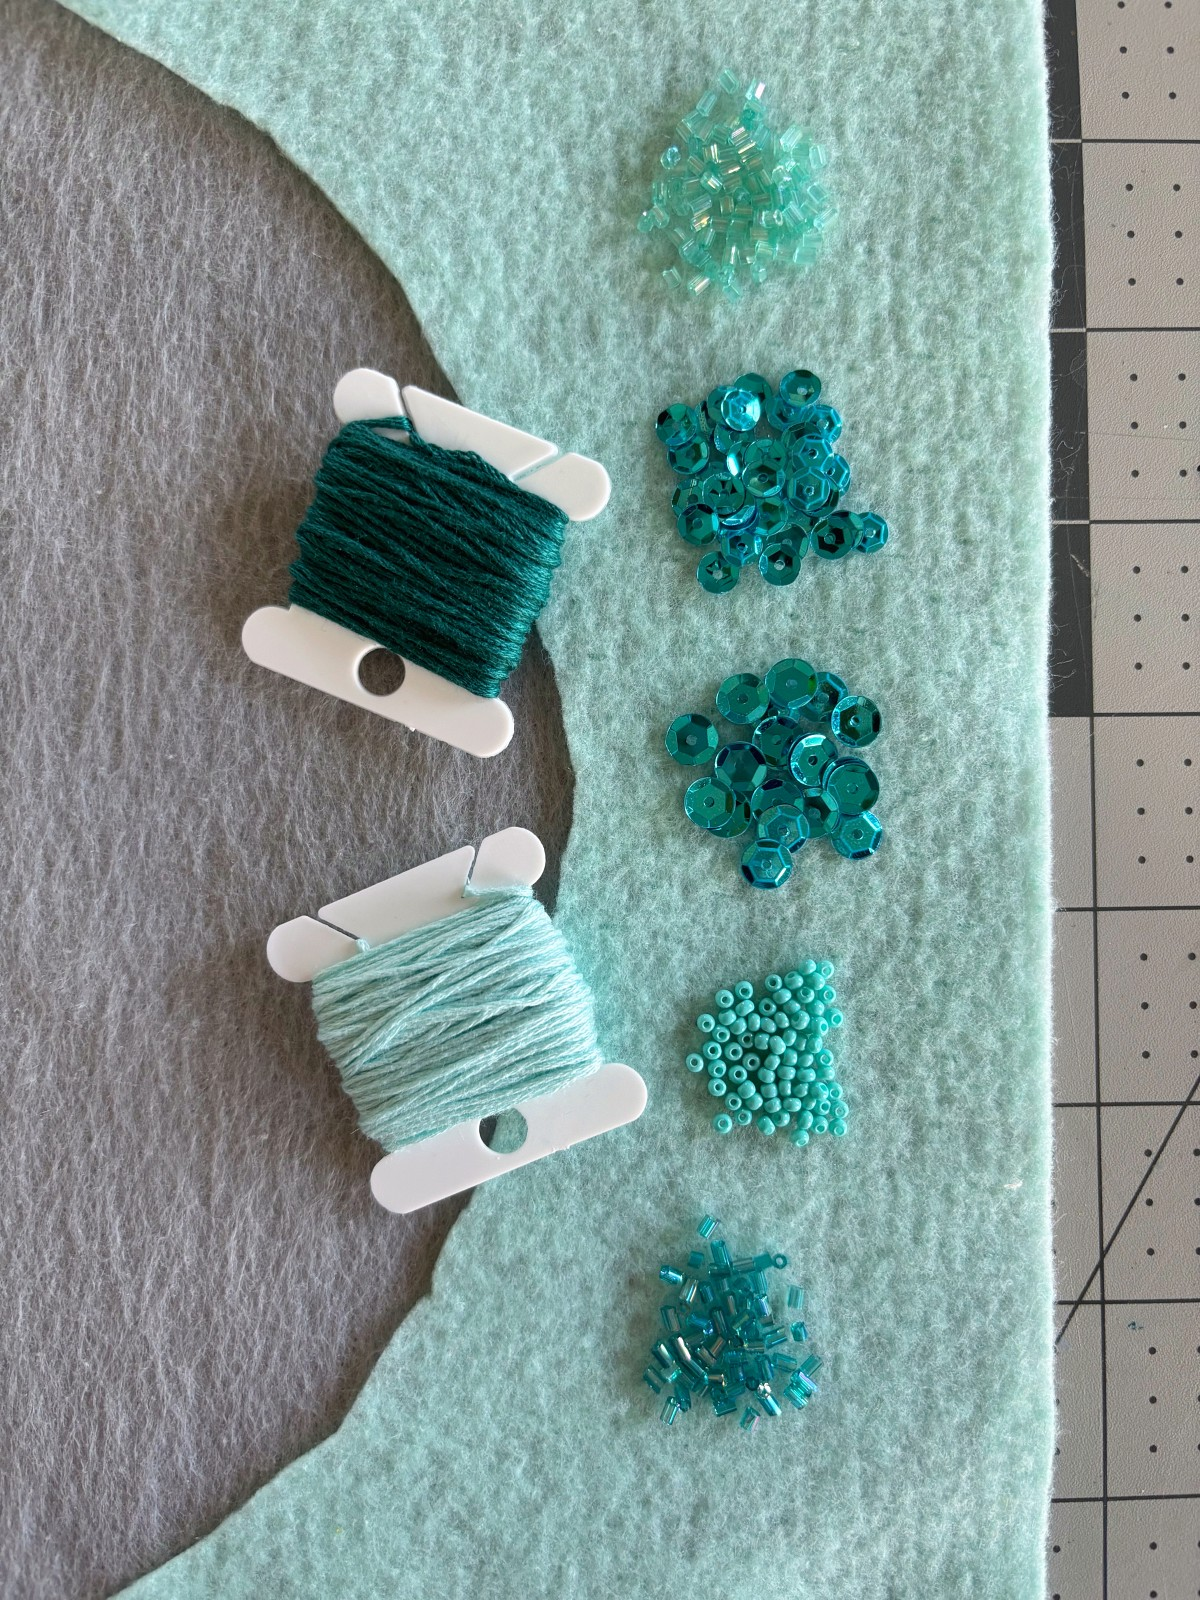
- Embroidery thread (dark teal, light teal, and dark gray)
- Embroidery thread wax (optional)
- 4mm sequins (teal)
- 6mm sequins (teal)
- Seed beads (teal)
- Tube beads 3mm and 7mm (teal)
- Dark gray felt (1 sheet)
- Teal felt (1 sheet)
Instructions
Step 1
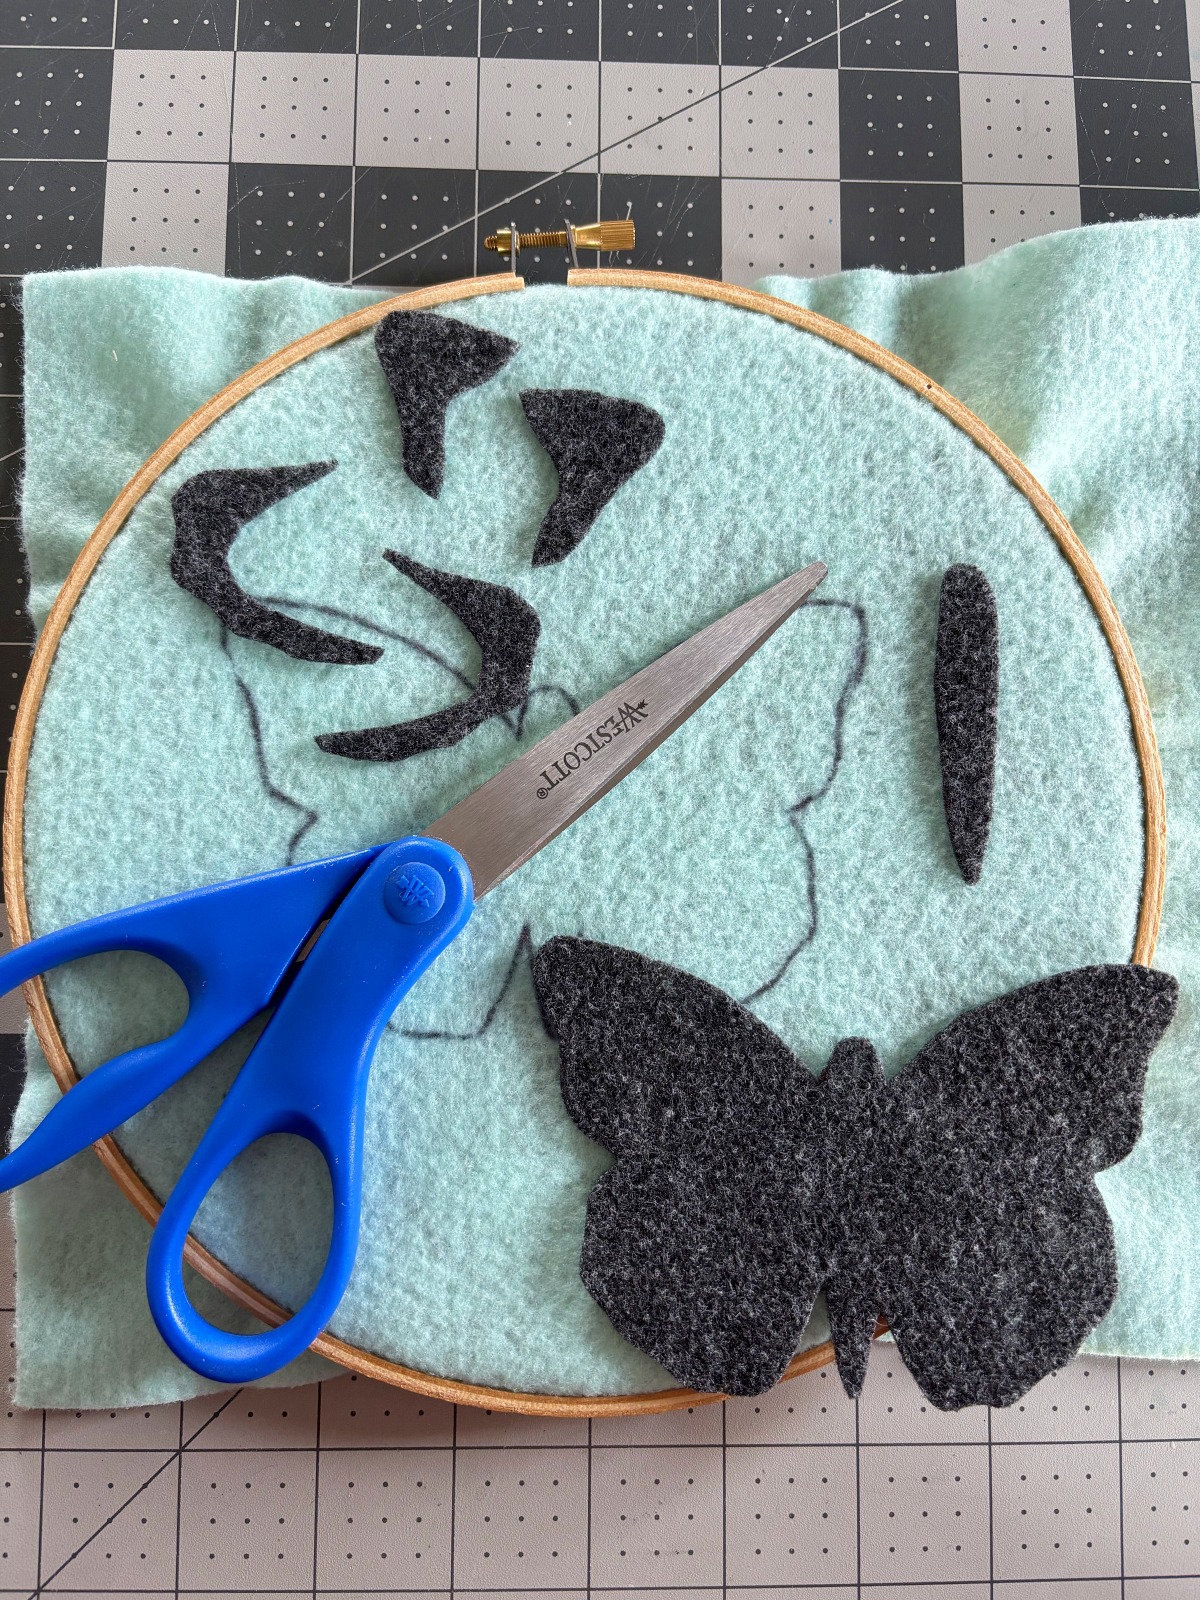
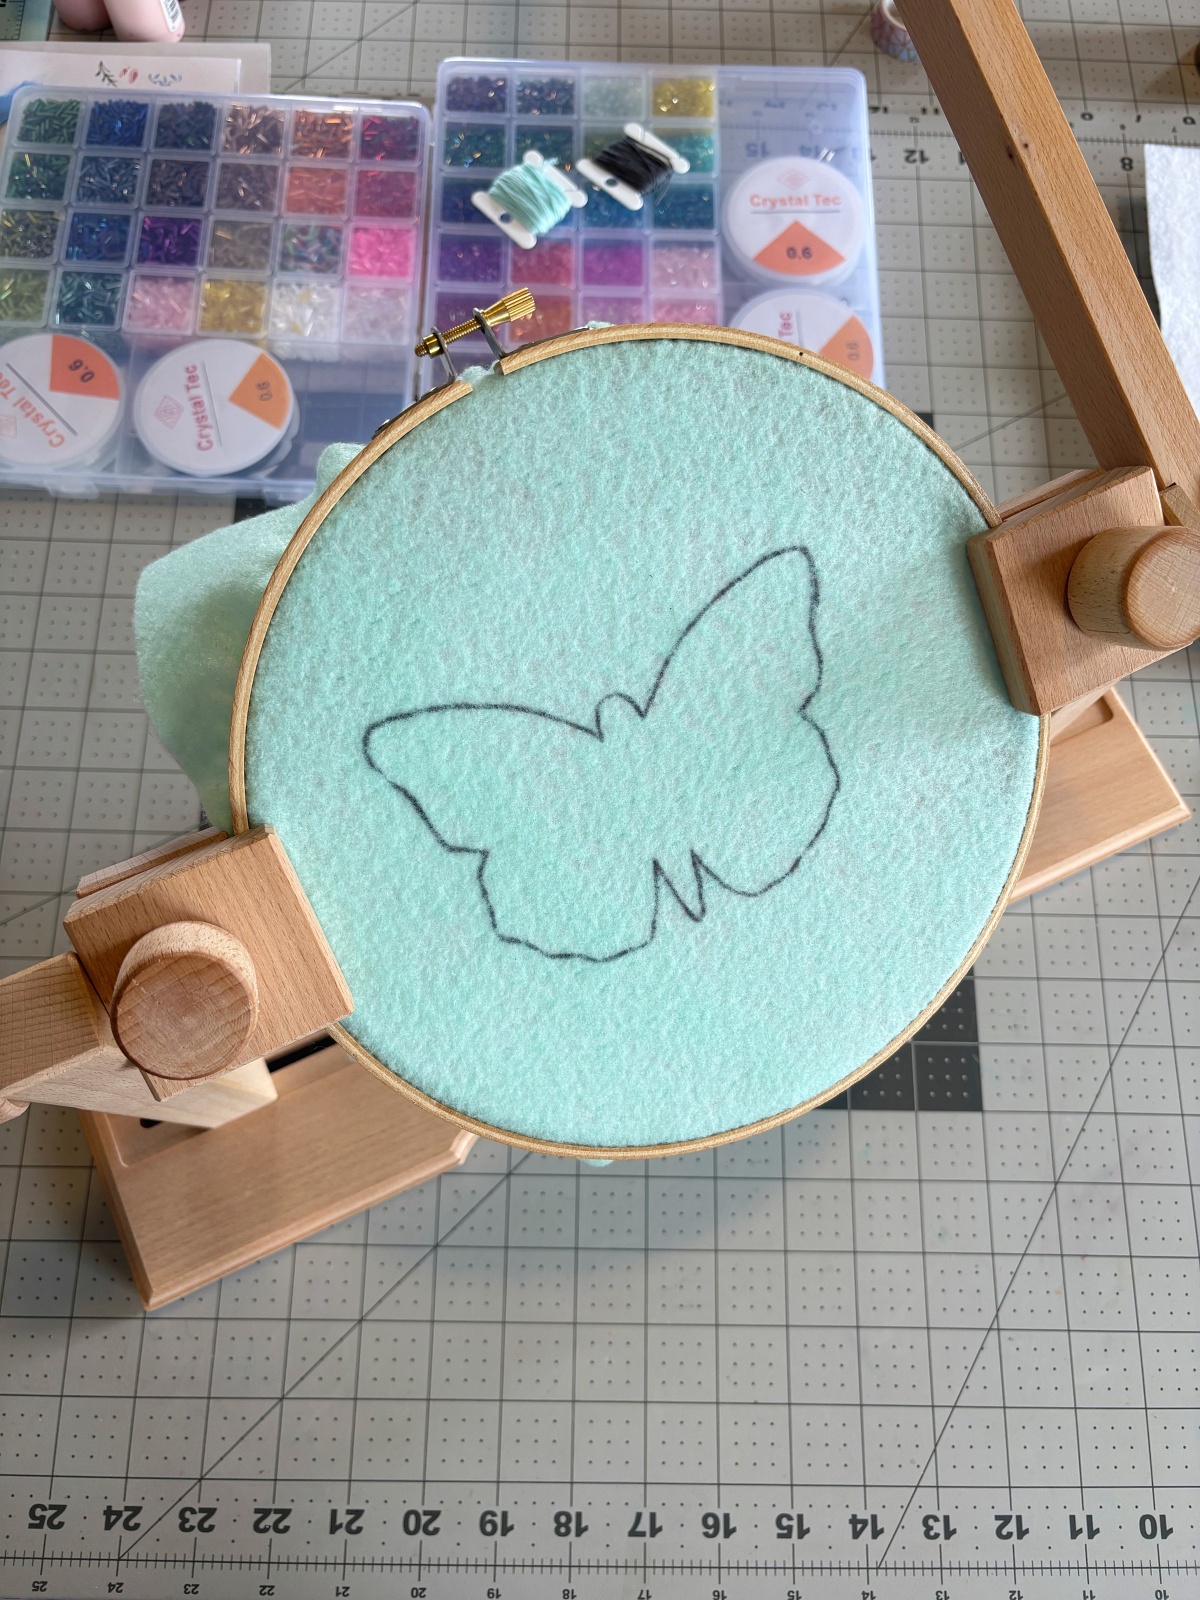
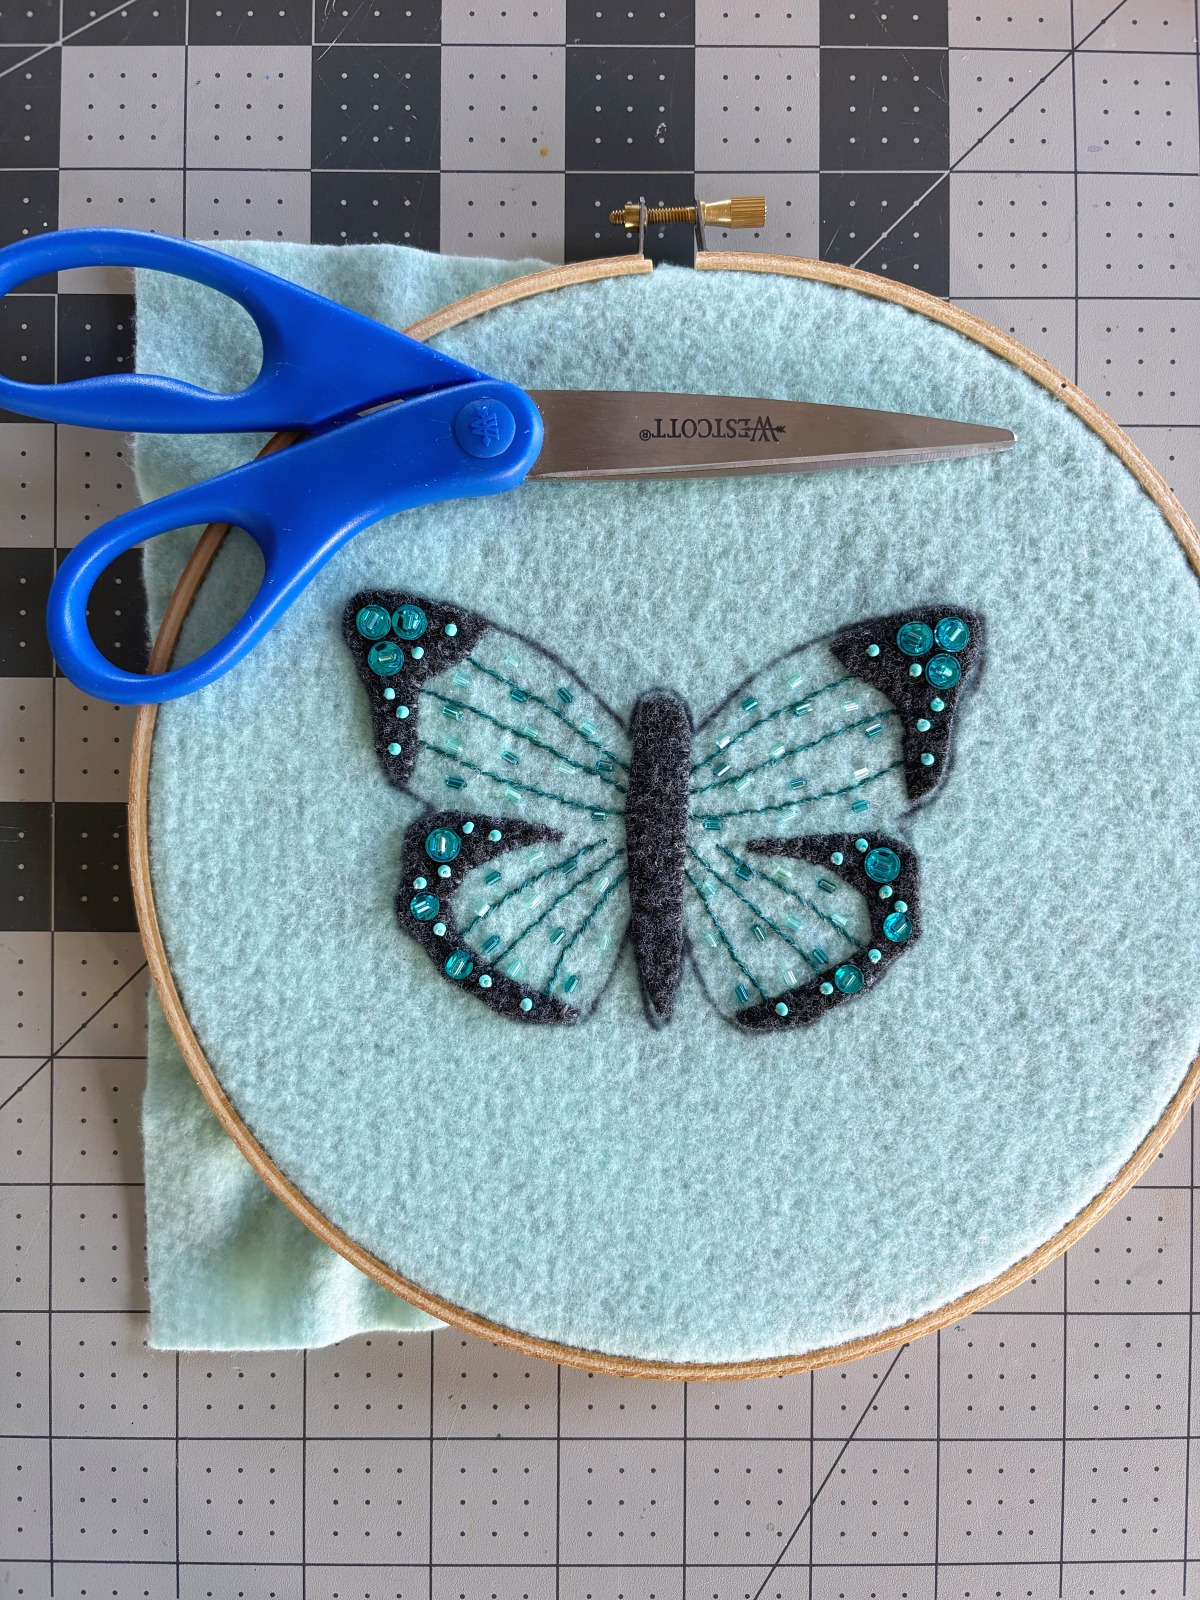
Outline each pattern piece onto your felt sheets using a pen. Then carefully cut out each piece except for the butterfly base on the teal felt. You will leave the base uncut so that you can put it in the embroidery hoop and sew on your details. I use an embroidery hoop holder so that my hands don’t get cramped while sewing. This is completely optional and you can still do the project without one.
Note: Everything I sew during this project uses three strands thick of embroidery thread.
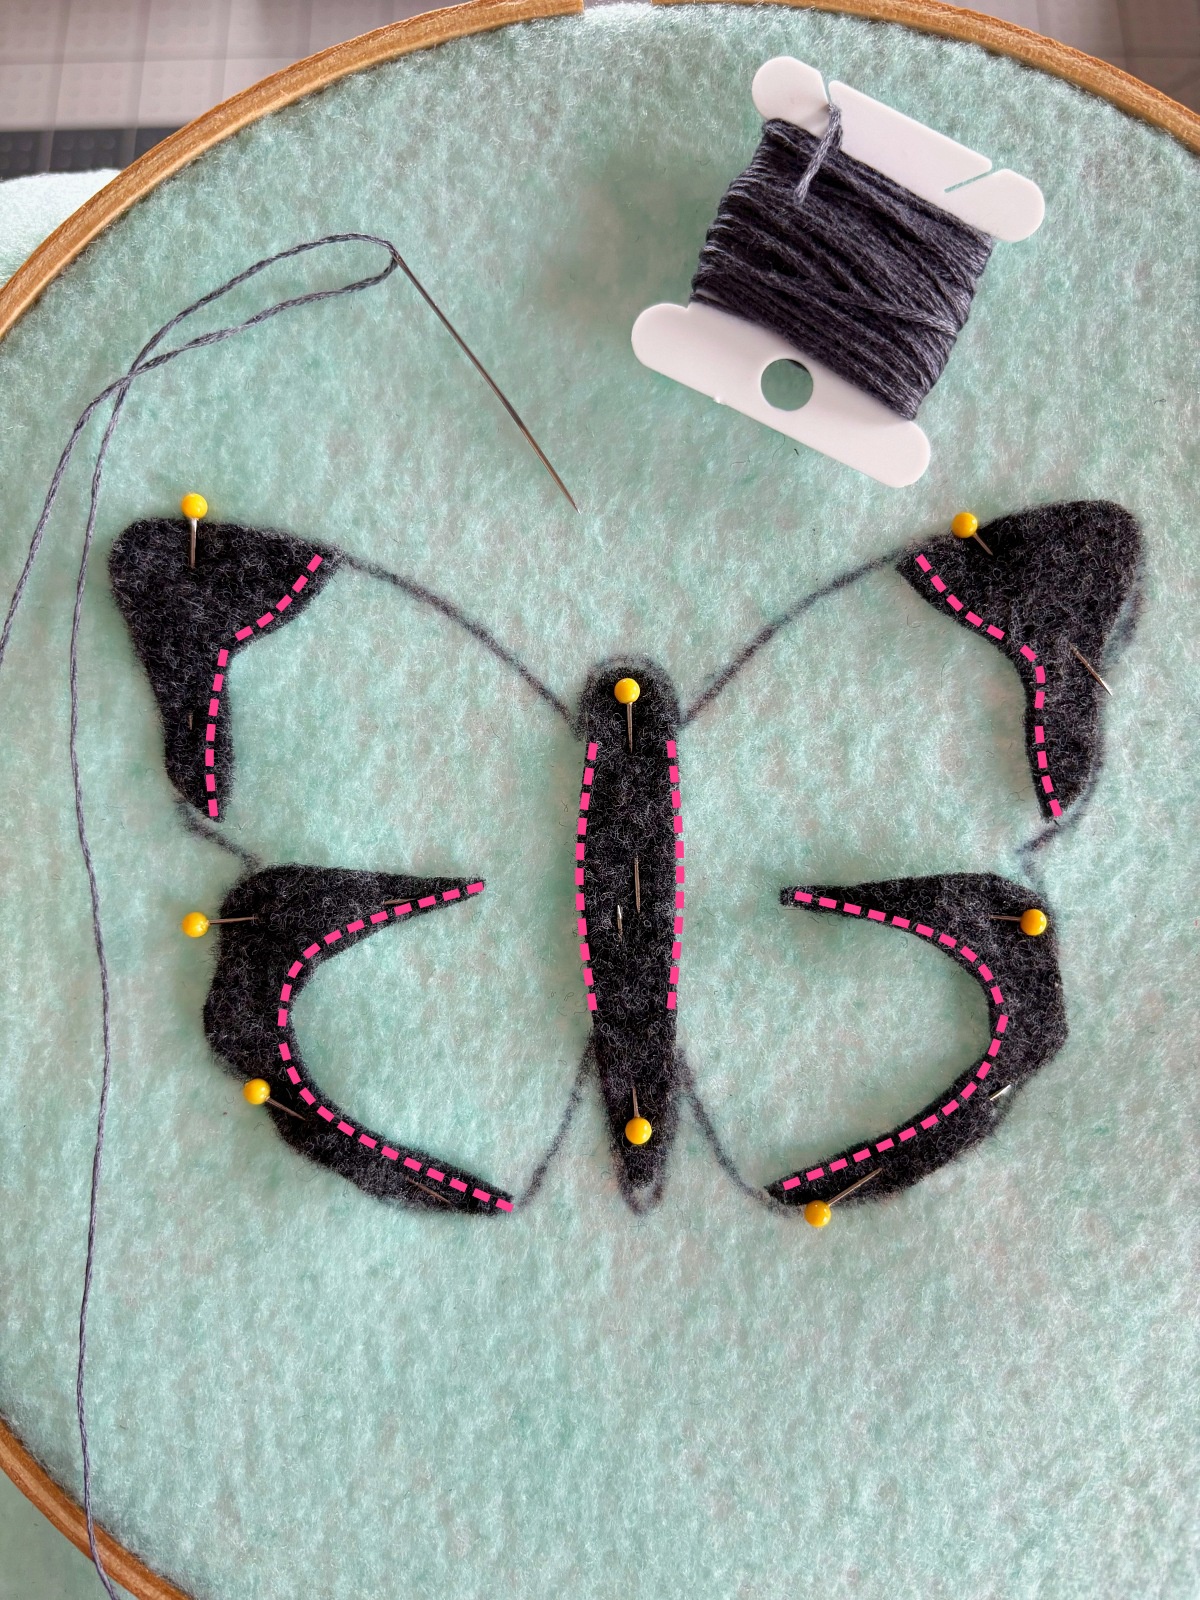
Step 2
Next, pin the dark gray wing details and body onto the butterfly base using sewing pins. Then, using a whip stitch, sew around the perimeter of the wings and body with dark gray embroidery thread. The pink dotted lines in the picture below indicate where to sew.
Step 3
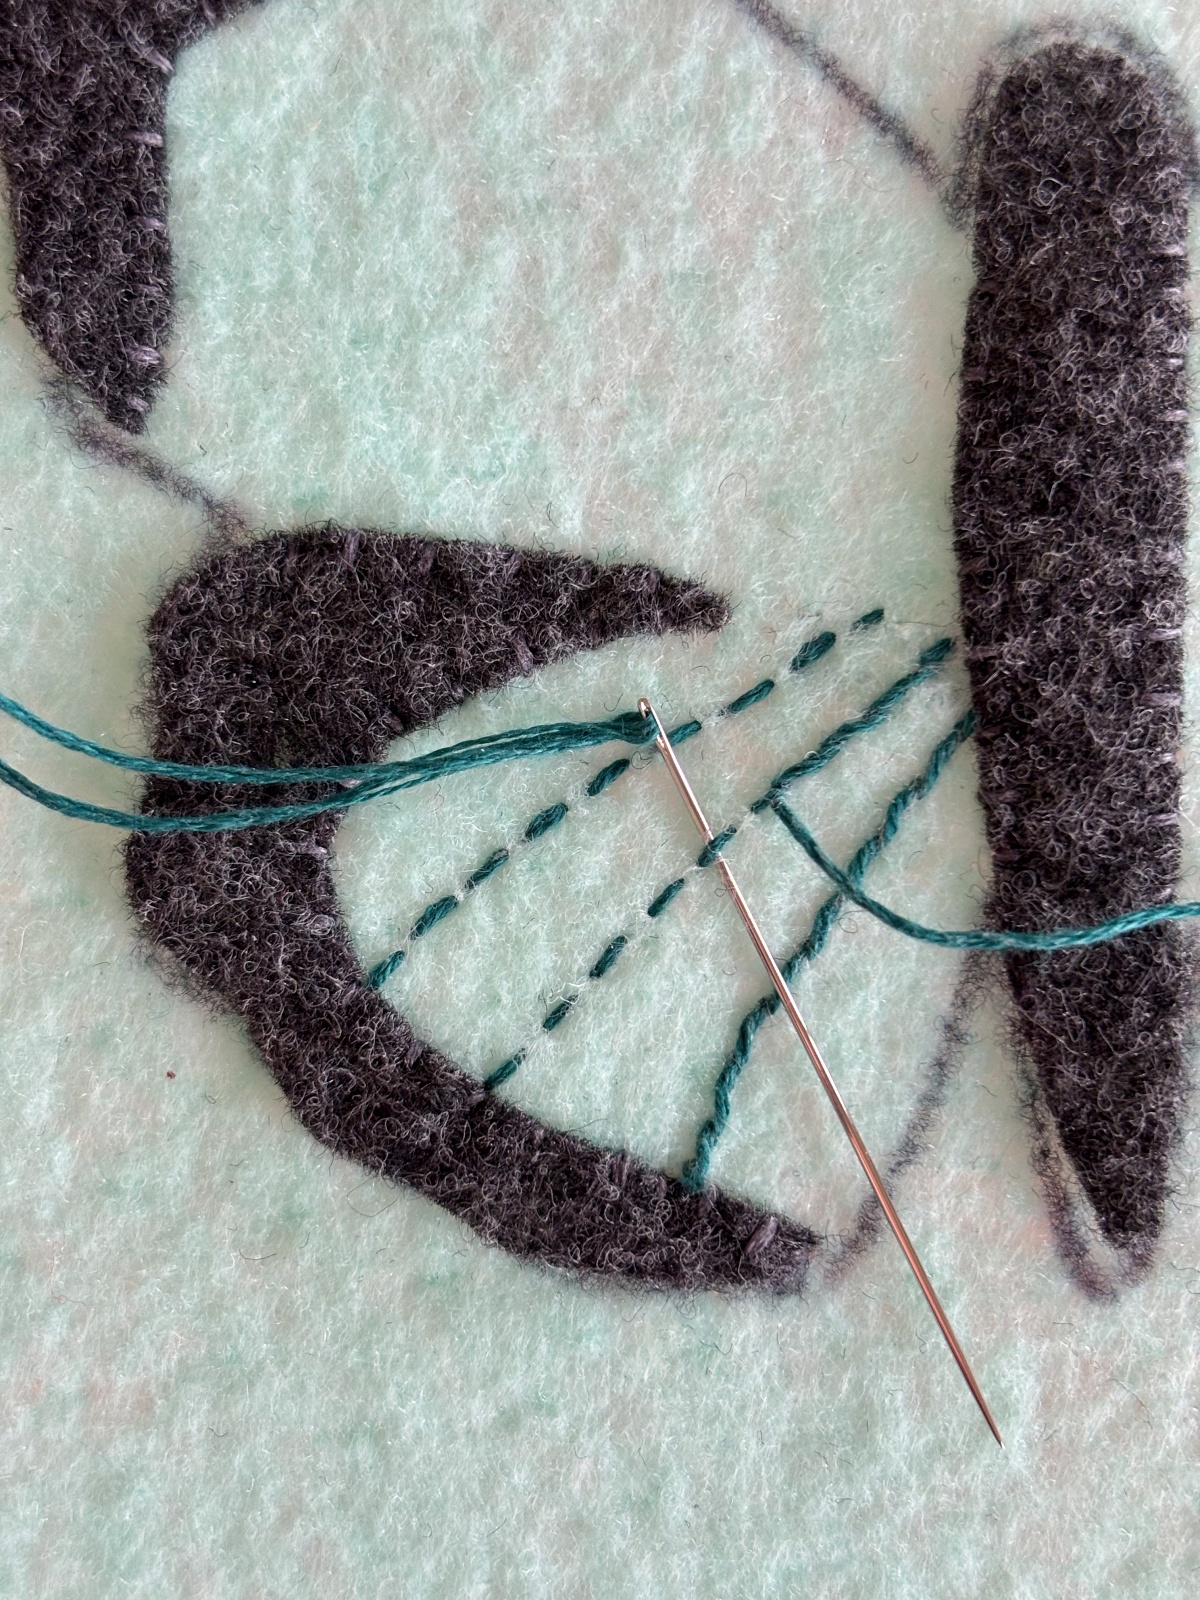
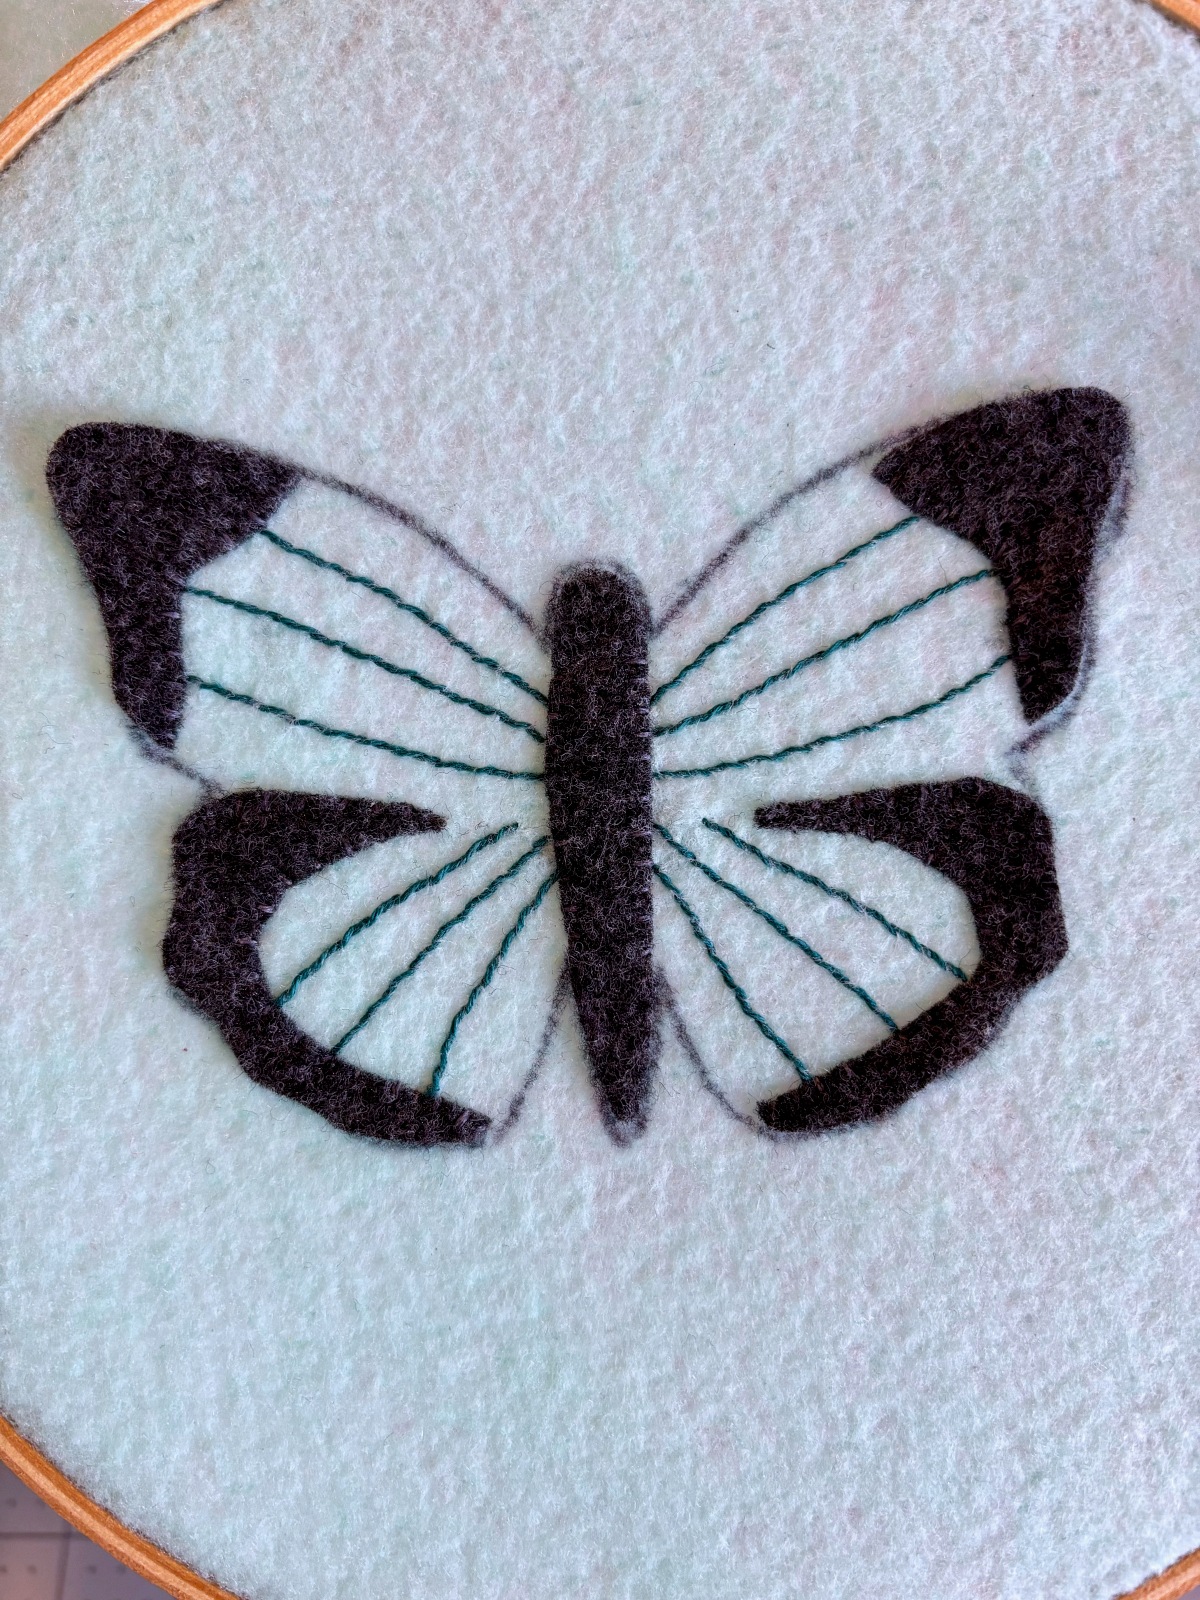
It is now time to add the dark teal embroidery thread details on the wings. Using the PDF pattern as a guide, sew three lines on each top and bottom wings. I used a running stitch as the base of each line and do a whipped backstitch to finish them.
Step 4
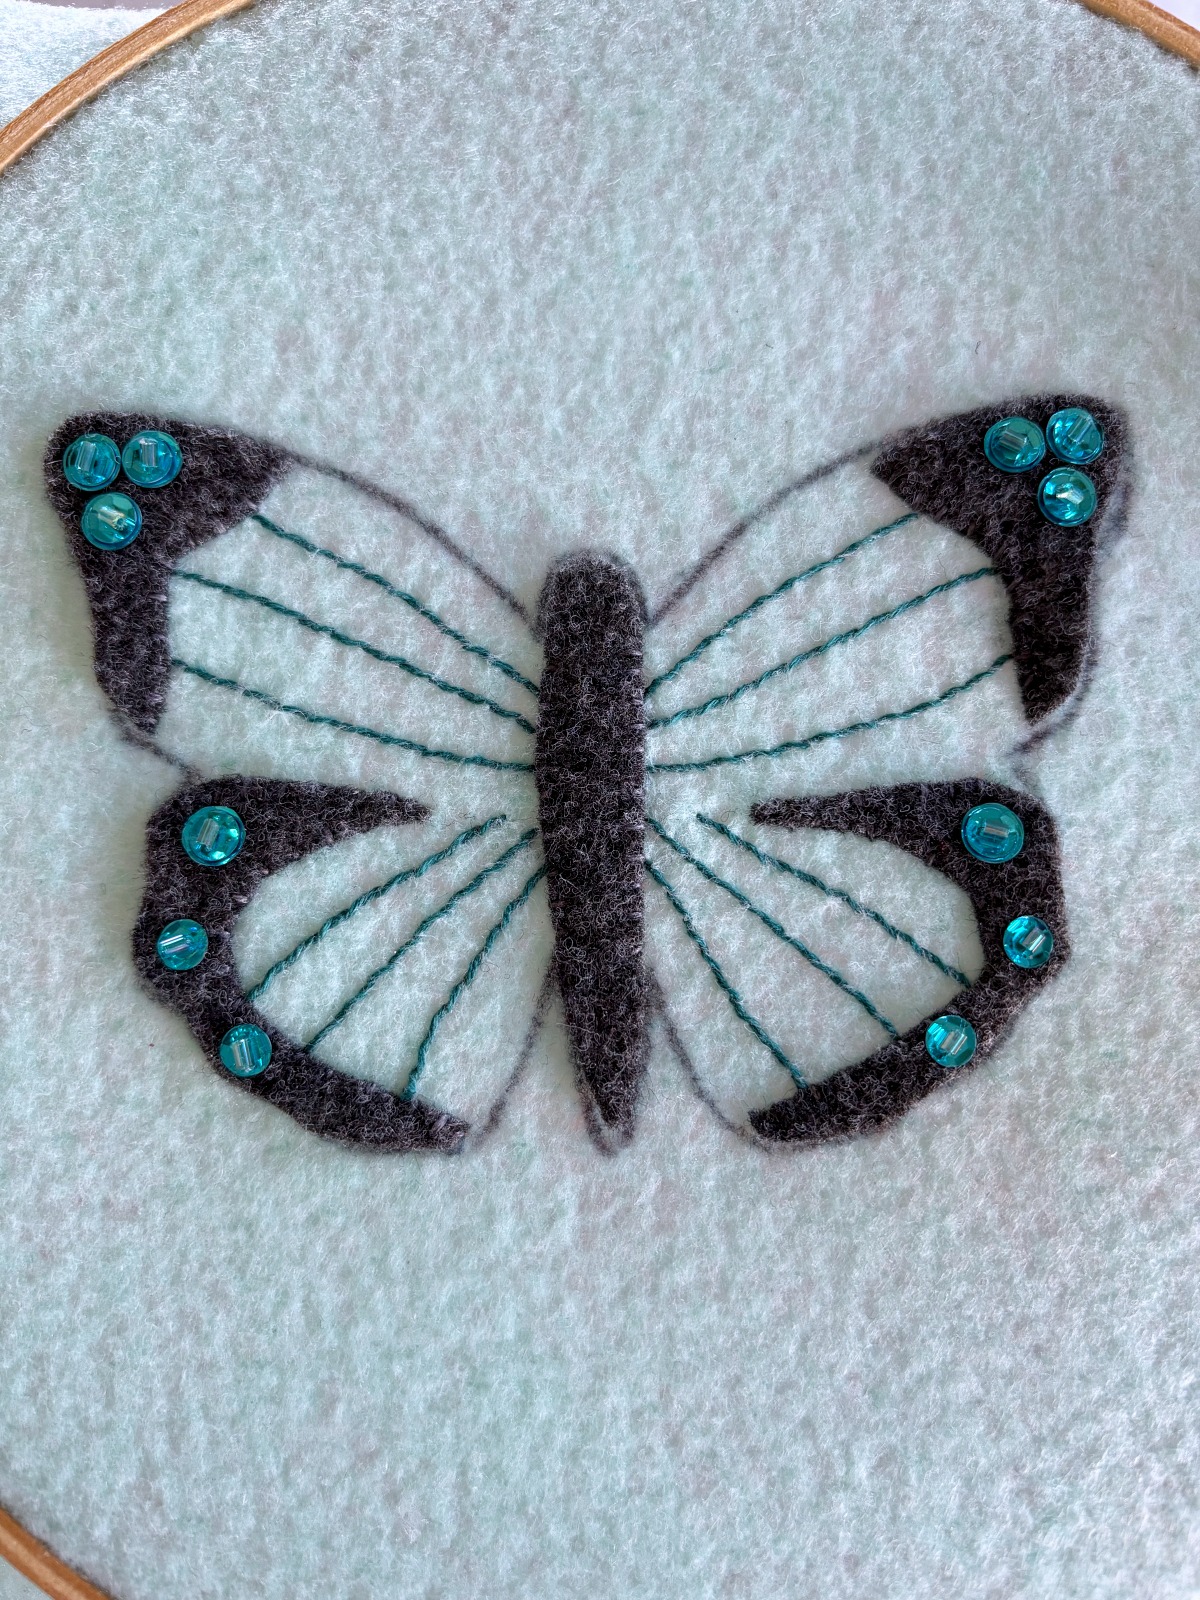
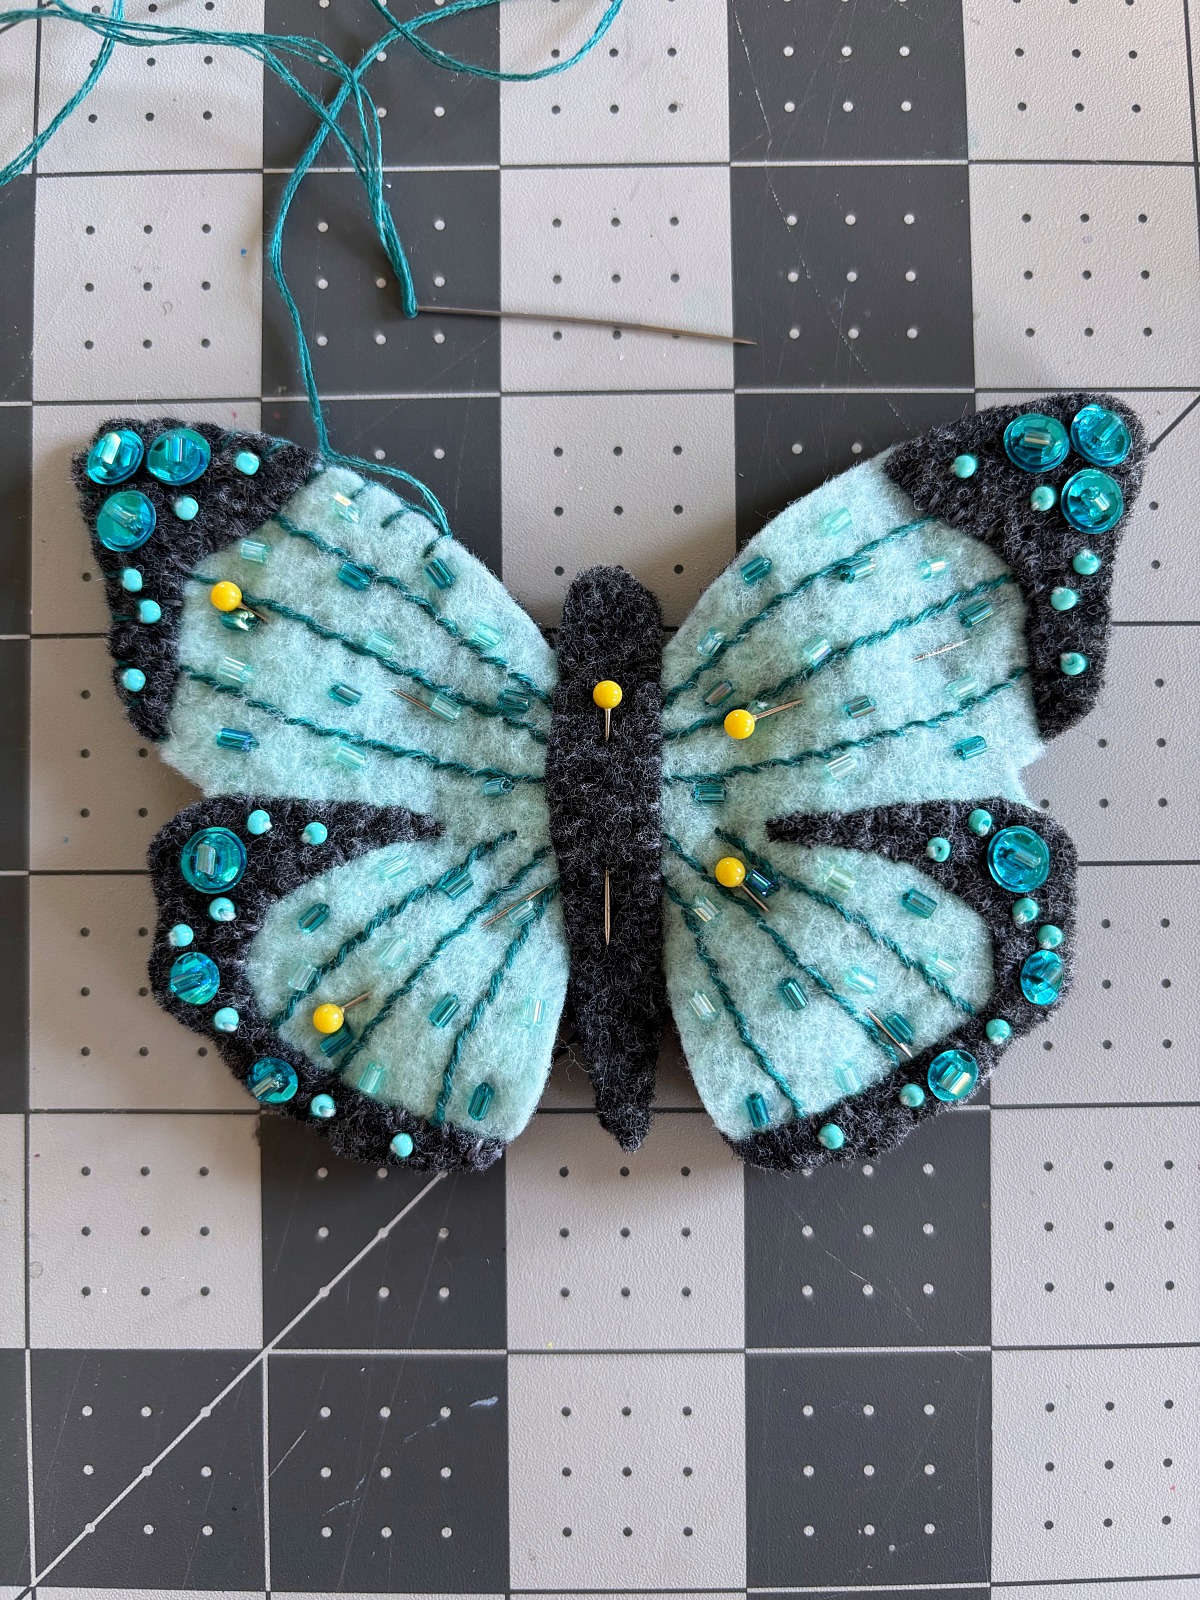
After you finish the embroidery lines, you can start to sew on some sequin and bead details. I decided to add three 6mm sequins and a few seed beads to each gray section of the top wings. Along with some 3mm tube beads scattered throughout the embroidery lines. I repeated these details on the bottom wings as well but used the smaller 4mm sequins because it is a skinnier area to work with. You can add any bead and sequin details you like, the options are endless! Copy my design exactly or tweak it to your own preference, either way you can’t really go wrong adding these beautiful glass beads and sequins.
Step 5
Once all the wing details are complete, it is time to take it off the embroidery hoop and carefully cut it out.
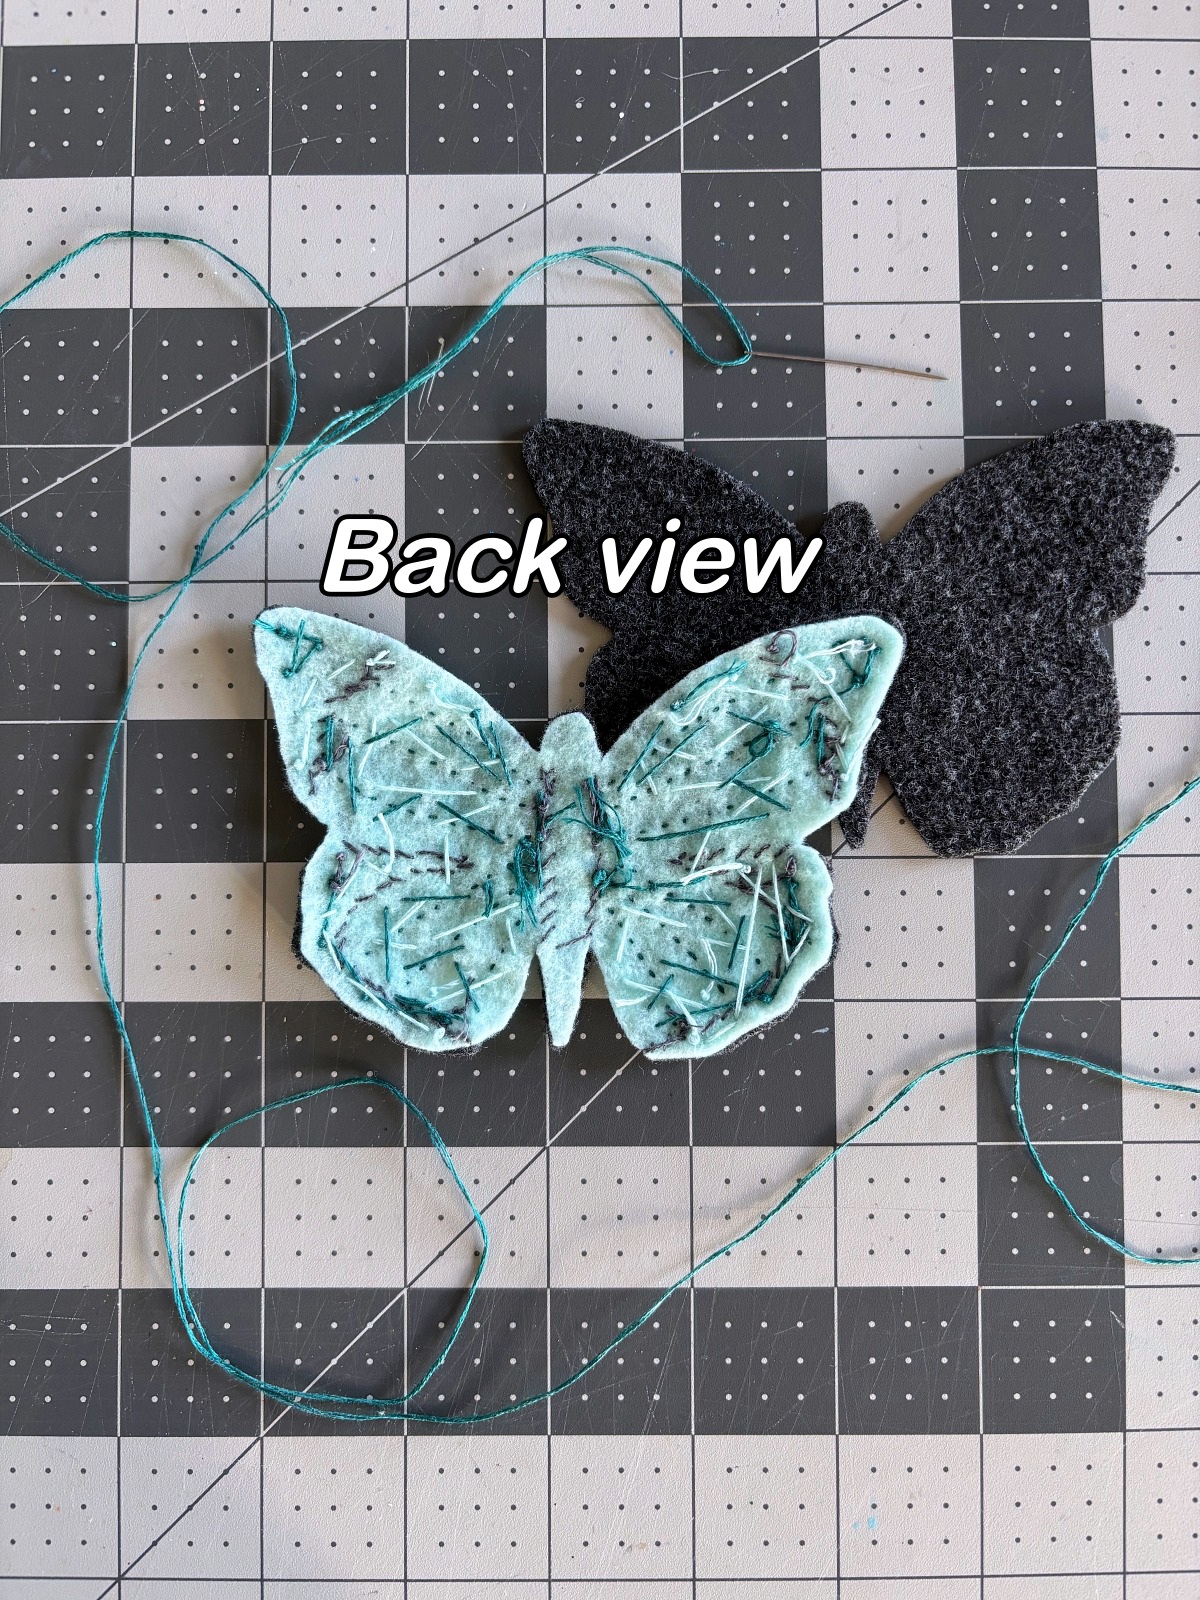
Step 6
Take your butterfly bases and pin them together using a few sewing pins. This will hide all the embroidery lines in the middle and make the back look nice and clean. Sew around the entire edge using a blanket stitch.
Step 7
You are now done! The last thing I did was hang my ornament using a little bit of embroidery thread looped through the blanket stitch.

This felt butterfly ornament is the perfect summer time craft. If you are looking for a simple sewing project that can be done in a day or over the weekend then I recommend trying it out. Use our free PDF pattern to create your very own. If you do try making this ornament we would love to see it! Tag us on instagram @mirrortwins.studio and we will add it to our story.