Yellow Butterfly Ornament. Simple hand-sewn Felt Project
Follow along with our step by step tutorial to create this beautiful butterfly ornament. It’s the perfect one day felt sewing project and can be used as an ornament, wall decor, or bag accessory.

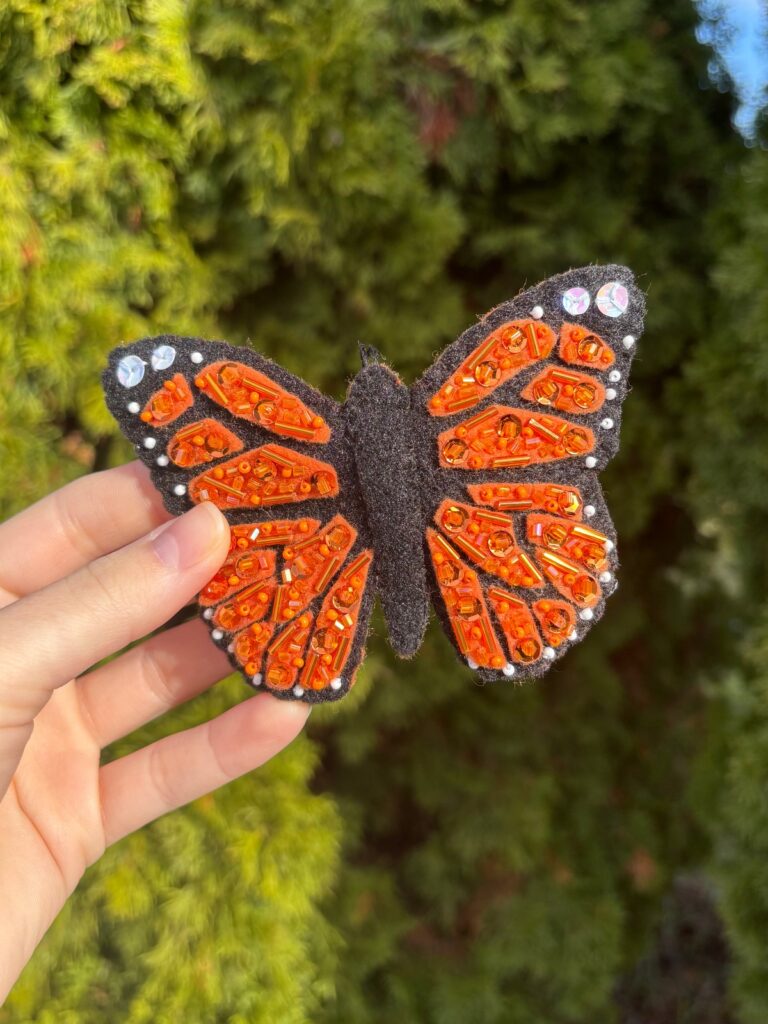
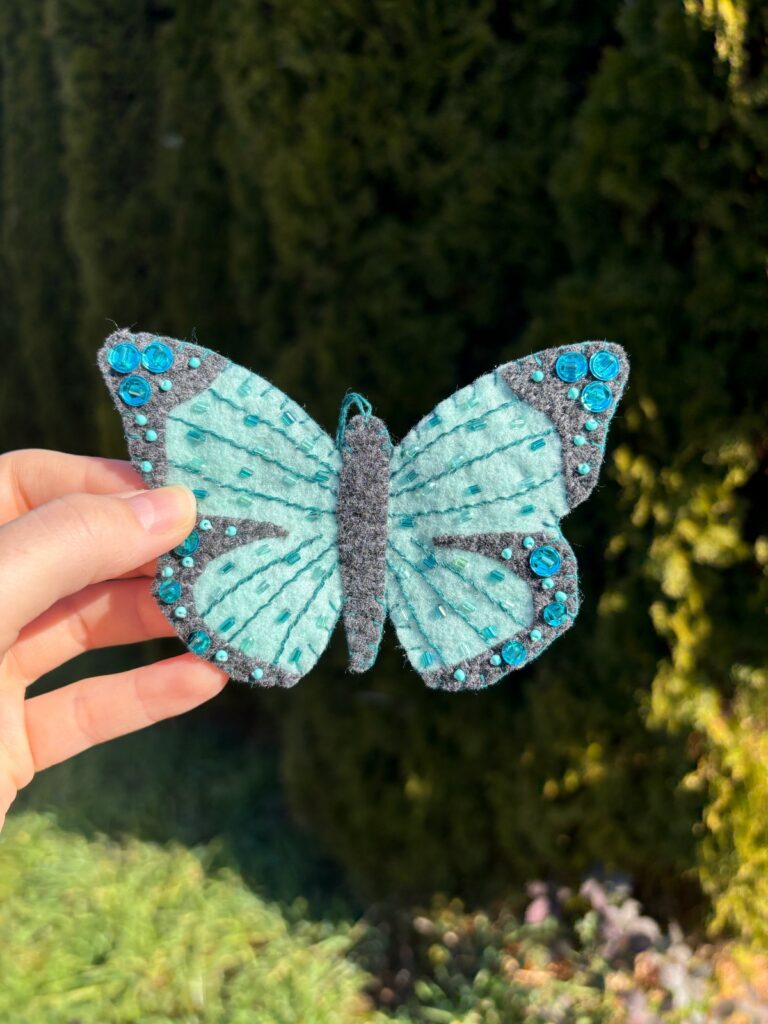
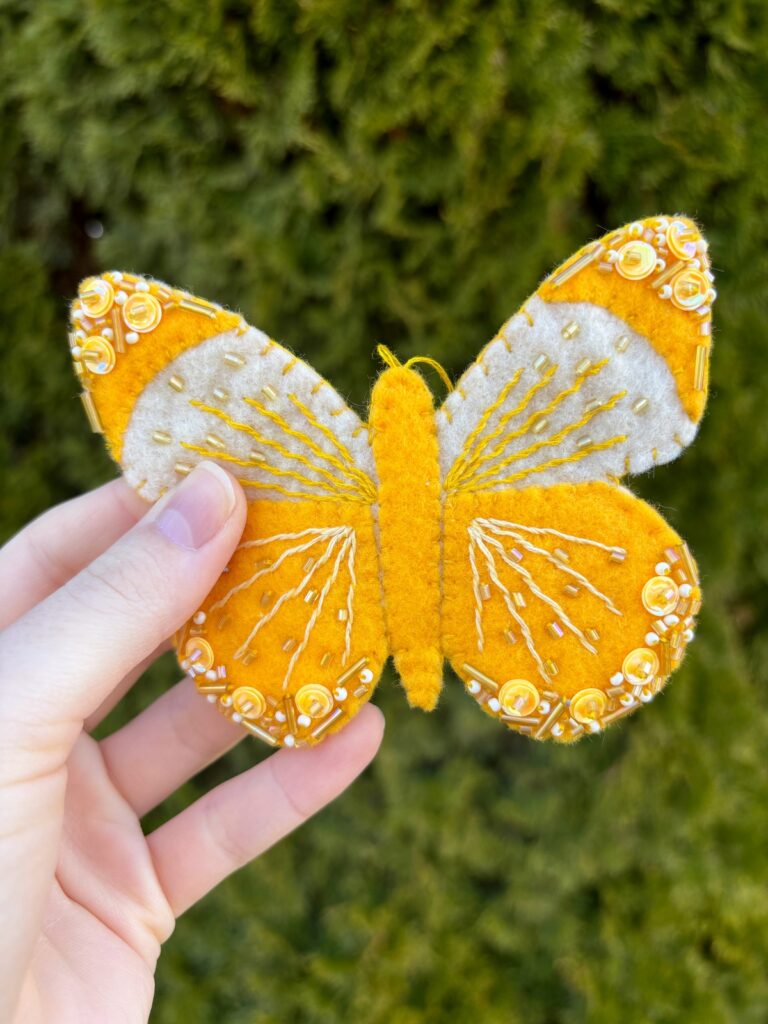
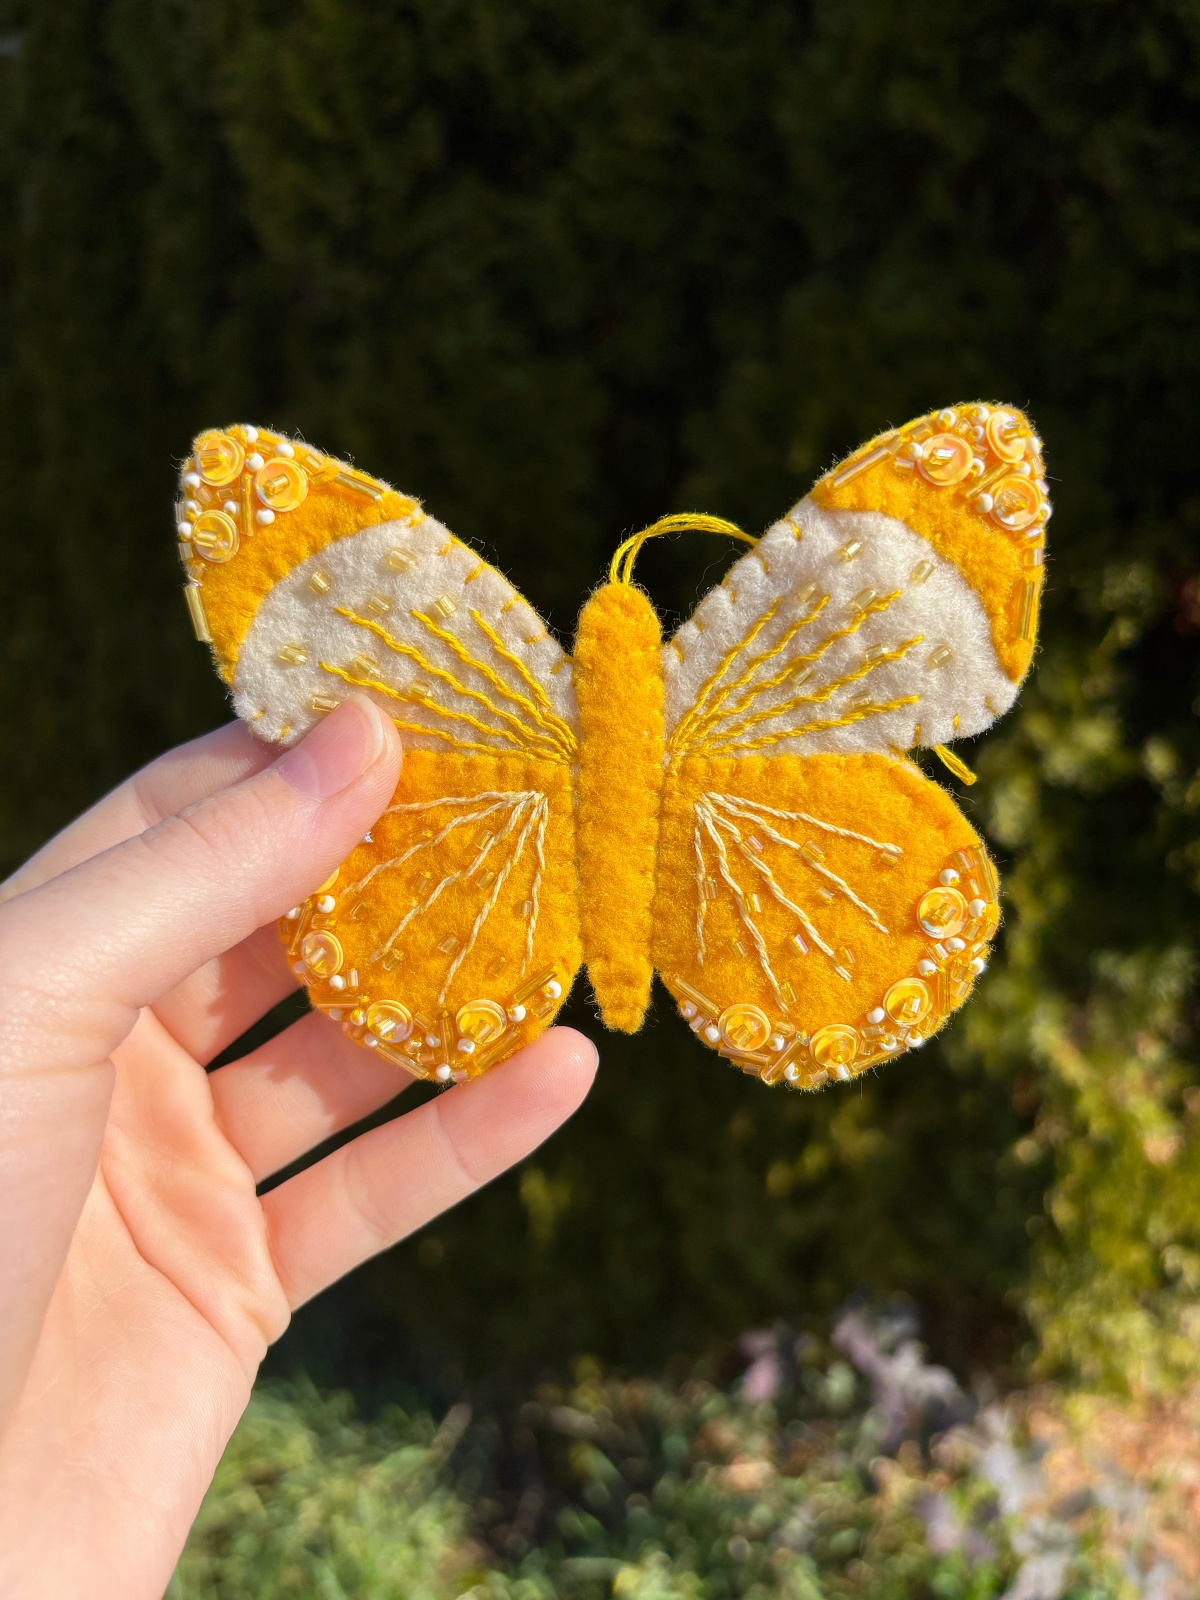
Felt is such a versatile crafting medium and one way we love to use it is to create adorable ornaments. Today we will share our process of creating this beautiful hand-sewn yellow butterfly ornament. This butterfly ornament is the perfect spring time craft. It includes embroidery, sequins, and bead details. Any of the colors could be replaced to match your own personal preference, the options are endless! If you are looking for a simple sewing project that can be done in a day then I recommend trying it out. We have provided a Free PDF printable pattern at the bottom of the page for you to download.
*This post contains affiliate links meaning I get a commission if you purchase through my links, at no extra cost to you.
Materials
- Scissors
- Sewing pins
- Sewing needles
- 8 inch embroidery hoop
- Embroidery hoop holder (optional)
- Embroidery thread (light yellow and dark yellow)
- Embroidery thread wax (optional)
- 4mm sequins (yellow)
- 6mm sequins (yellow)
- Seed beads (varying colors of yellow)
- Tube beads 3mm and 7mm (yellow)
- Dark yellow felt (1 sheet)
- Light yellow felt (1 sheet)
Step 1
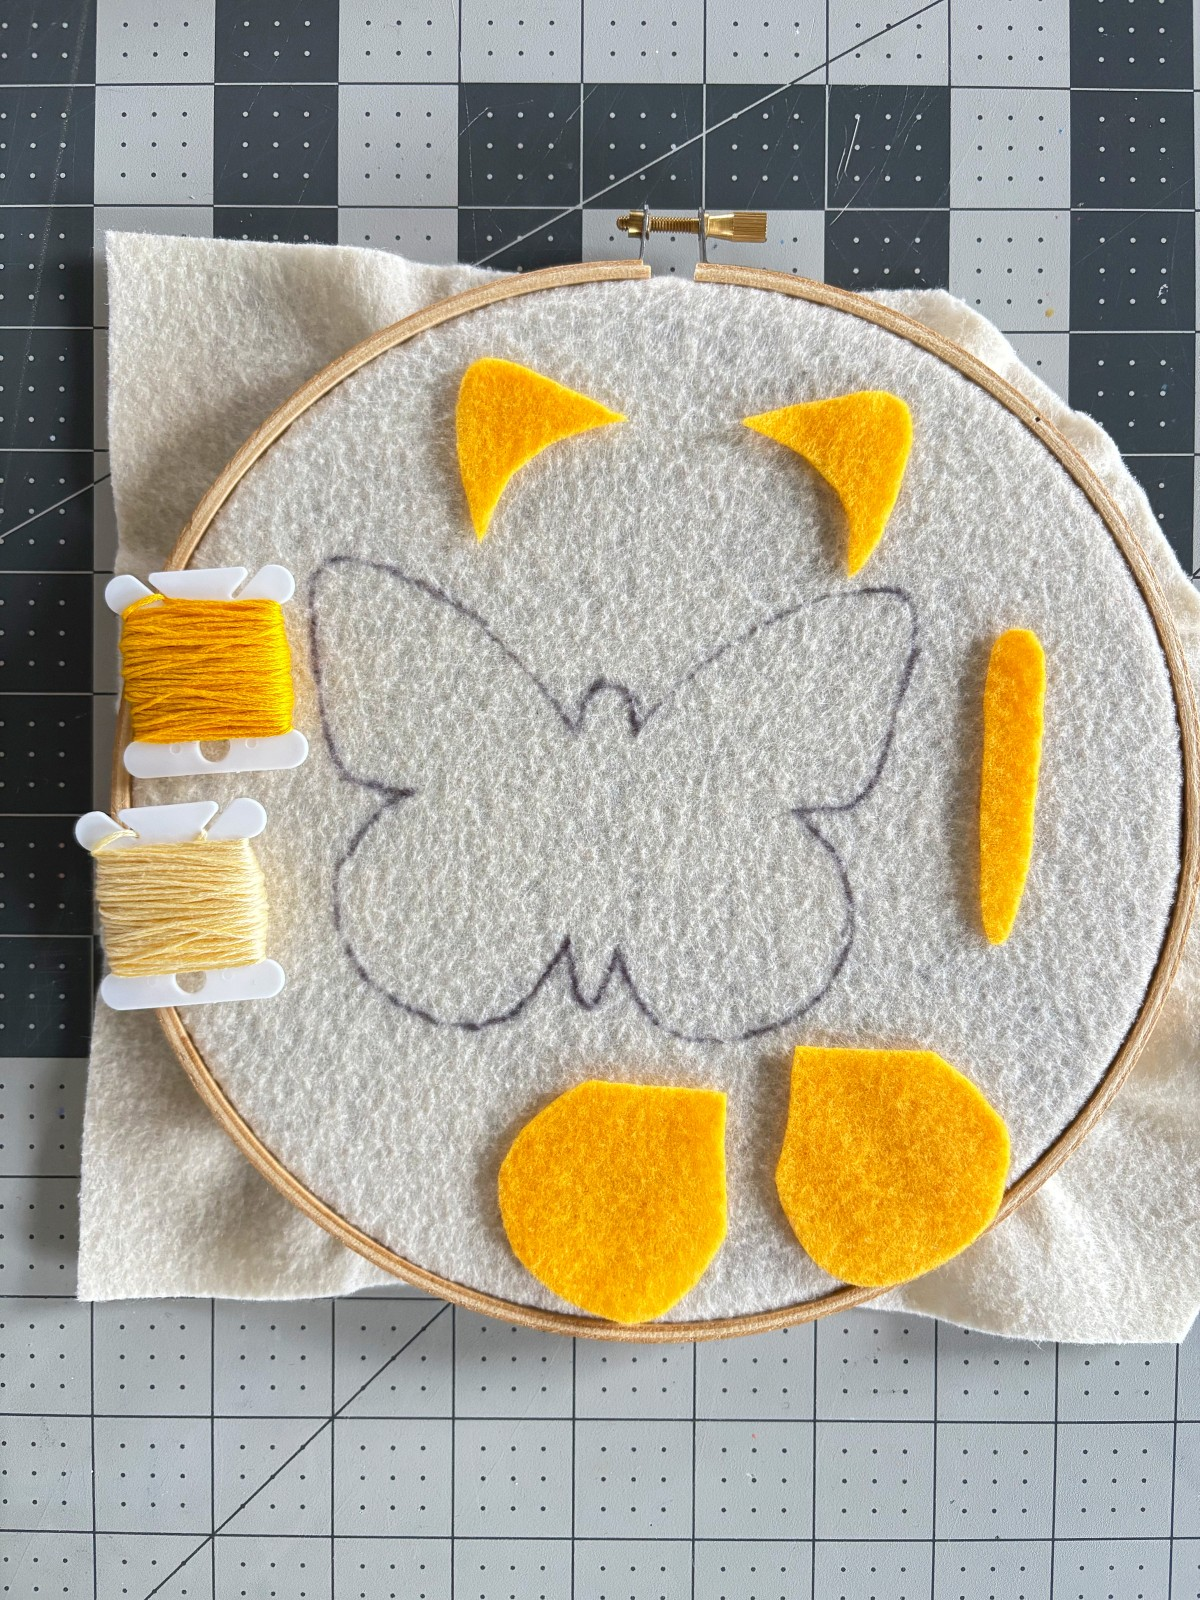
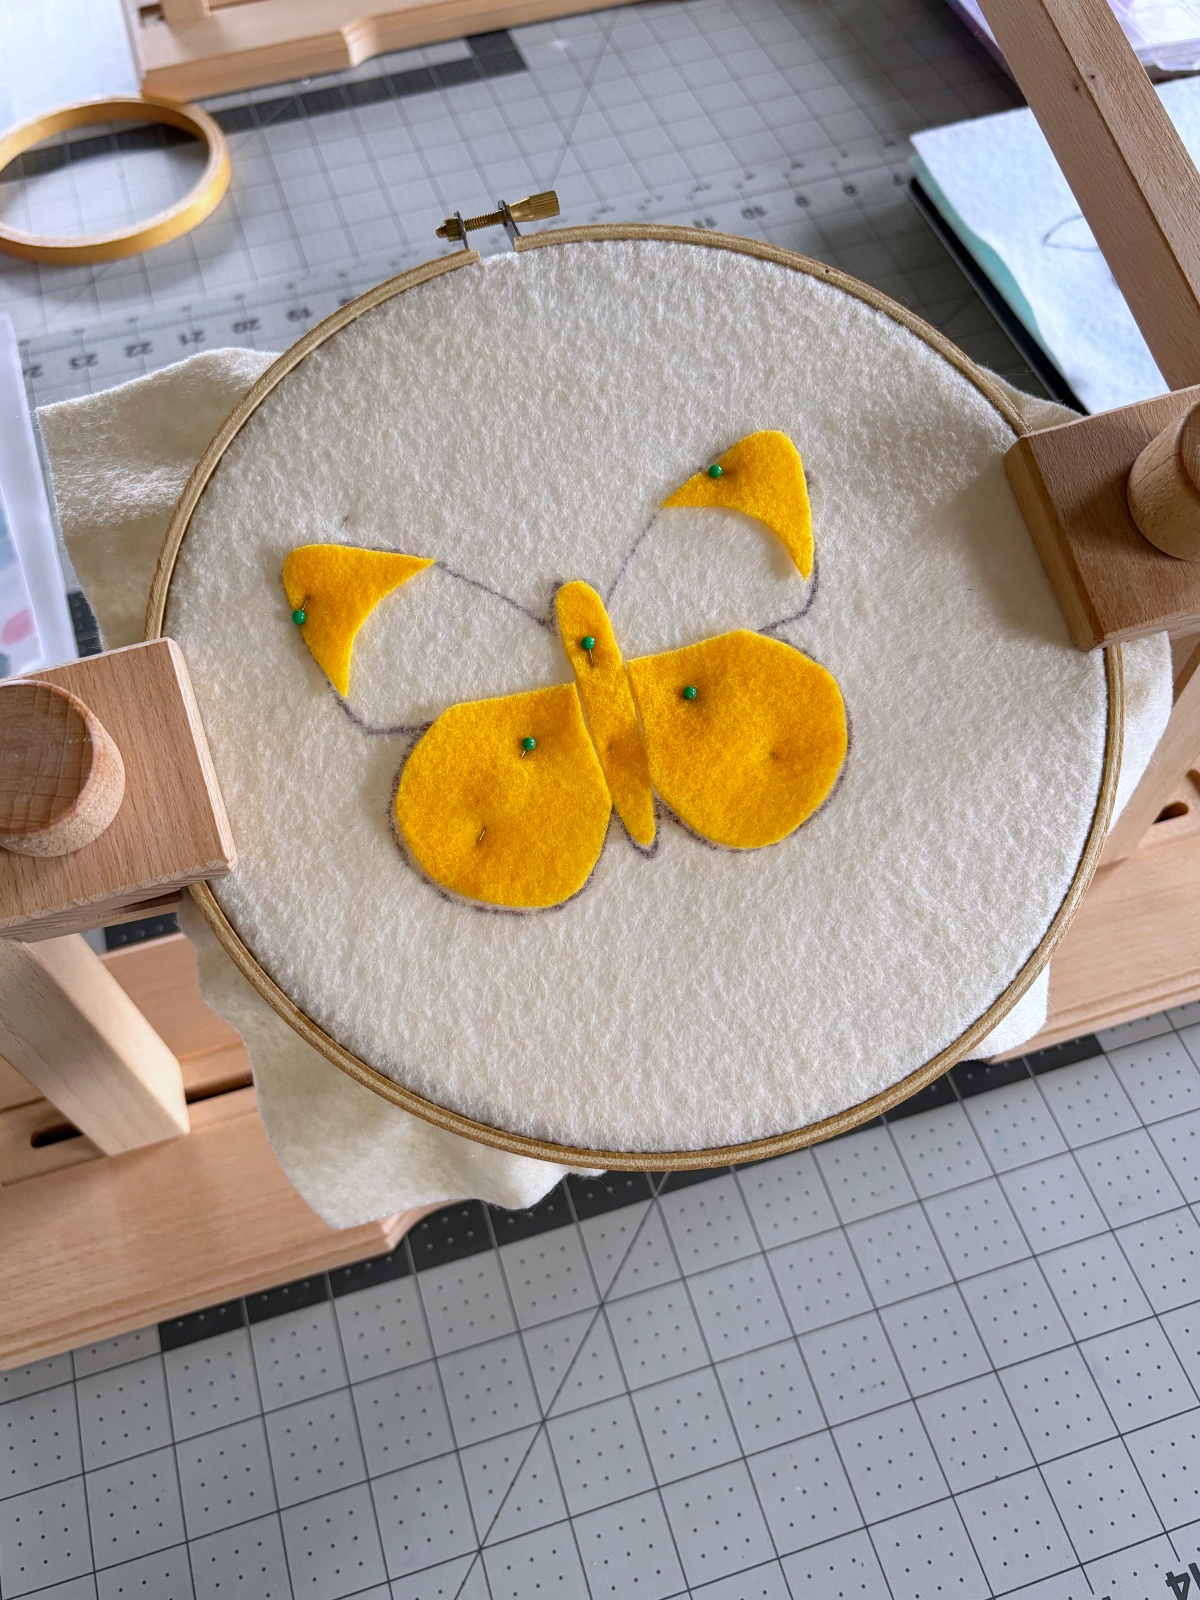
The first thing you want to do is trace your pattern pieces onto your felt using a pen. Then carefully cut out each piece except for the base butterfly body on the light yellow felt. You will be placing it uncut into an 8inch embroidery hoop. I like to use an embroidery hoop stand while sewing because it really helps me not strain my hands or neck, but this is completely optional.
Note: Everything I sew during this project uses three strands thick of embroidery thread.
Step 2
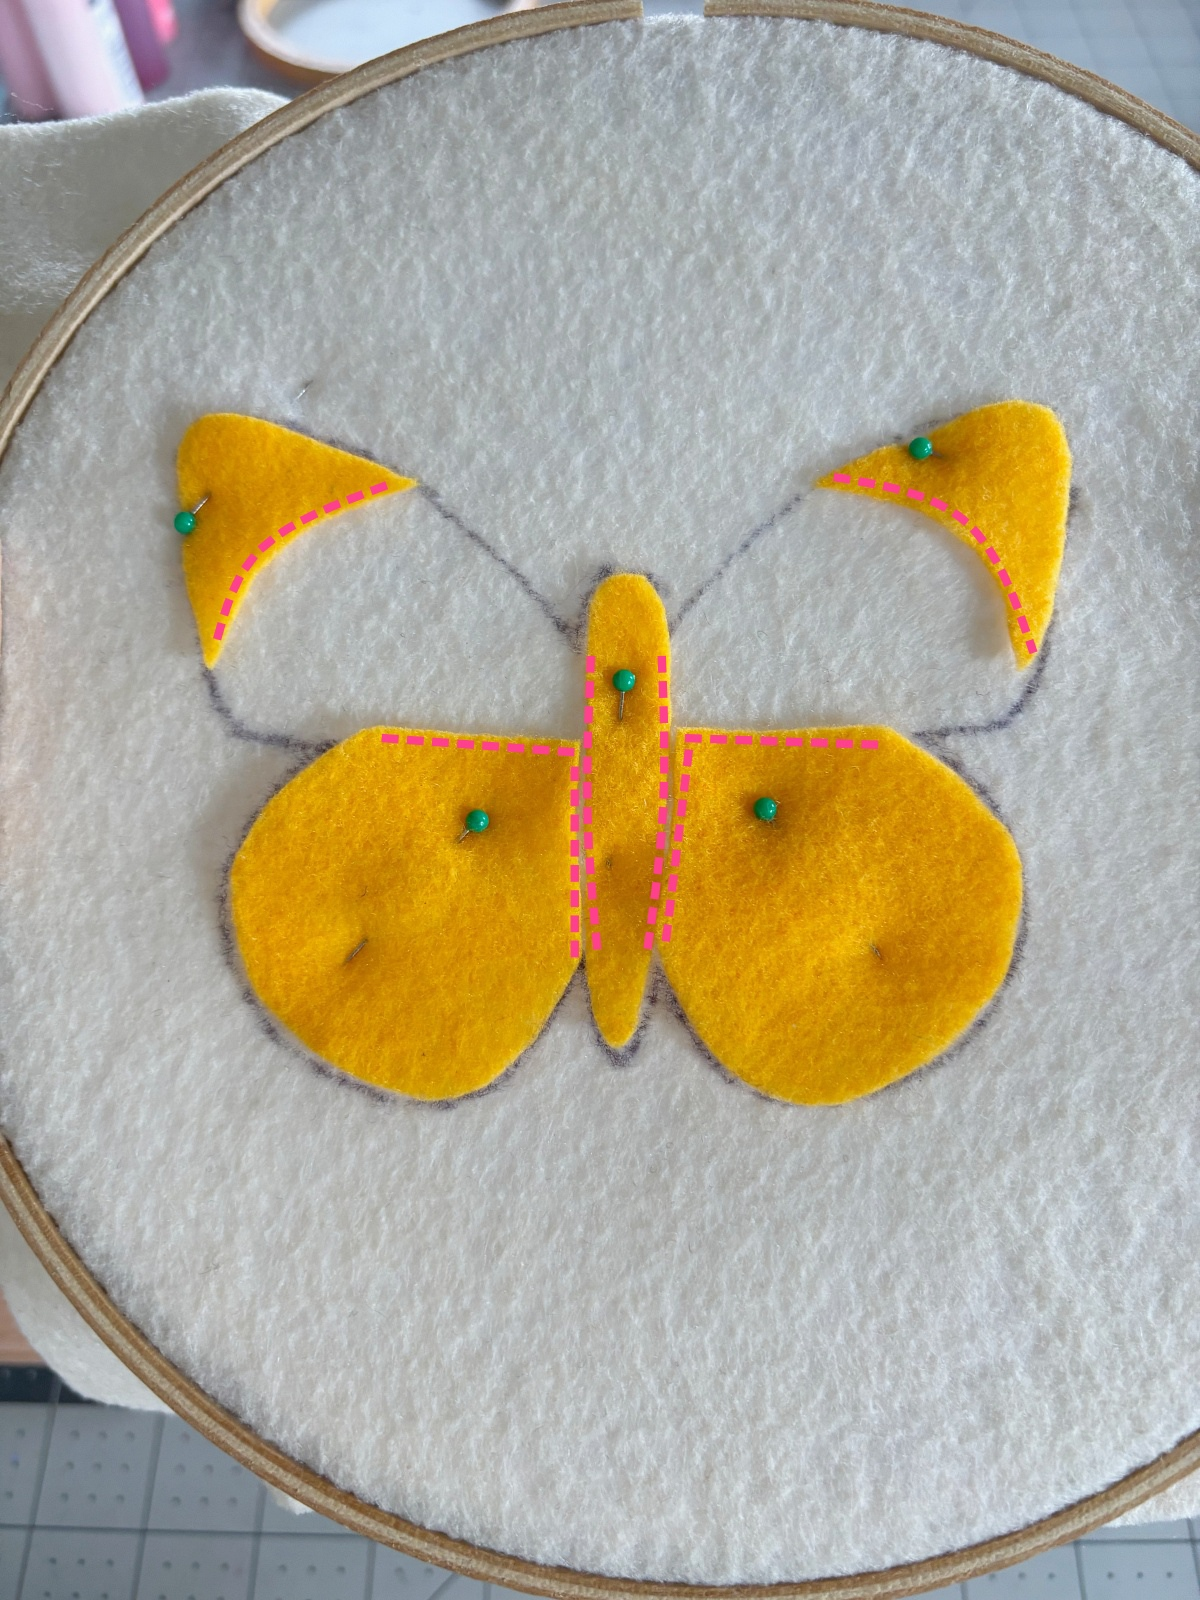
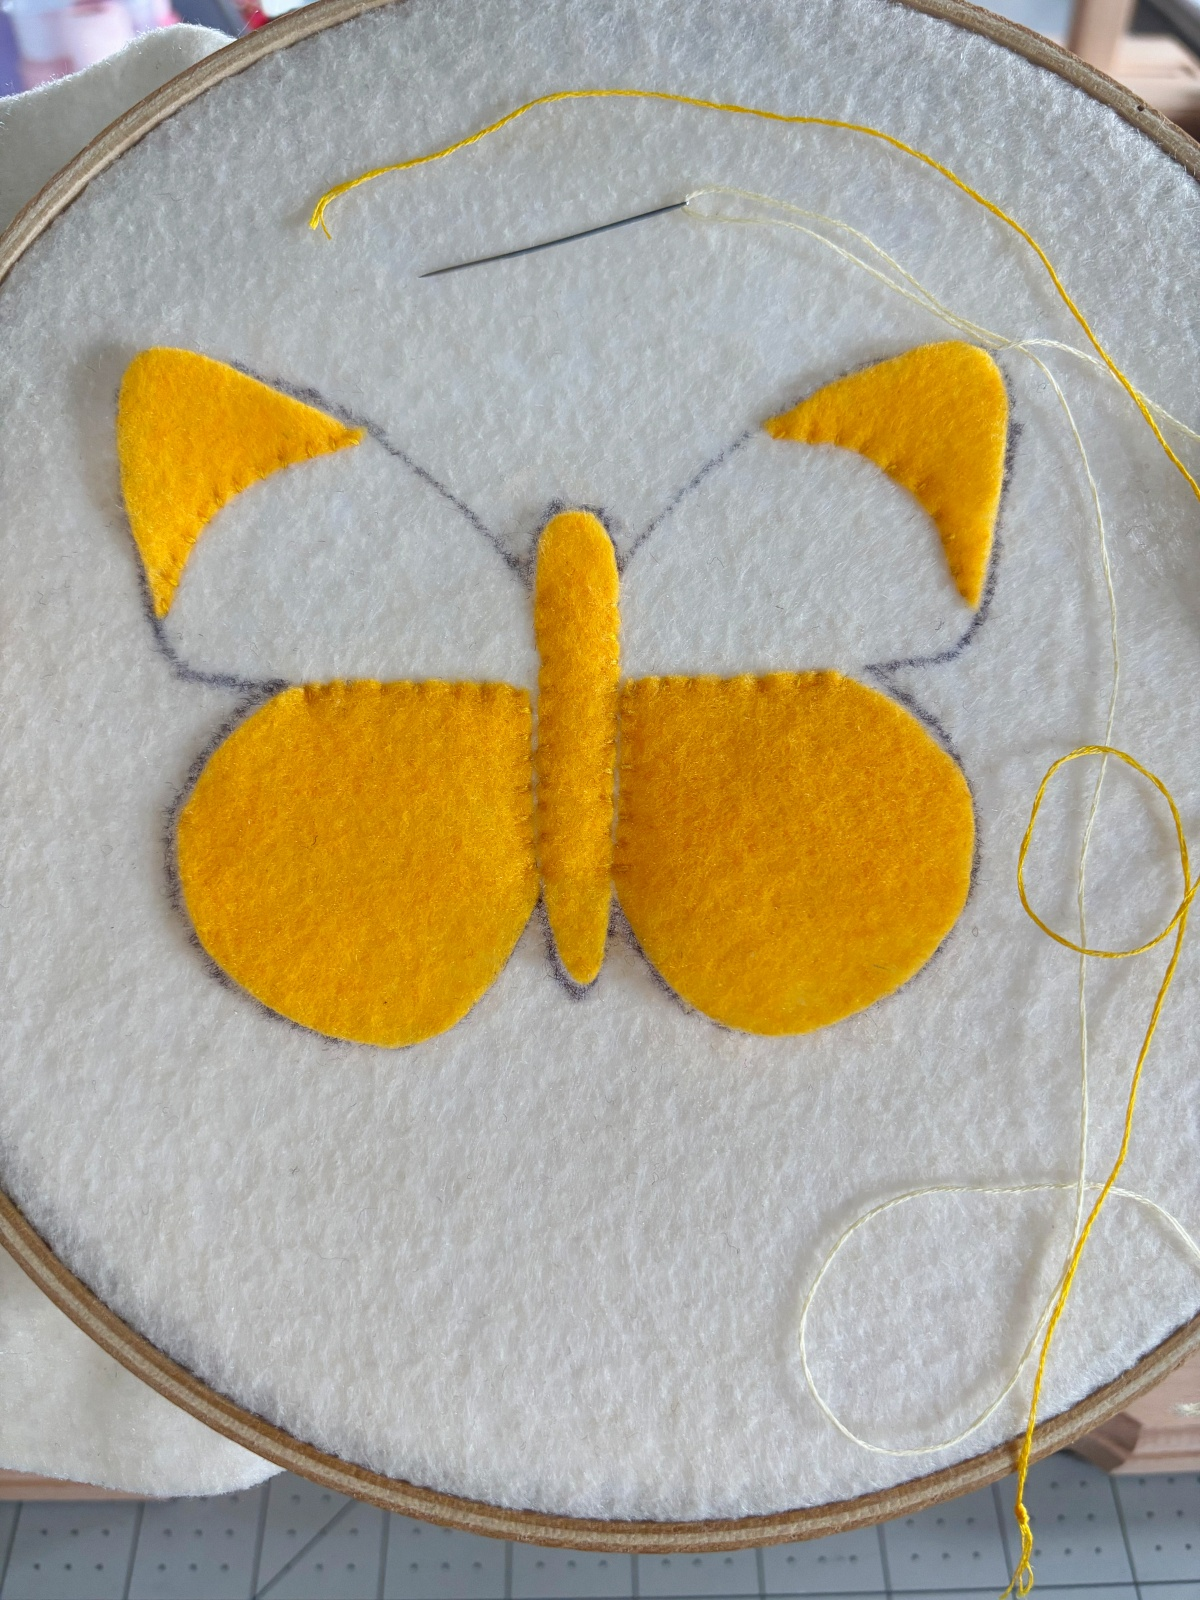
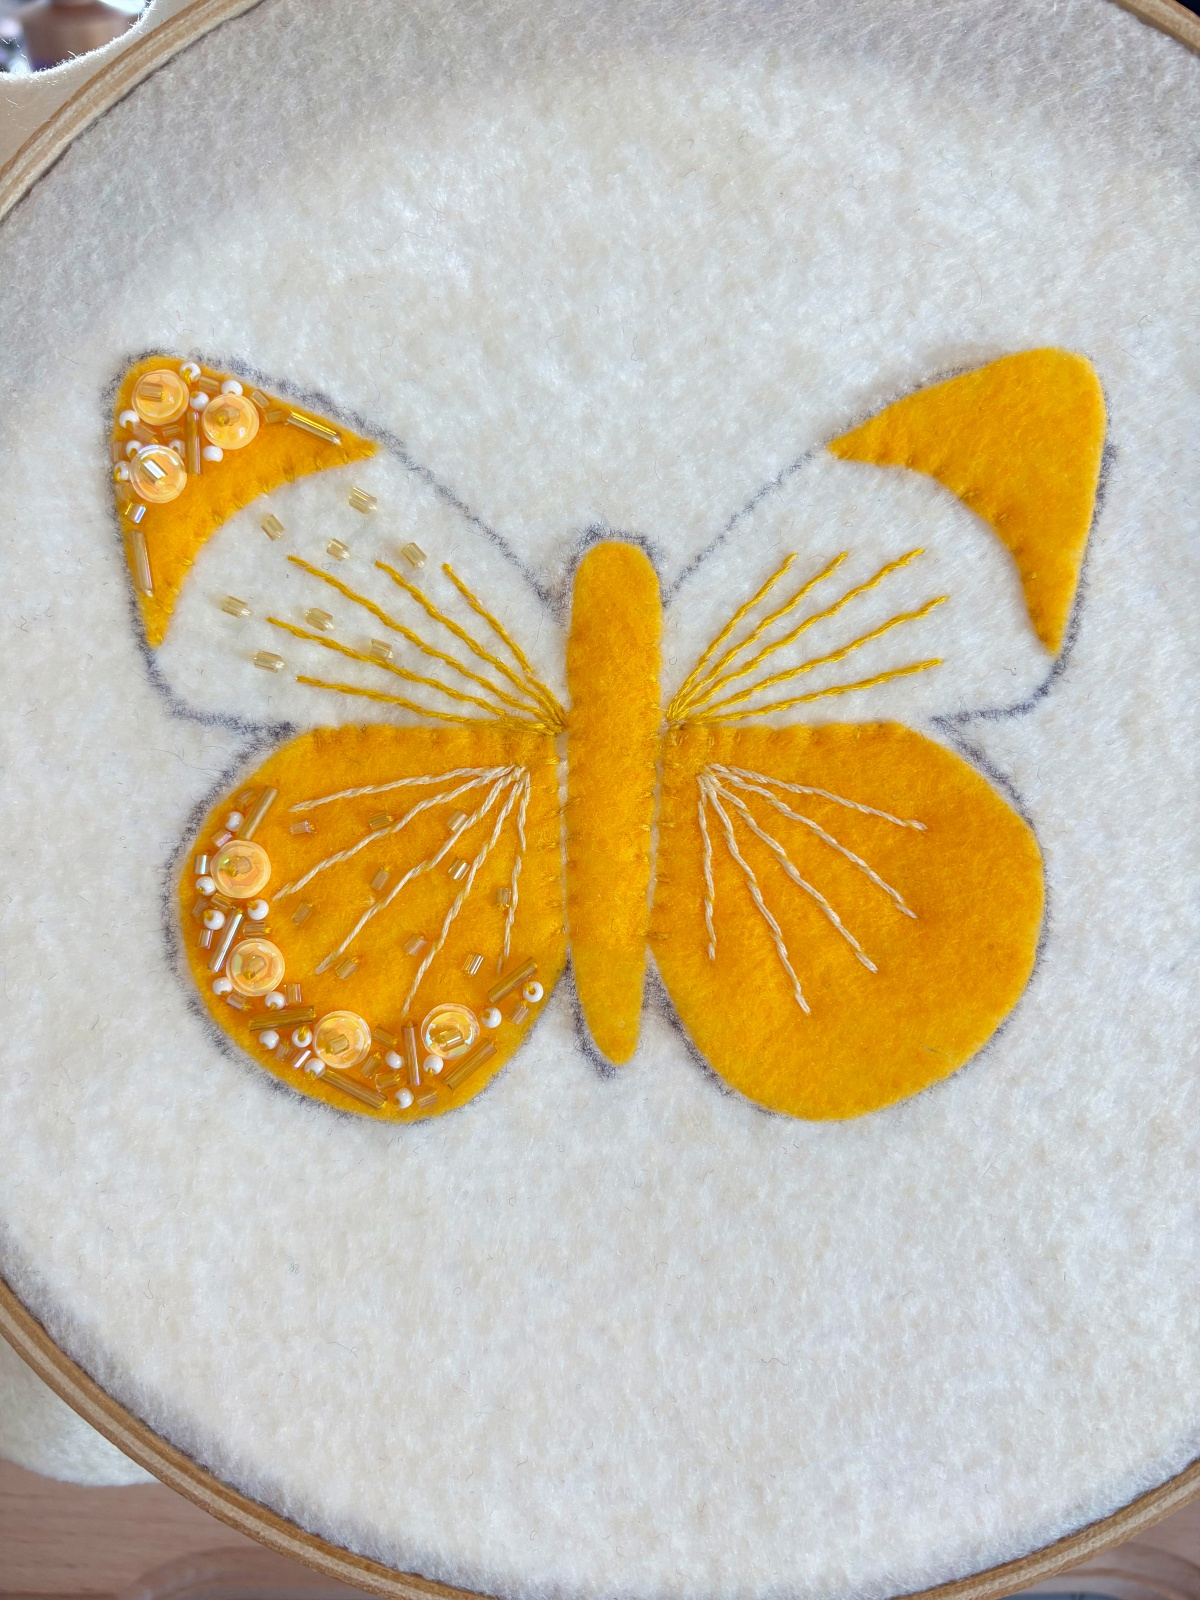
Next you will take the dark yellow pattern pieces (the top and bottom wing details and the body) and pin them onto the butterfly base using sewing pins. Sew along the inside perimeter of the wing details and body indicated by the pink dotted lines in the picture below. I like to use embroidery thread wax while sewing to keep my thread from knotting.
Step 3
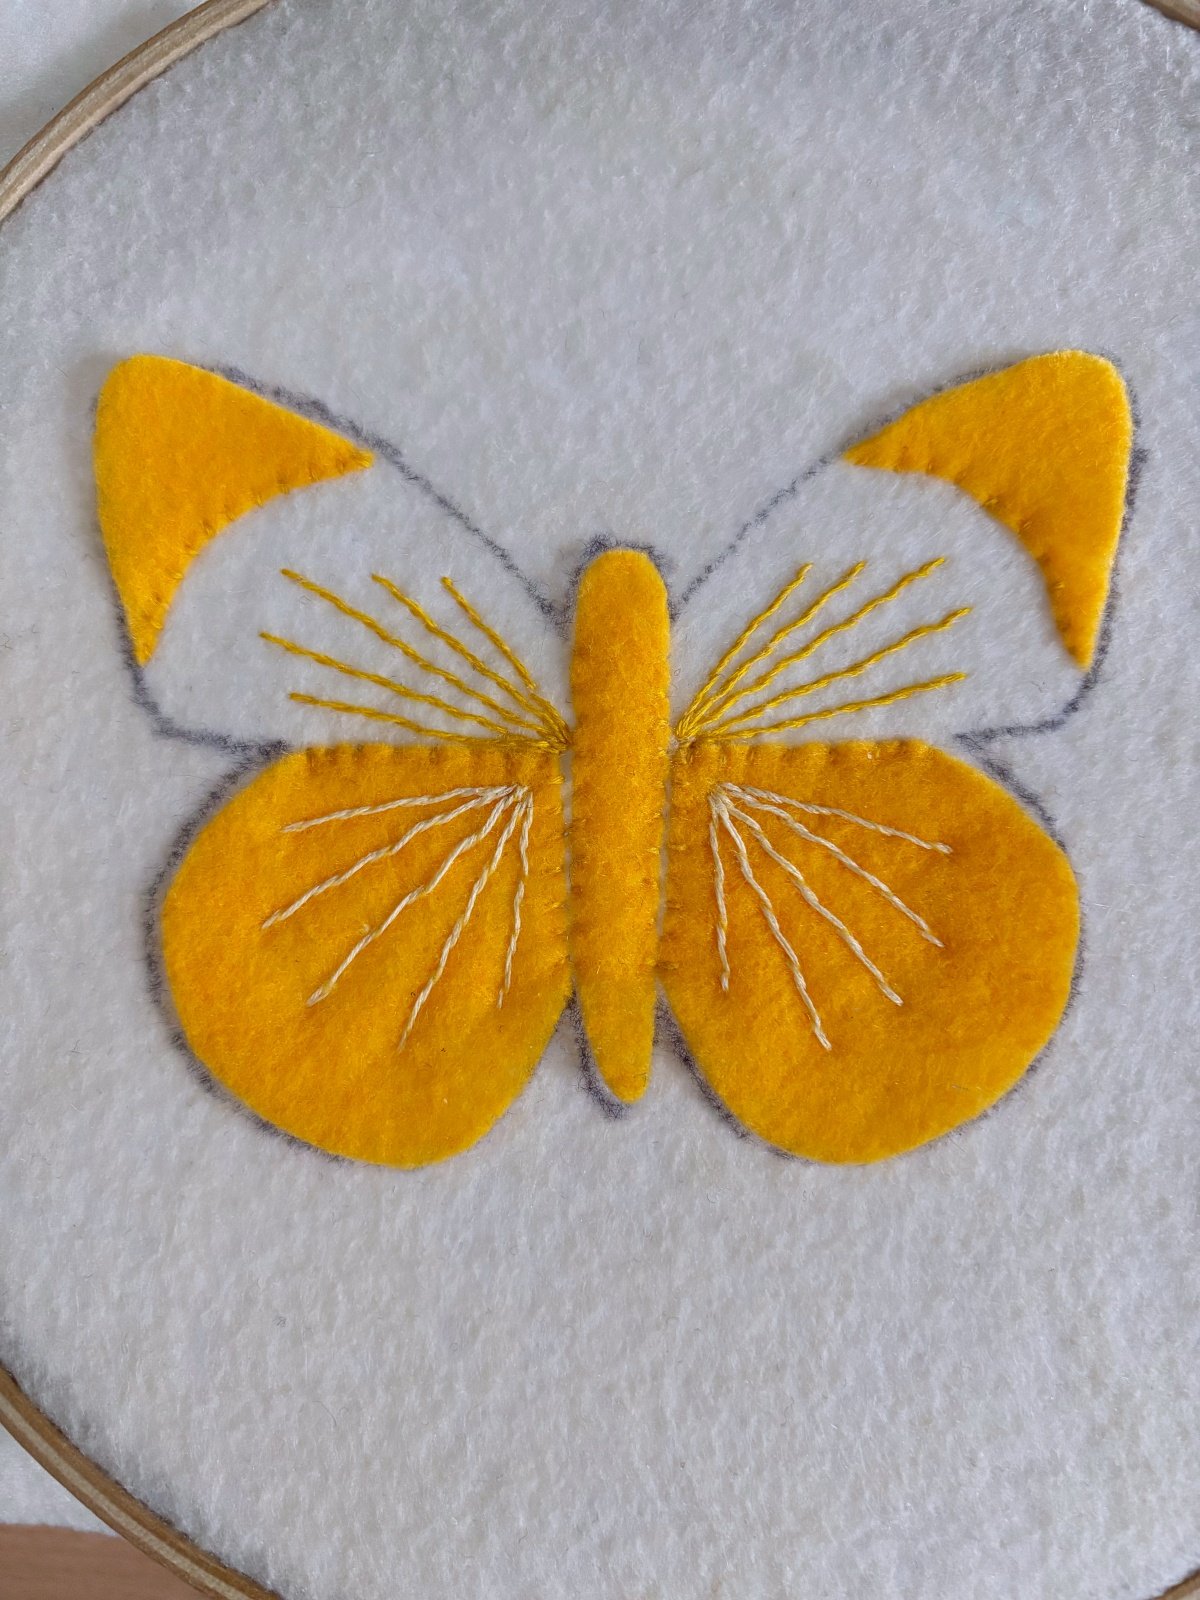
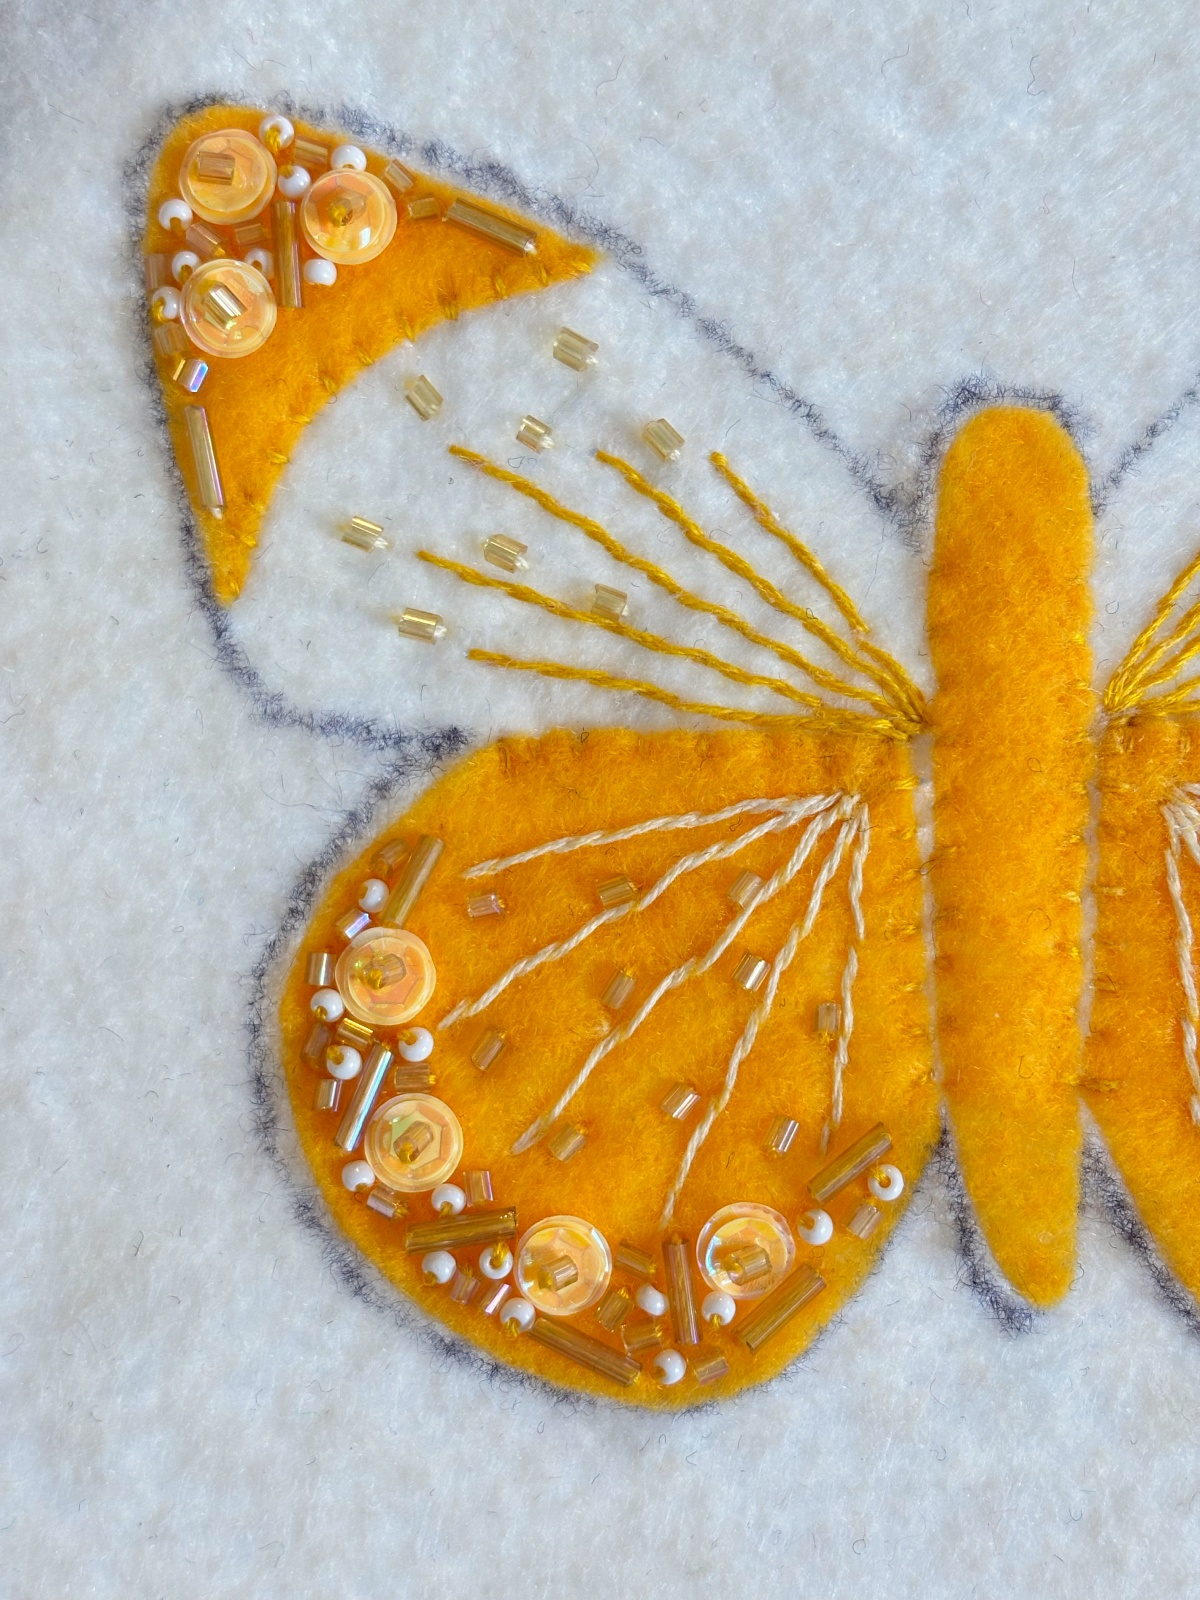
Now you can move onto the embroidery details. Following along with the guide lines in the PDF pattern, sew five lines on each wing. Use dark yellow thread on the top wings and light yellow thread on the bottom wings. I used a running stitch for the base of each line and a whipped backstitch back down to finish them off.
Step 4
After you finish the embroidery it is time for my favorite part, the bead and sequin details! I used a mix of seed beads, tube beads, and sequins to make a sort of randomized pattern along the edges of the butterfly wings. Then I took the 3mm tube beads and sprinkled them throughout the embroidered lines of each wing. I like to complete the top and bottom wings on one side of the butterfly first. That way I can use it as a guide and sort of replicate what I did on the other side. How you decide to place all the beads and sequins is entirely up to you. Just have fun and experiment until you have a look you are happy with.
Step 5
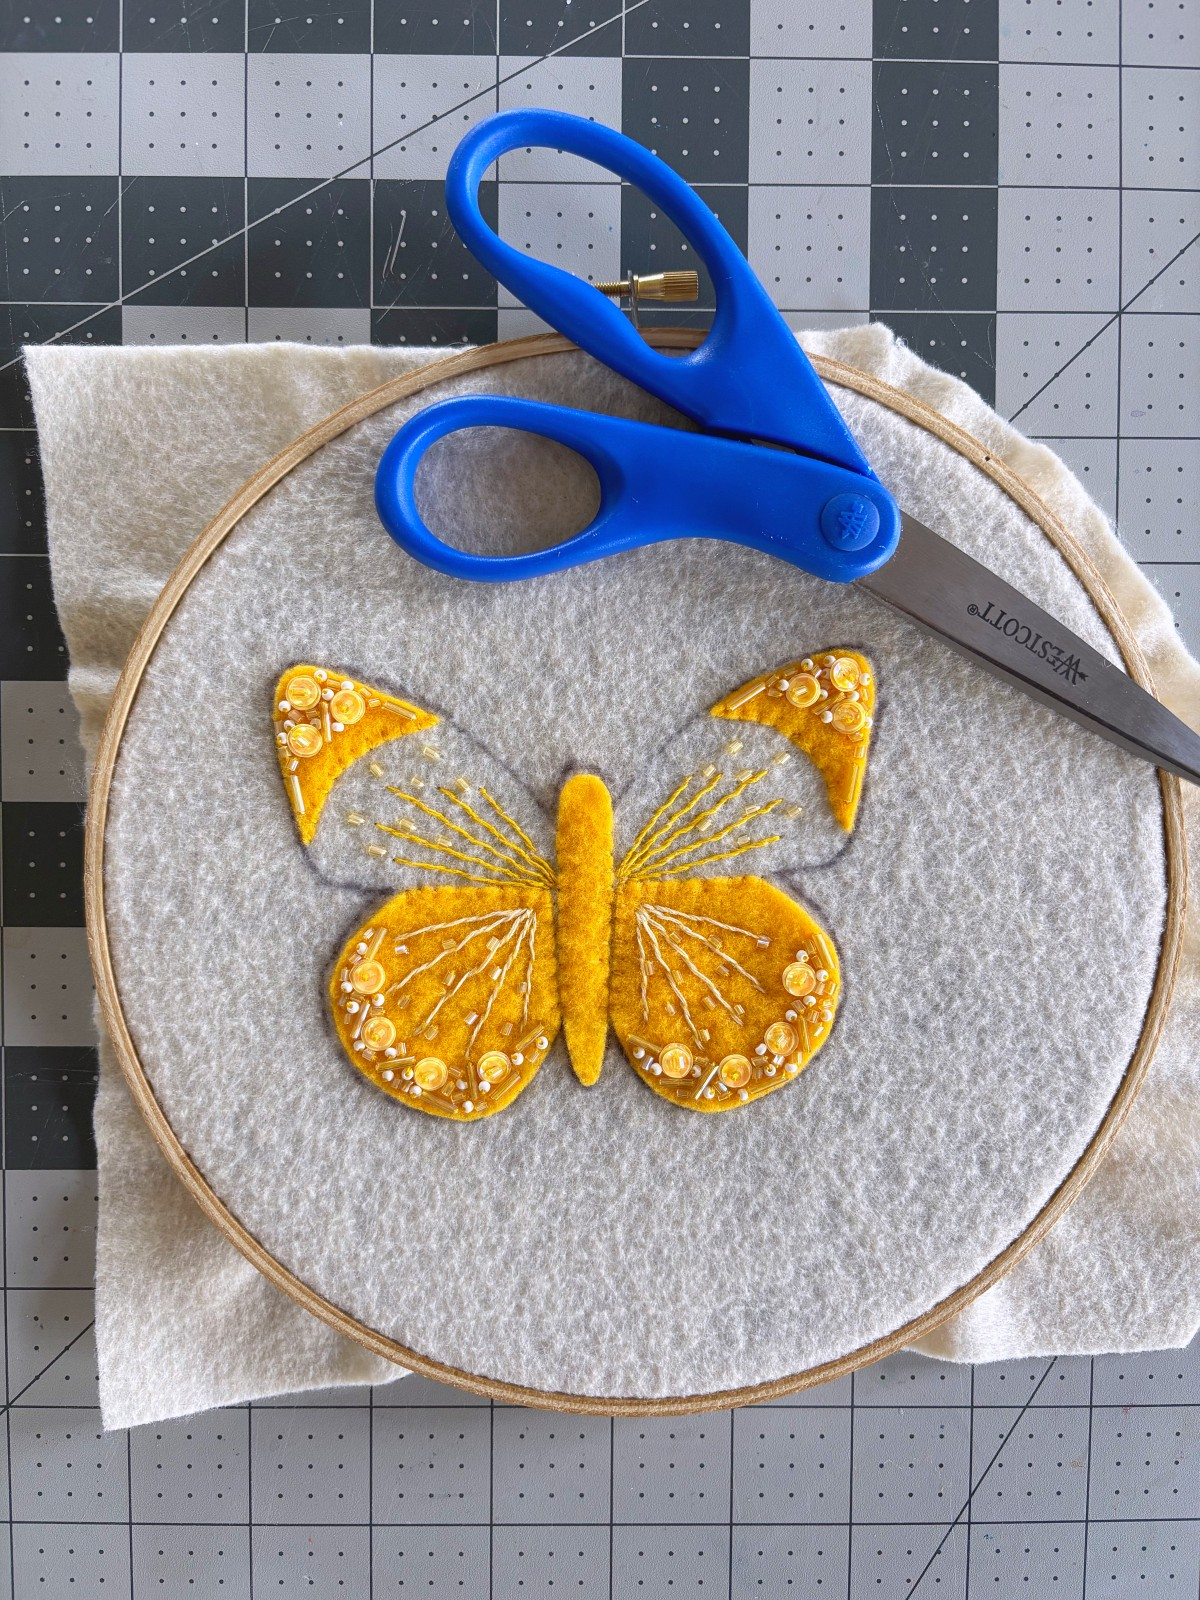
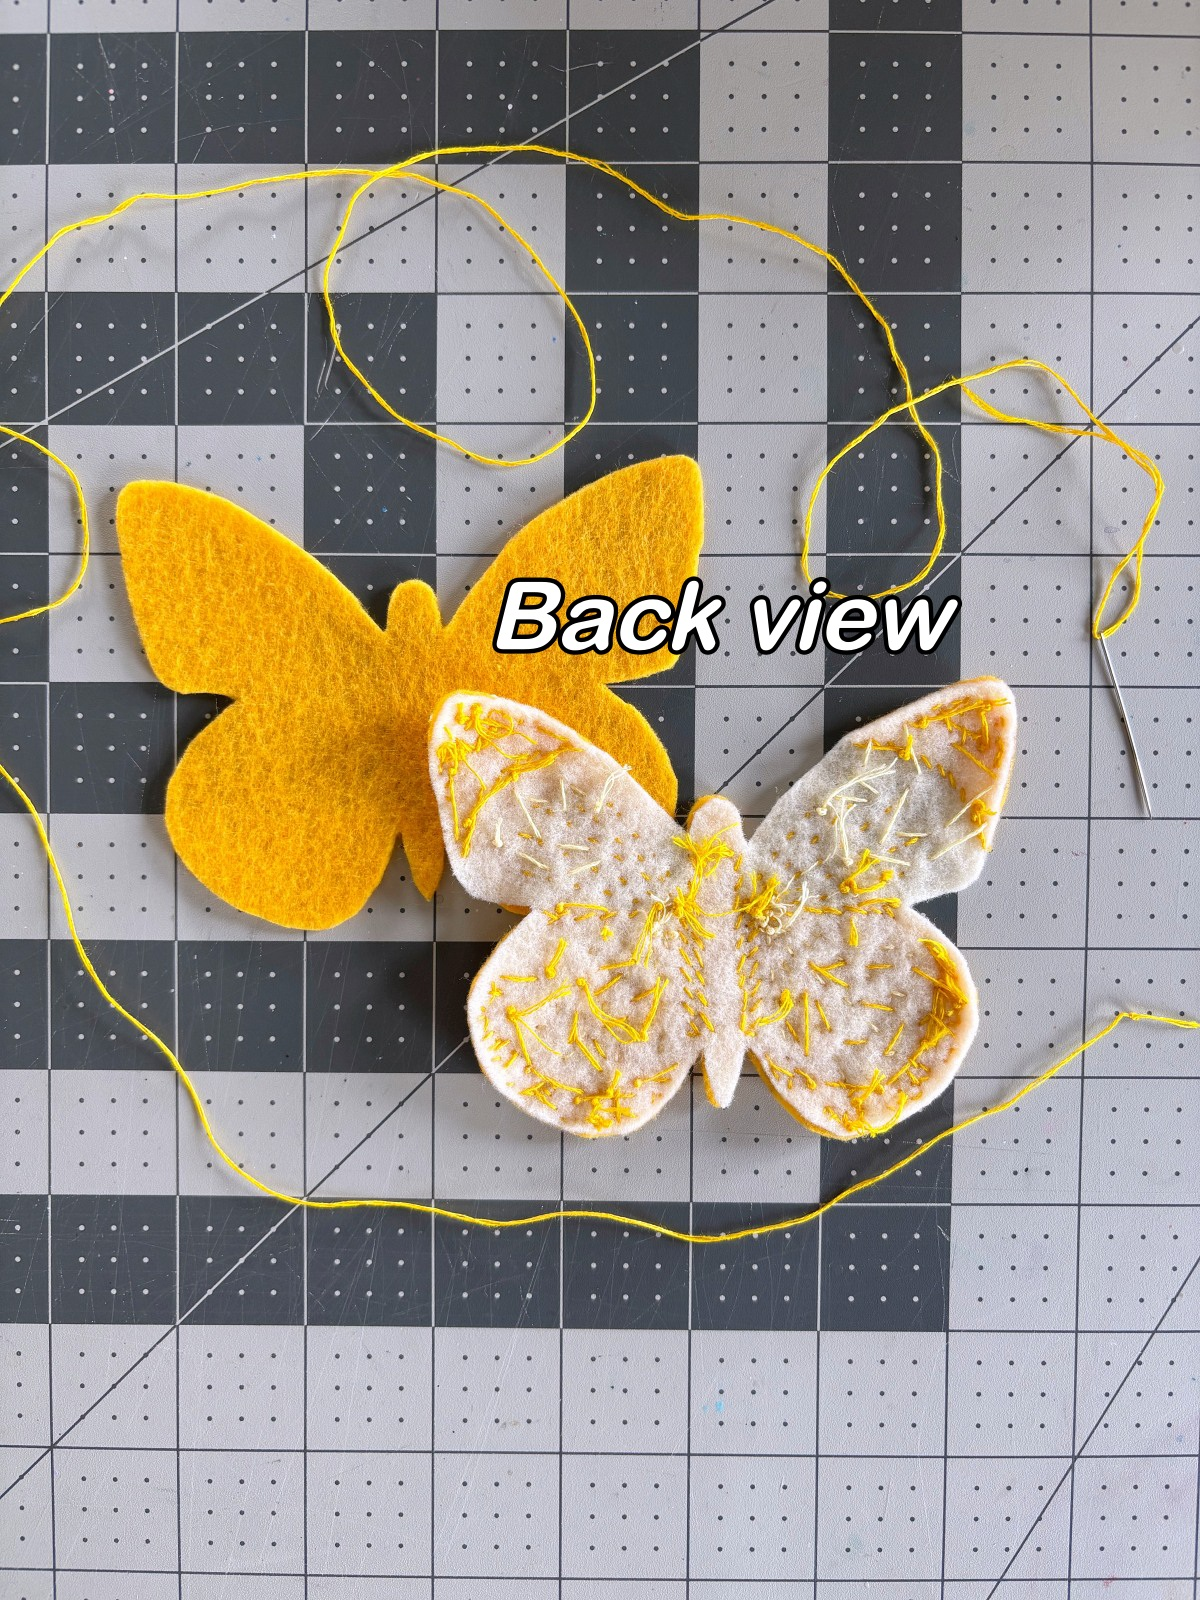
Once all the wing details are complete, and you are happy with how it looks, take it off the embroidery hoop and carefully cut it out. After it is cut out, pin both butterfly base pieces together. Sew around the entire perimeter using a blanket stitch to finish it.
Step 6
I chose to hang my yellow butterfly ornament by stringing some embroidery thread through the blanket stitch at the top of the butterfly head. Alternatively, you could hook a metal jump ring through the blanket stitch and hang it by some keychain hardware if you prefer. Now you should have a beautiful finished butterfly ornament!
I hope you enjoyed this project and it inspires you to get crafty with felt. Use our free PDF pattern to create your very own yellow butterfly ornament. We would love to see your felt creations! Tag us on instagram @mirrortwins.studio and we will add it to our story.