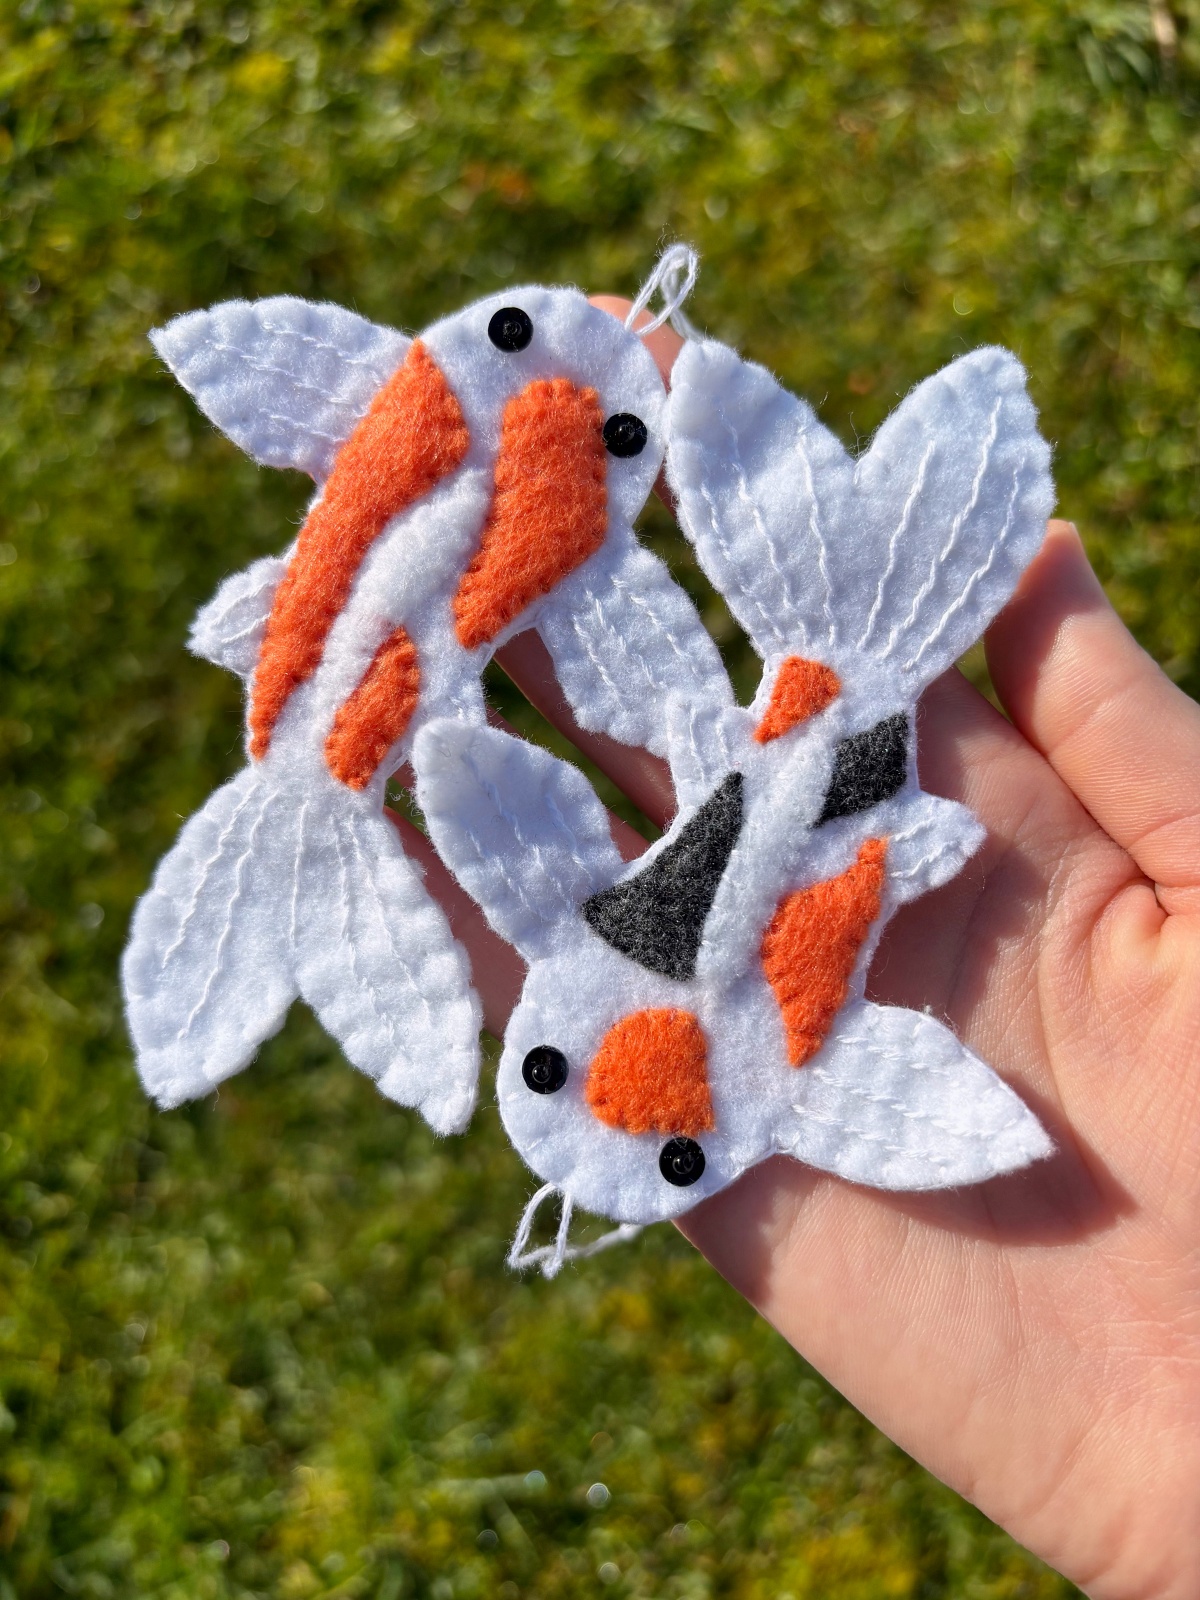
Koi Fish Ornament. Hand-sewn DIY sewing project.
Follow along with our simple step by step tutorial to create these adorable koi fish ornaments. This hand-sewn DIY felt ornament is relatively quick and could be completed in one day depending on your level of sewing experience. They would work well as wall decor, a keychain, bag accessory, or ornaments.
I have always loved how koi fish look in nature and art throughout history. They have such lovely movement and pretty patterns. Today we will share our process of creating this beautiful hand-sewn Koi Fish ornament and all the materials you would need to make one yourself. Any of the colors can be changed or modified to match your own personal preference. A Pink and black koi fish or even a rainbow one, why not! The options are endless. We hope you enjoy this project and get inspired to make your own. We have provided a Free PDF printable pattern at the bottom of the page for you to download.
*This post contains affiliate links meaning I get a commission if you purchase through my links, at no extra cost to you.

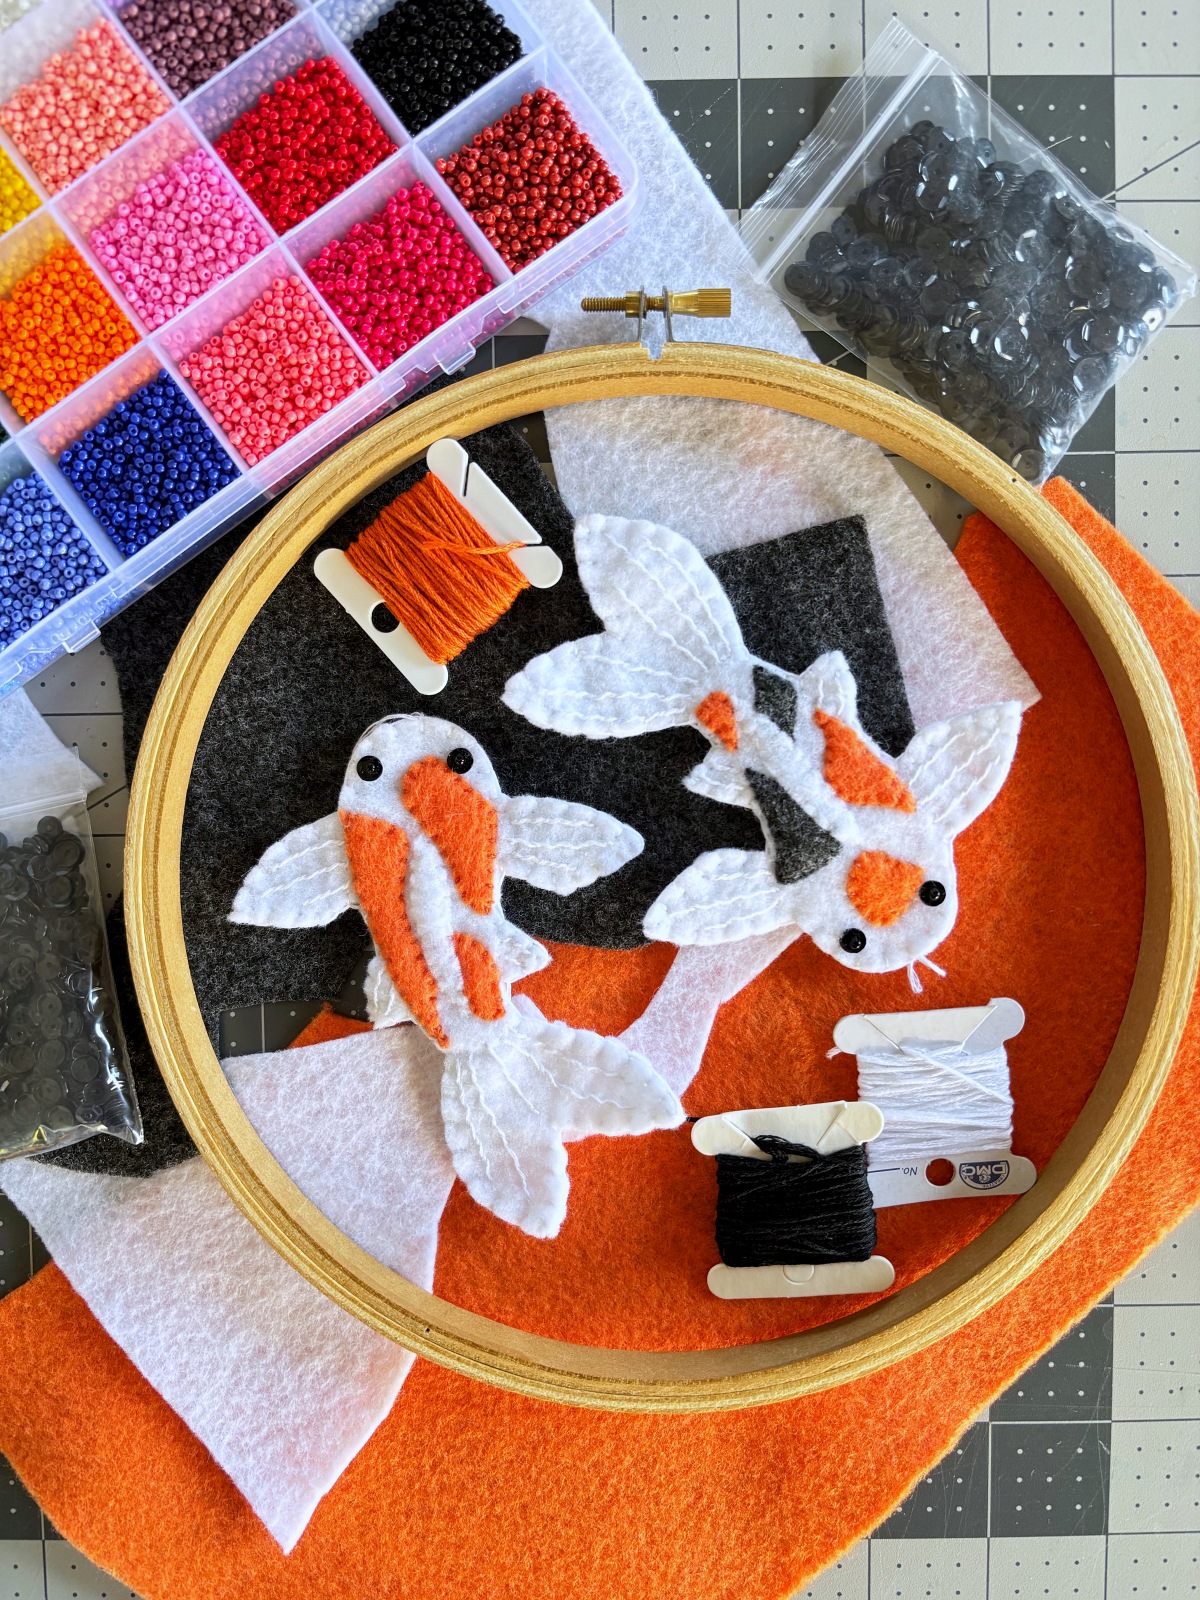
Materials
- Scissors
- Sewing pins
- Sewing needles
- 8 inch embroidery hoop
- Embroidery hoop holder (optional)
- Embroidery thread (white, orange, and black)
- Embroidery thread wax (optional)
- 4mm sequins (black)
- Seed beads (black)
- White felt (1-2 sheets)
- Orange felt (You only need a little bit)
- Black felt (You only need a little bit)
Koi Fish Ornament Instructions
Step 1
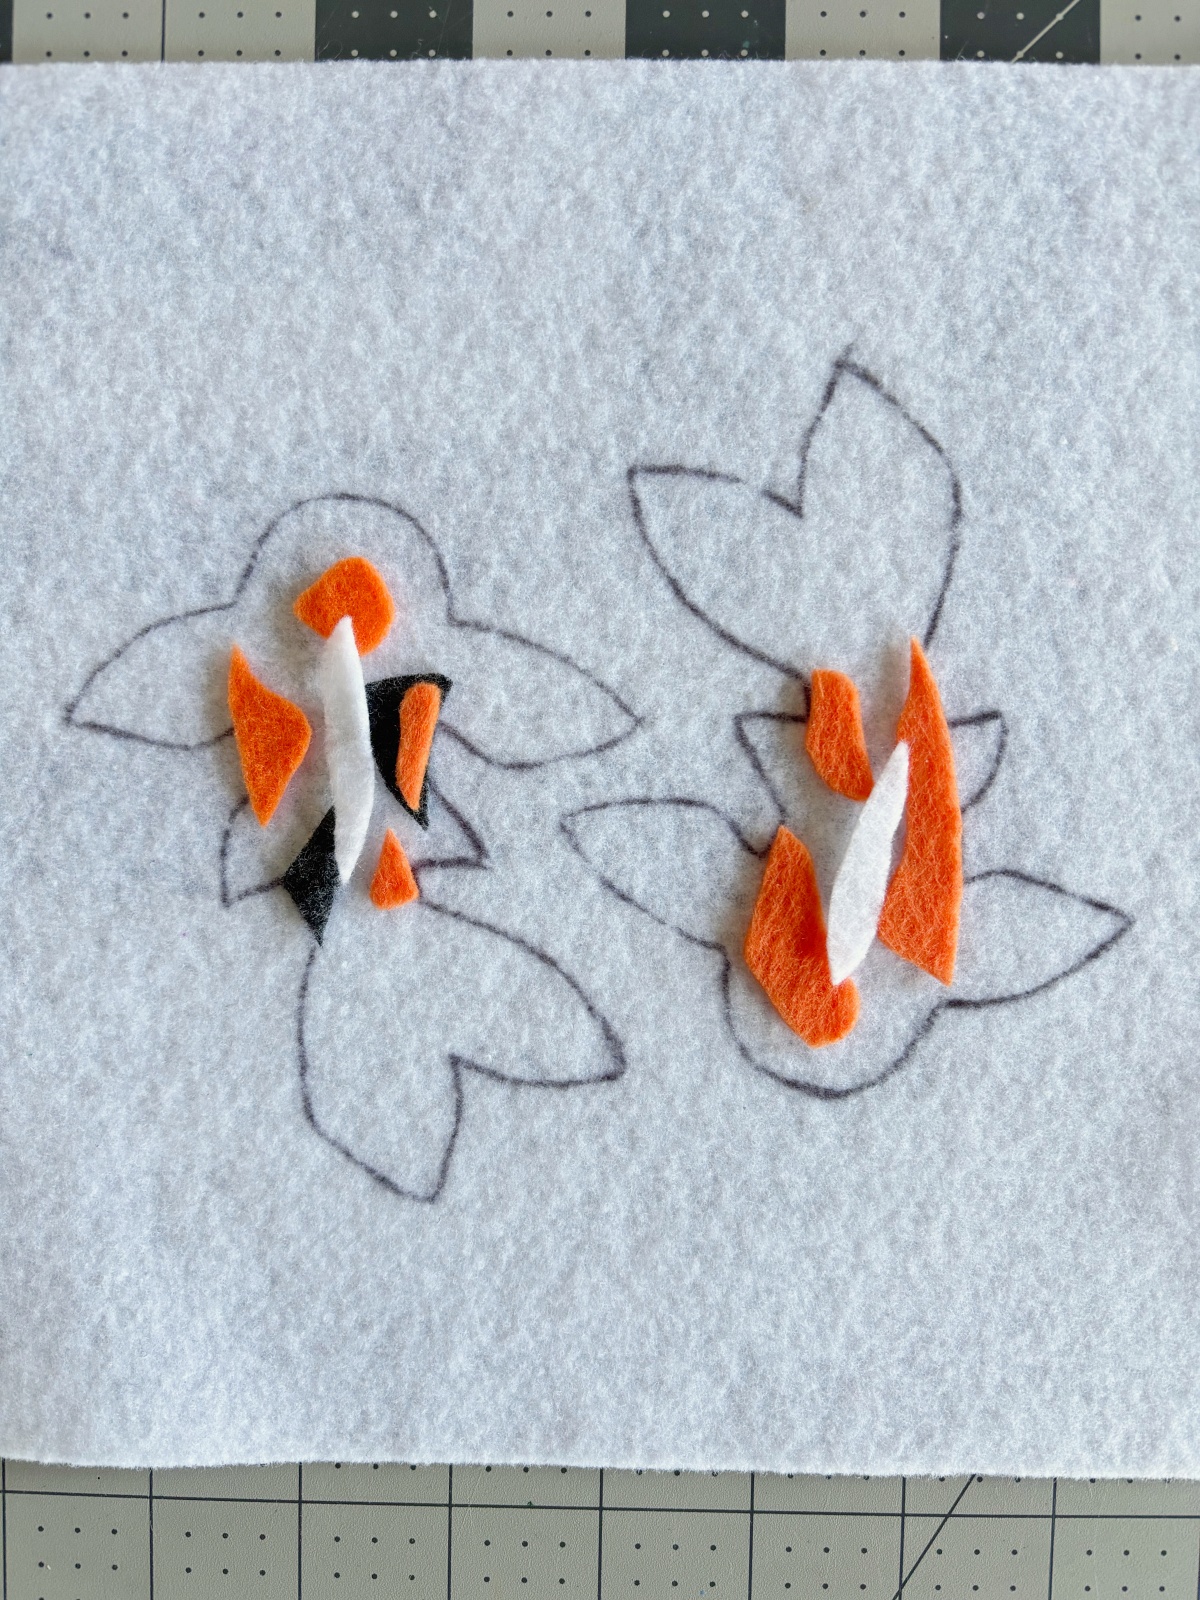
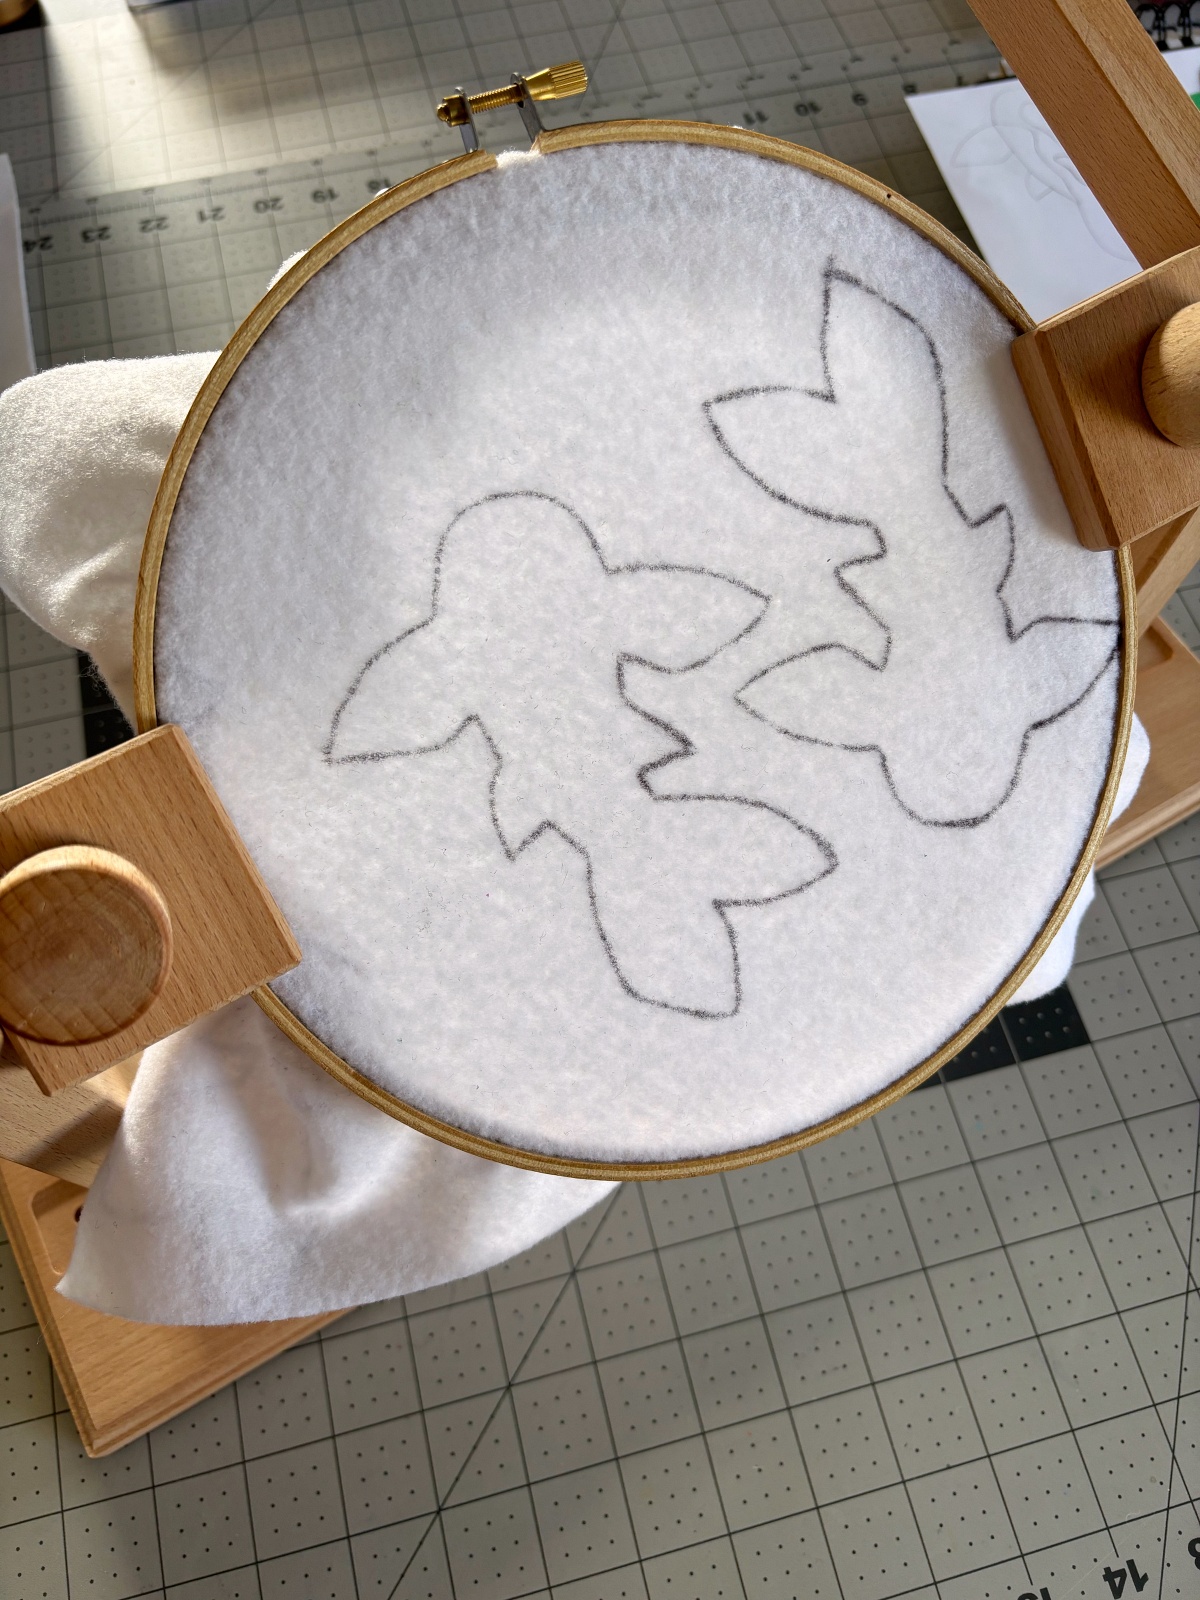
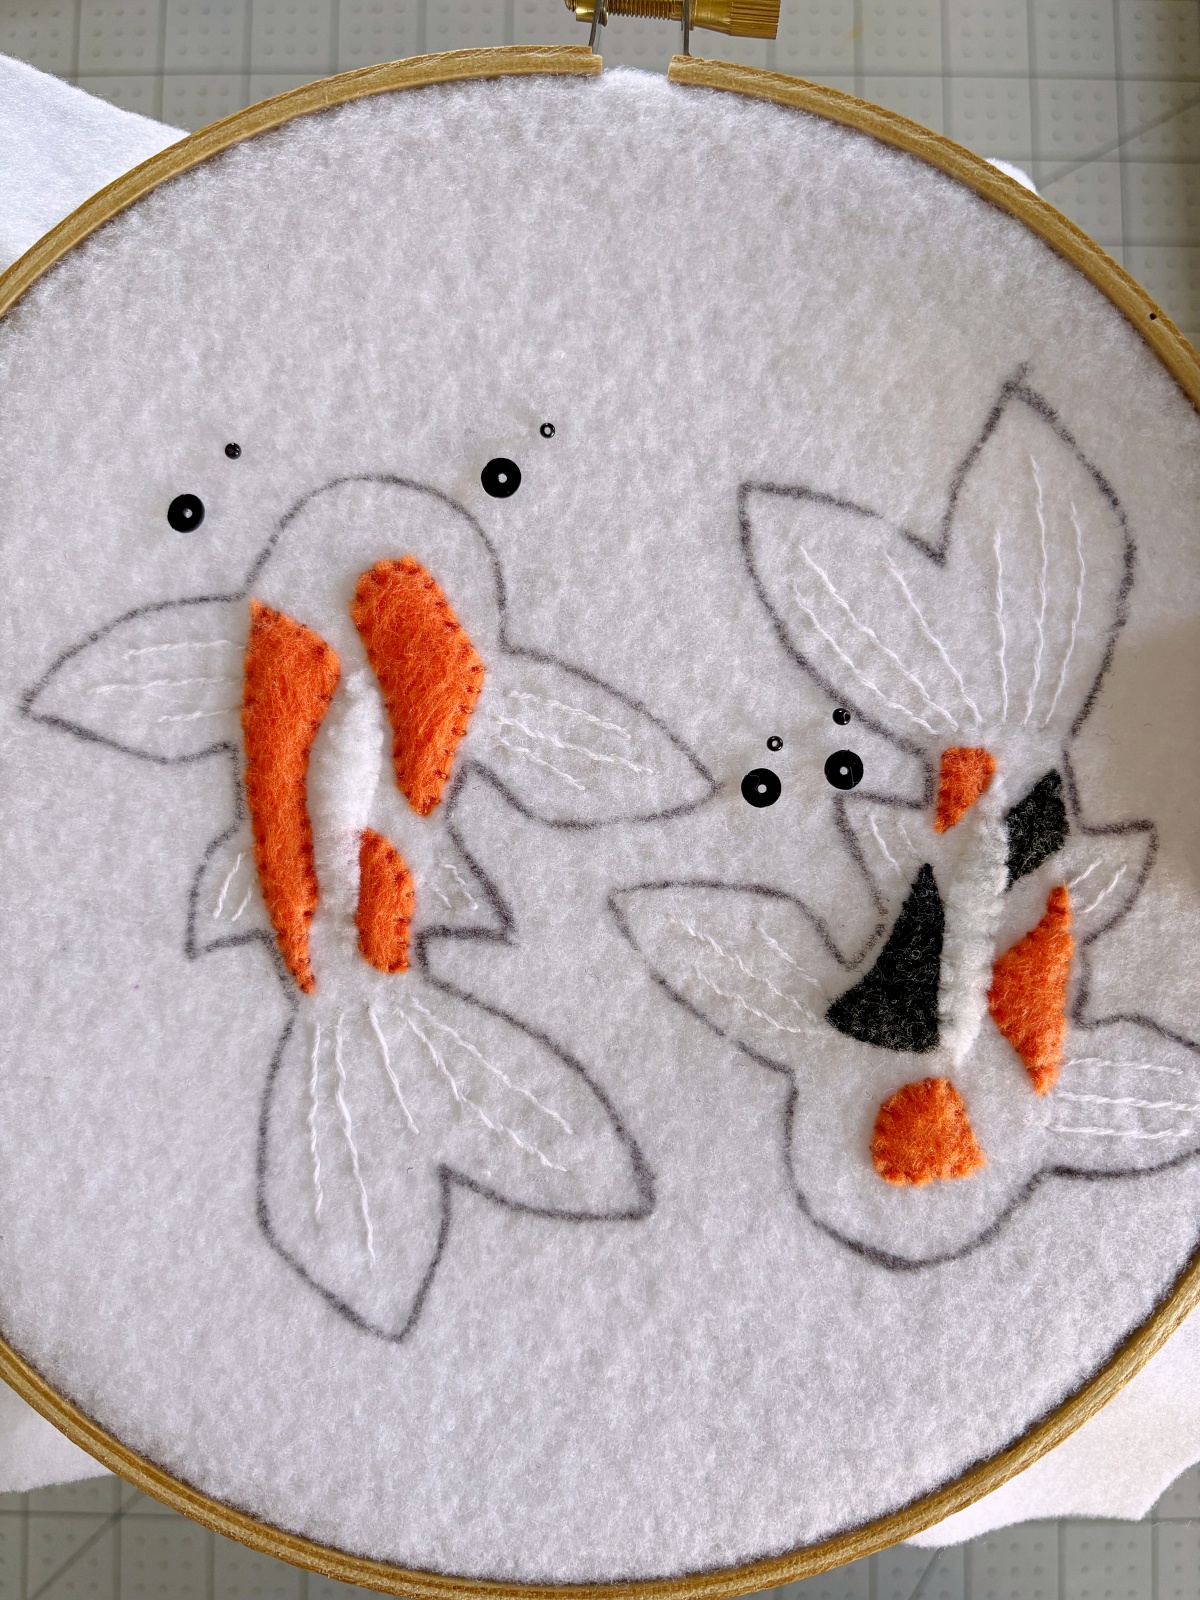
Outline each pattern piece onto your felt sheets using a pen. Then carefully cut out each piece except for 2 koi fish bases on the white felt. You will leave these uncut so that you can put it in the embroidery hoop and sew on your fish details. I use an embroidery hoop holder so that my hands don’t get cramped while sewing. This is completely optional and you can still do the project without an embroidery hoop holder.
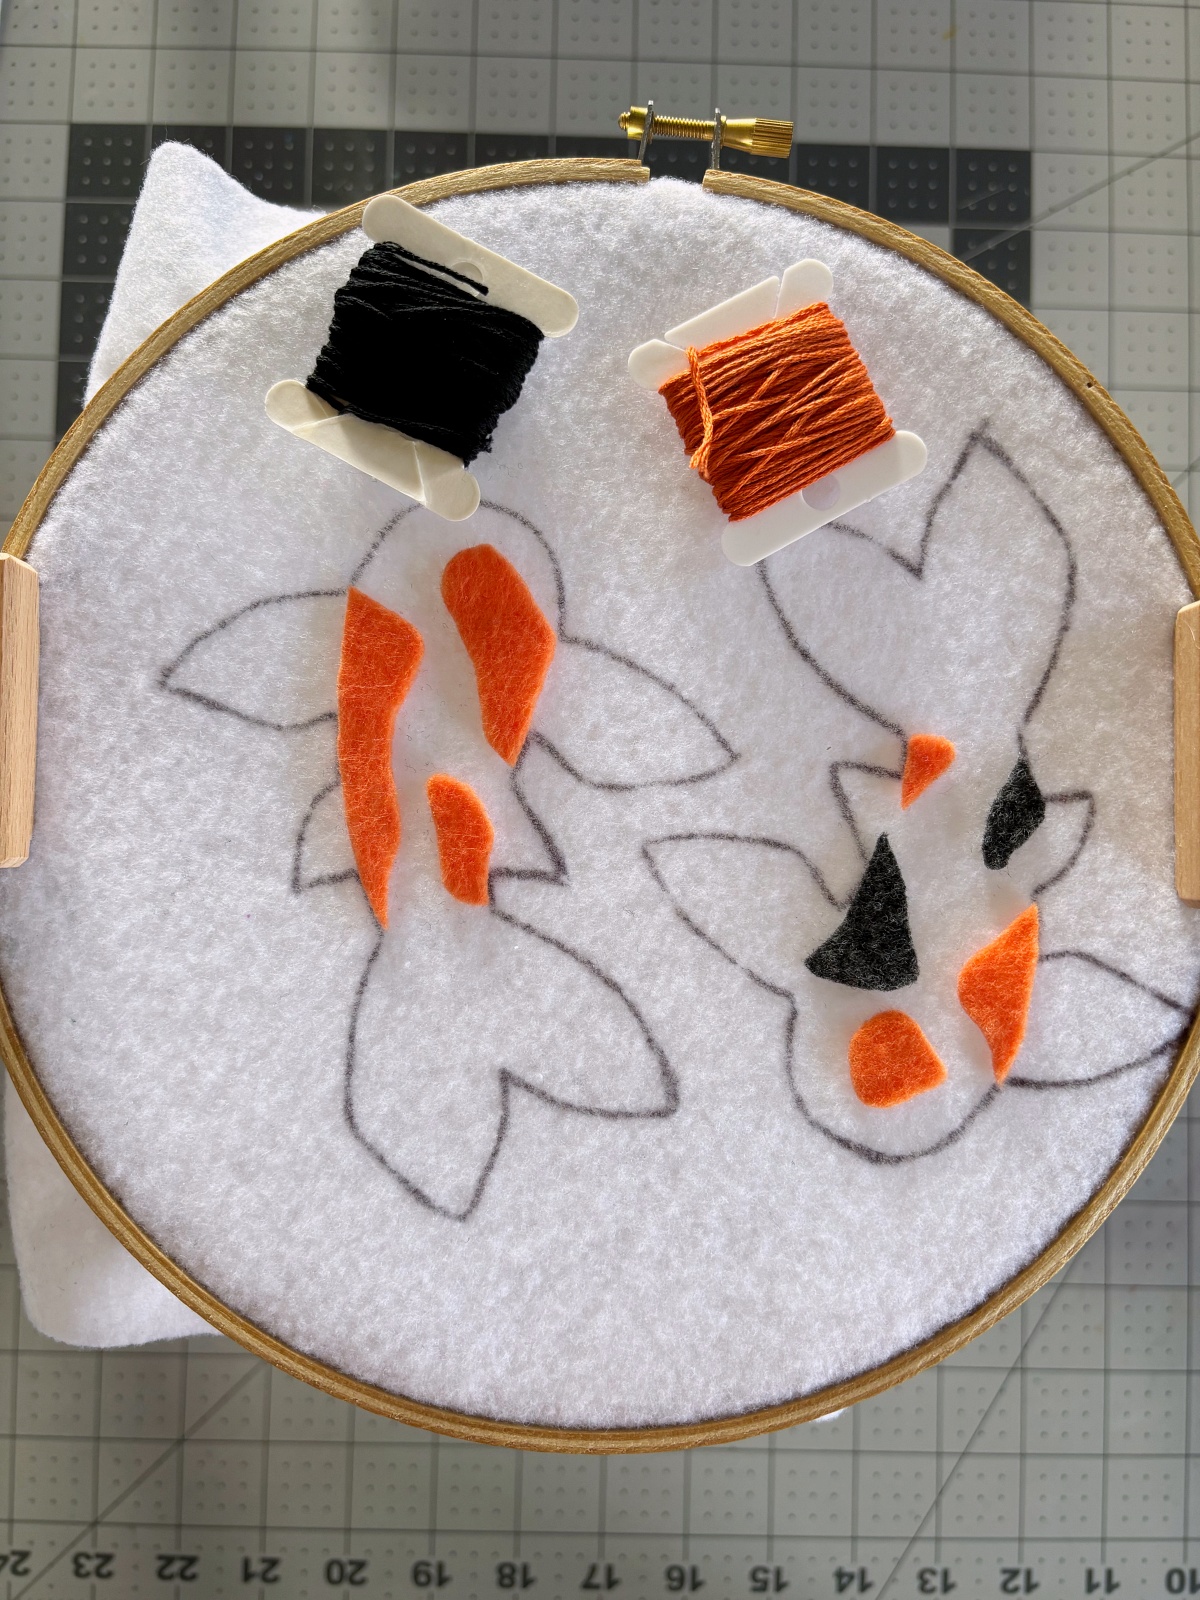
Note: Everything I sew during this project uses three strands thick of embroidery thread.
Step 2
Position your koi fish pattern pieces (pattern option 1 and 2) on each base using the PDF as a guide. Pin in place using sewing pins and sew around the entire edge of each pattern piece using either orange embroidery thread or black. I used a whip stitch to attach each piece.
Step 3
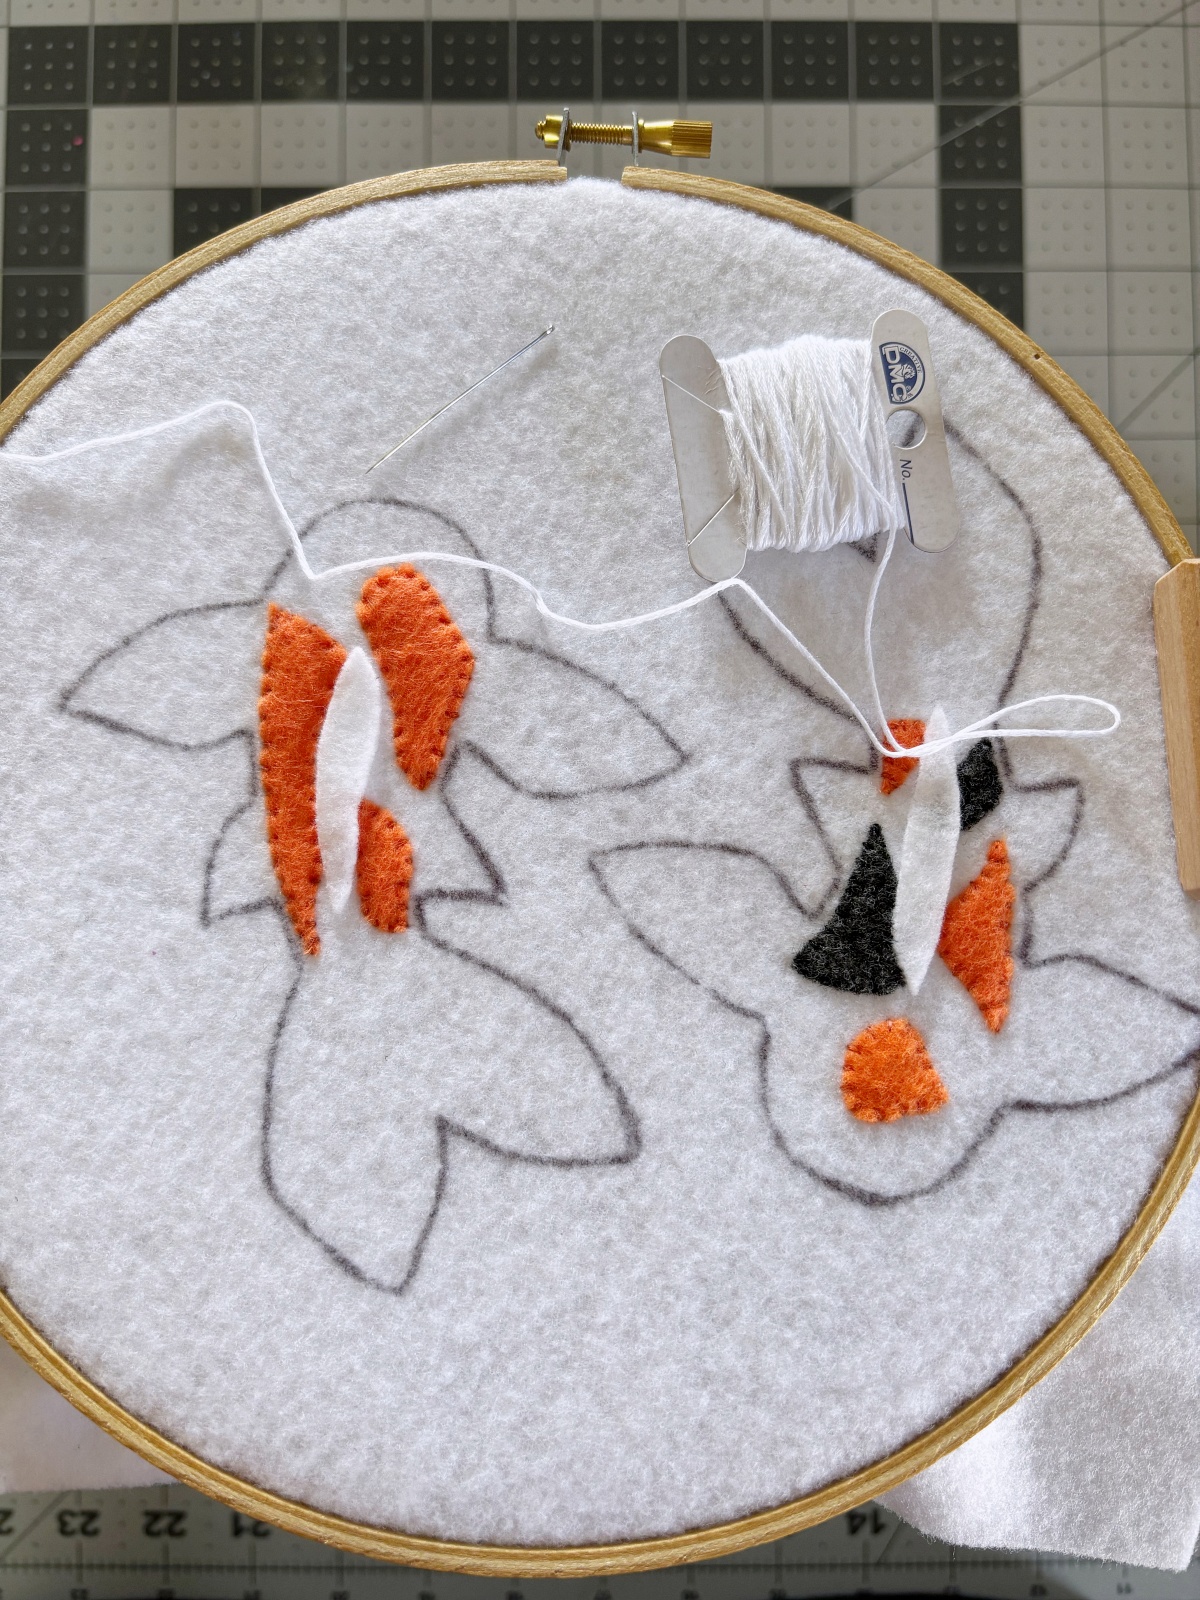
Next, take your white embroidery thread and sew on the top fin using a whip stitch all the way around. After that, while you still have the white embroidery thread handy, sew on the fin embroidery details indicated in red on the PDF pattern. I used a running stitch for the base of the fin lines and a whipped backstitch to finish them off.
Step 4
After the koi fish pattern and fin details are complete, you can add the eyes. I did this by taking one black 4mm sequin and one black seed bead for each eye. I went up through the back using black embroidery thread, put the sewing needle through the sequin and seed bead. Then I went back down through the sequin again into the same spot on the felt that I started. Repeat this for each eye. If you want to have a different look, you could always embroider an eye using only the black embroidery thread, but I like the 3D look of the sequins.
Step 5
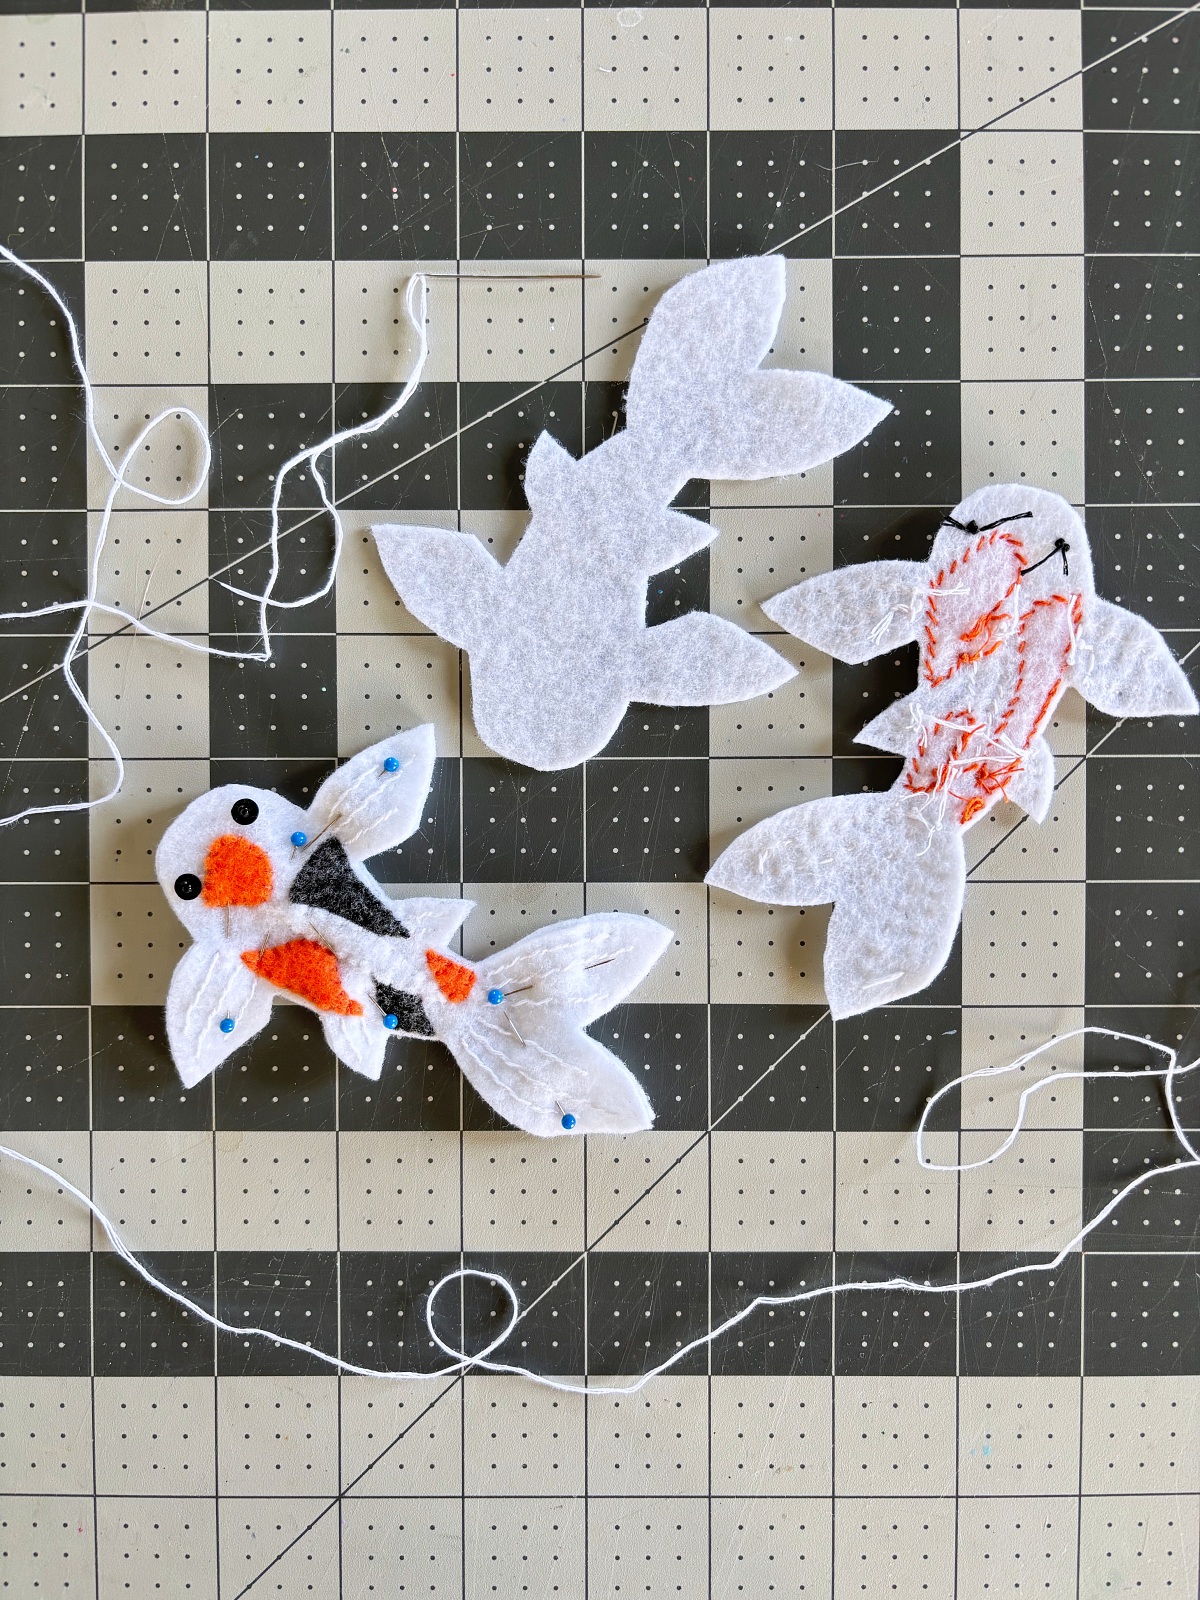
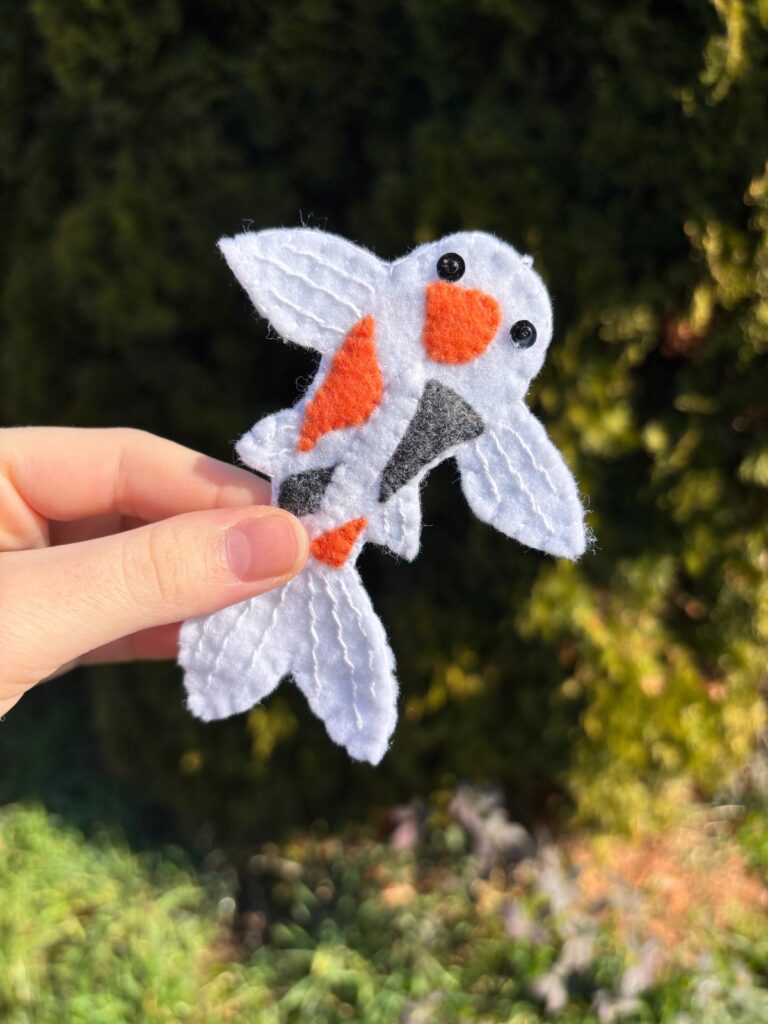
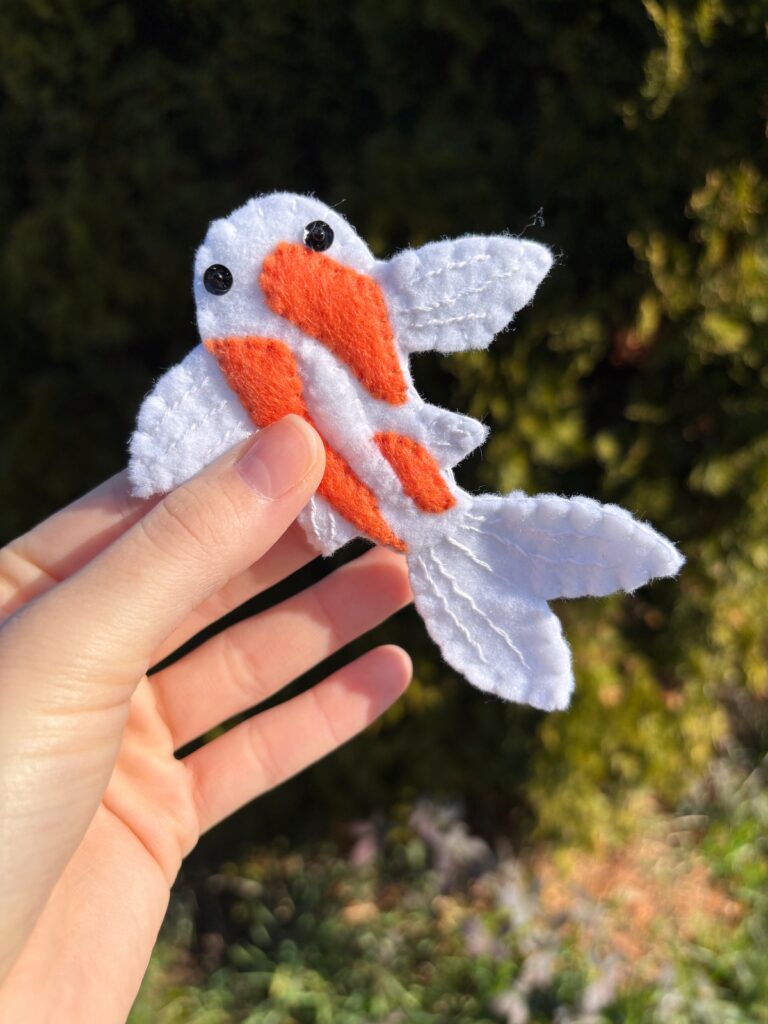
Once you are done with all the koi fish details, take them out of the embroidery hoop and carefully cut them out. Then take each fish and pin them together with their plane white base. This will hide all the embroidery lines in the middle and make the back look nice and clean. Sew around the entire edge using a blanket stitch.
Step 6
You are now done! You should have a couple beautiful koi fish ornaments. I decided to hang mine using some embroidery thread looped through the blanket stitch at the top of the head but you could also use ribbon or keychain hardware.
I hope you enjoyed this craft and are inspired to make your own. They would make a lovely ornament, keychain, bag accessory, or wall decor. If you decide to make one we would love to see how it turns out, tag us on instagram @mirrortwins.studio and we will add it to our story.