Whimsical Hydrangea Flower Crown DIY. Simple Sewing Project
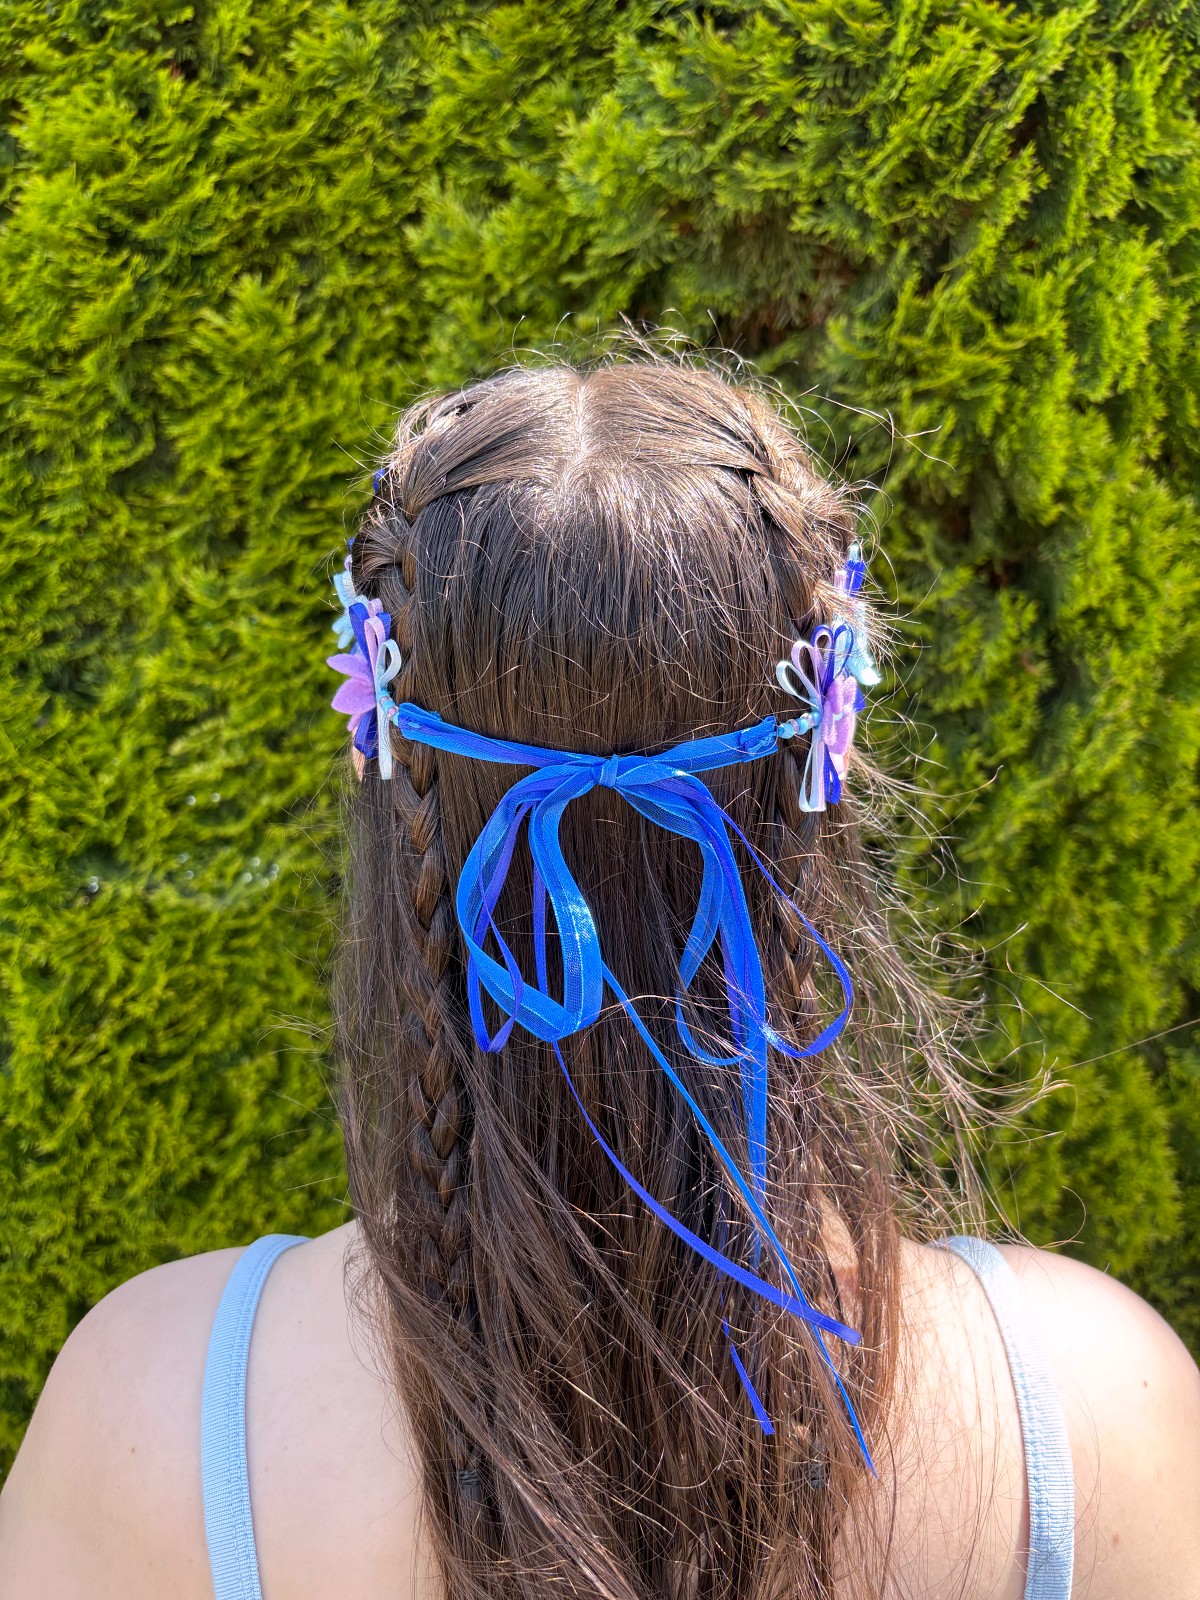
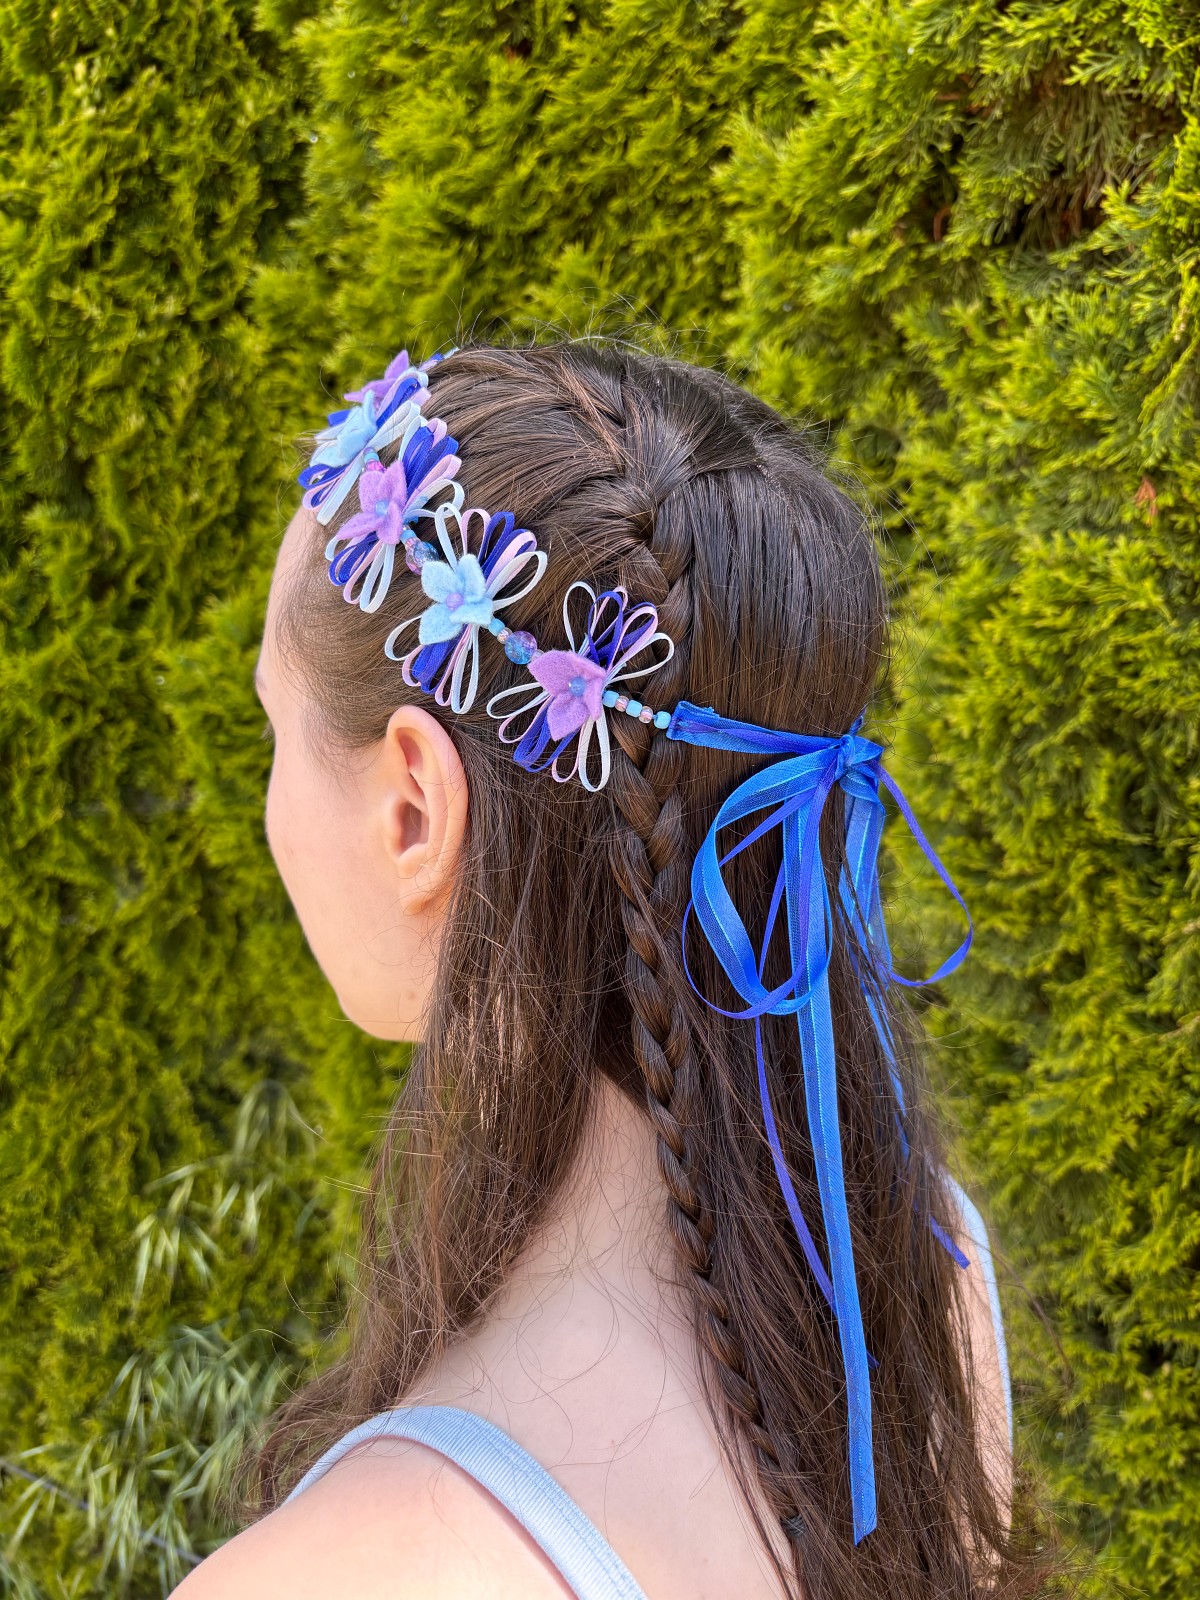
Easy step by step sewing tutorial. This DIY handmade whimsical hydrangea flower crown sparkles in the sun with beautiful beaded details and adorable hand-sewn felt flowers. A perfect addition to any outfit for your favorite summer events. Fairs, concerts, festivals and more. Happy Crafting.
Summer is here and so are the fairs, concerts, and festivals. With the country fair and our local Scandinavian festival coming up, my sister and I thought it would be the perfect time to make a whimsical hydrangea flower crown to wear to our summer events. With a few simple crafting supplies, you can make this awesome flower crown for yourself and friends. I can just picture it, everyone walking around their local fairs looking like fairy queens. I personally love the color purple so I based this design on the purple and blue hues of hydrangea flowers. Feel free to use any of your favorite colors when making this crown. Let’s get crafting! Follow along with our easy to follow step by step instructions below.
*This post contains affiliate links meaning I get a commission if you purchase through my links, at no extra cost to you.
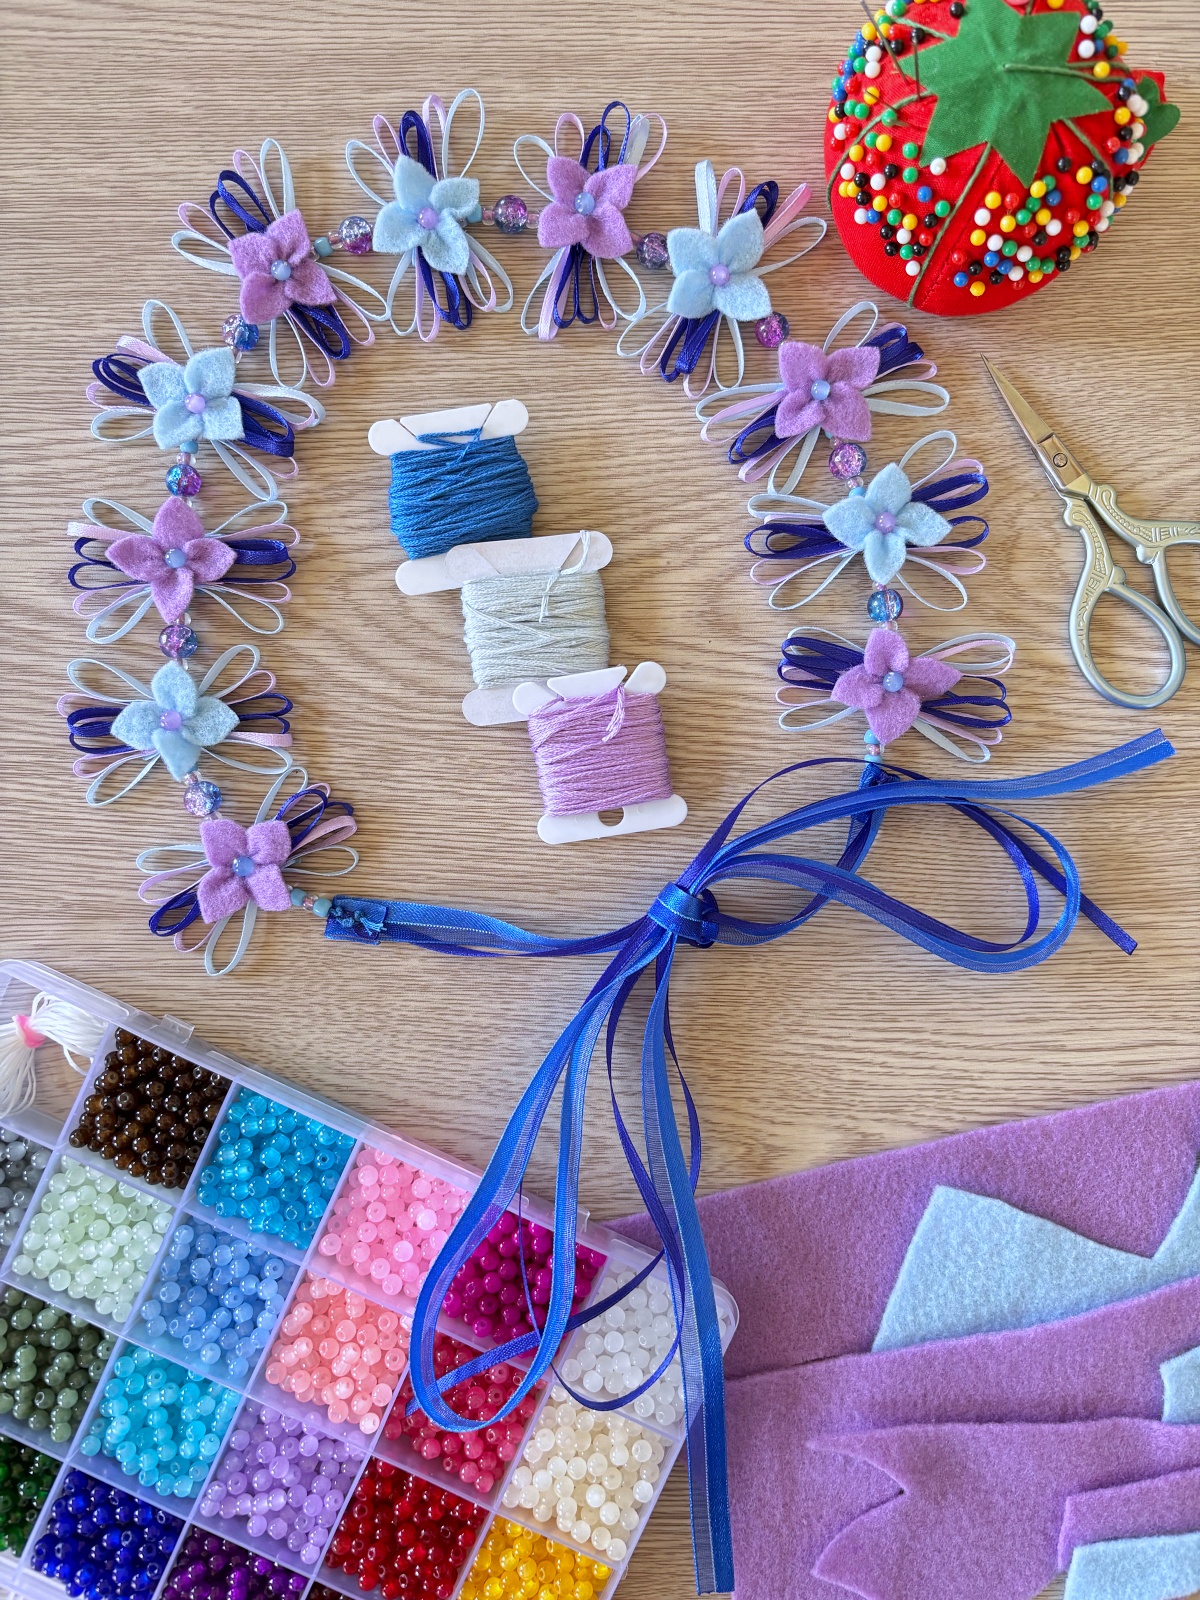
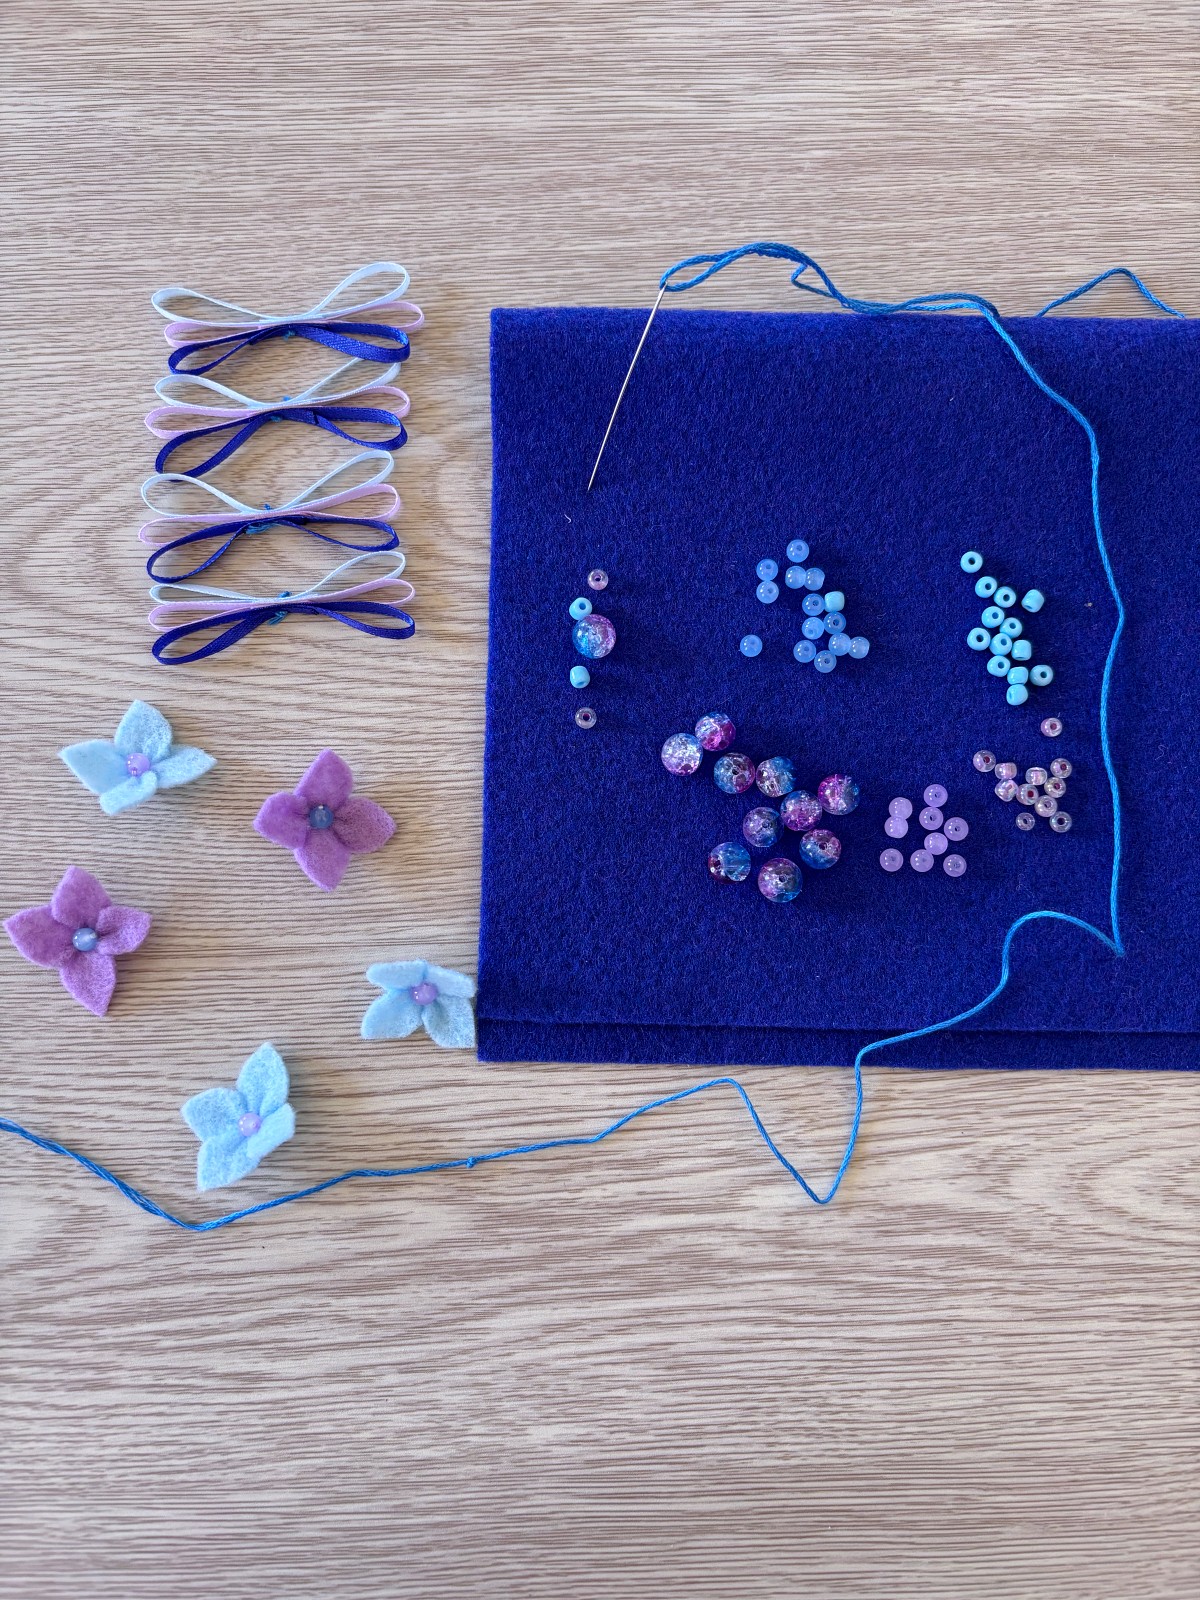
Materials
- Purple Felt
- Light Blue Felt
- Small Round Glass Beads (purple and blue)
- 4mm Seed Beads (Purple and blue)
- Statement beads of your choice (I used a round multi colored purple and blue bead)
- Ribbon (purple, light blue, dark blue)
- Thicker Ribbon for tie (dark blue)
- Embroidery thread
- Sewing needle
- Sewing pins
- Ballpoint pen
- Paper and pencil (to make the flower pattern)
- Scissors
Instructions
Step 1
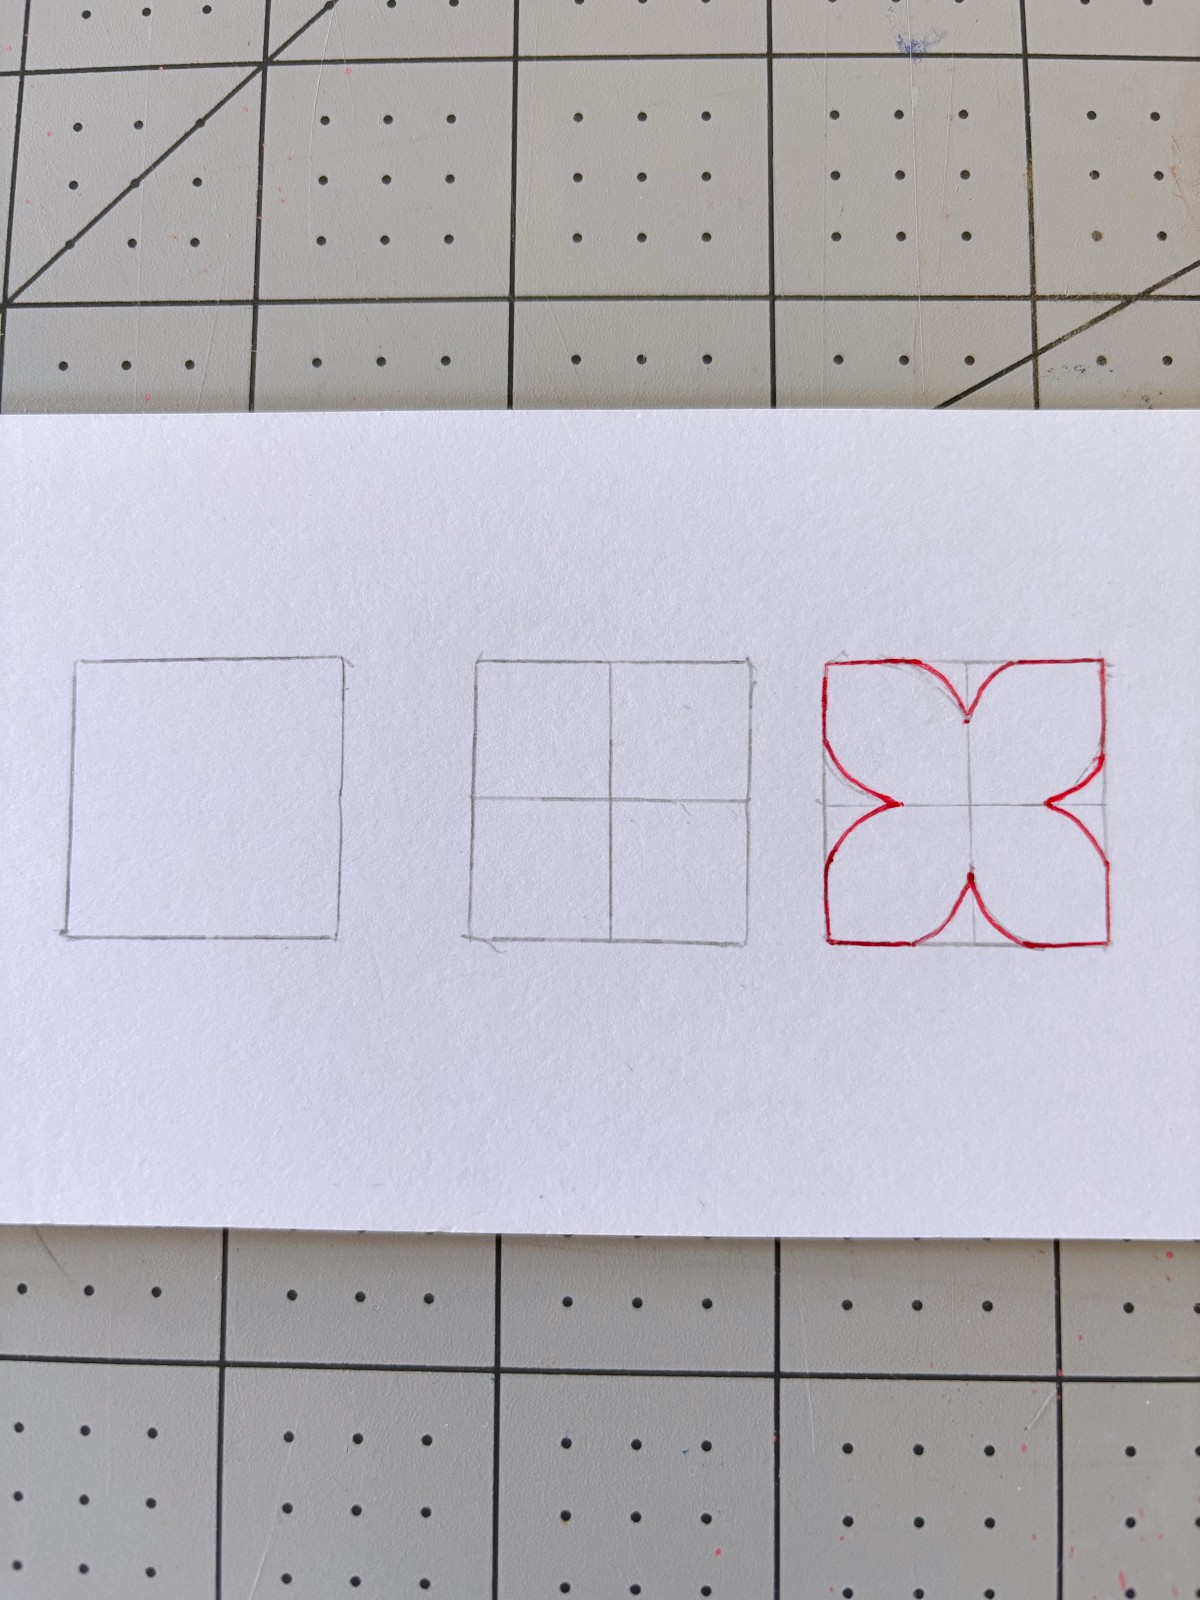
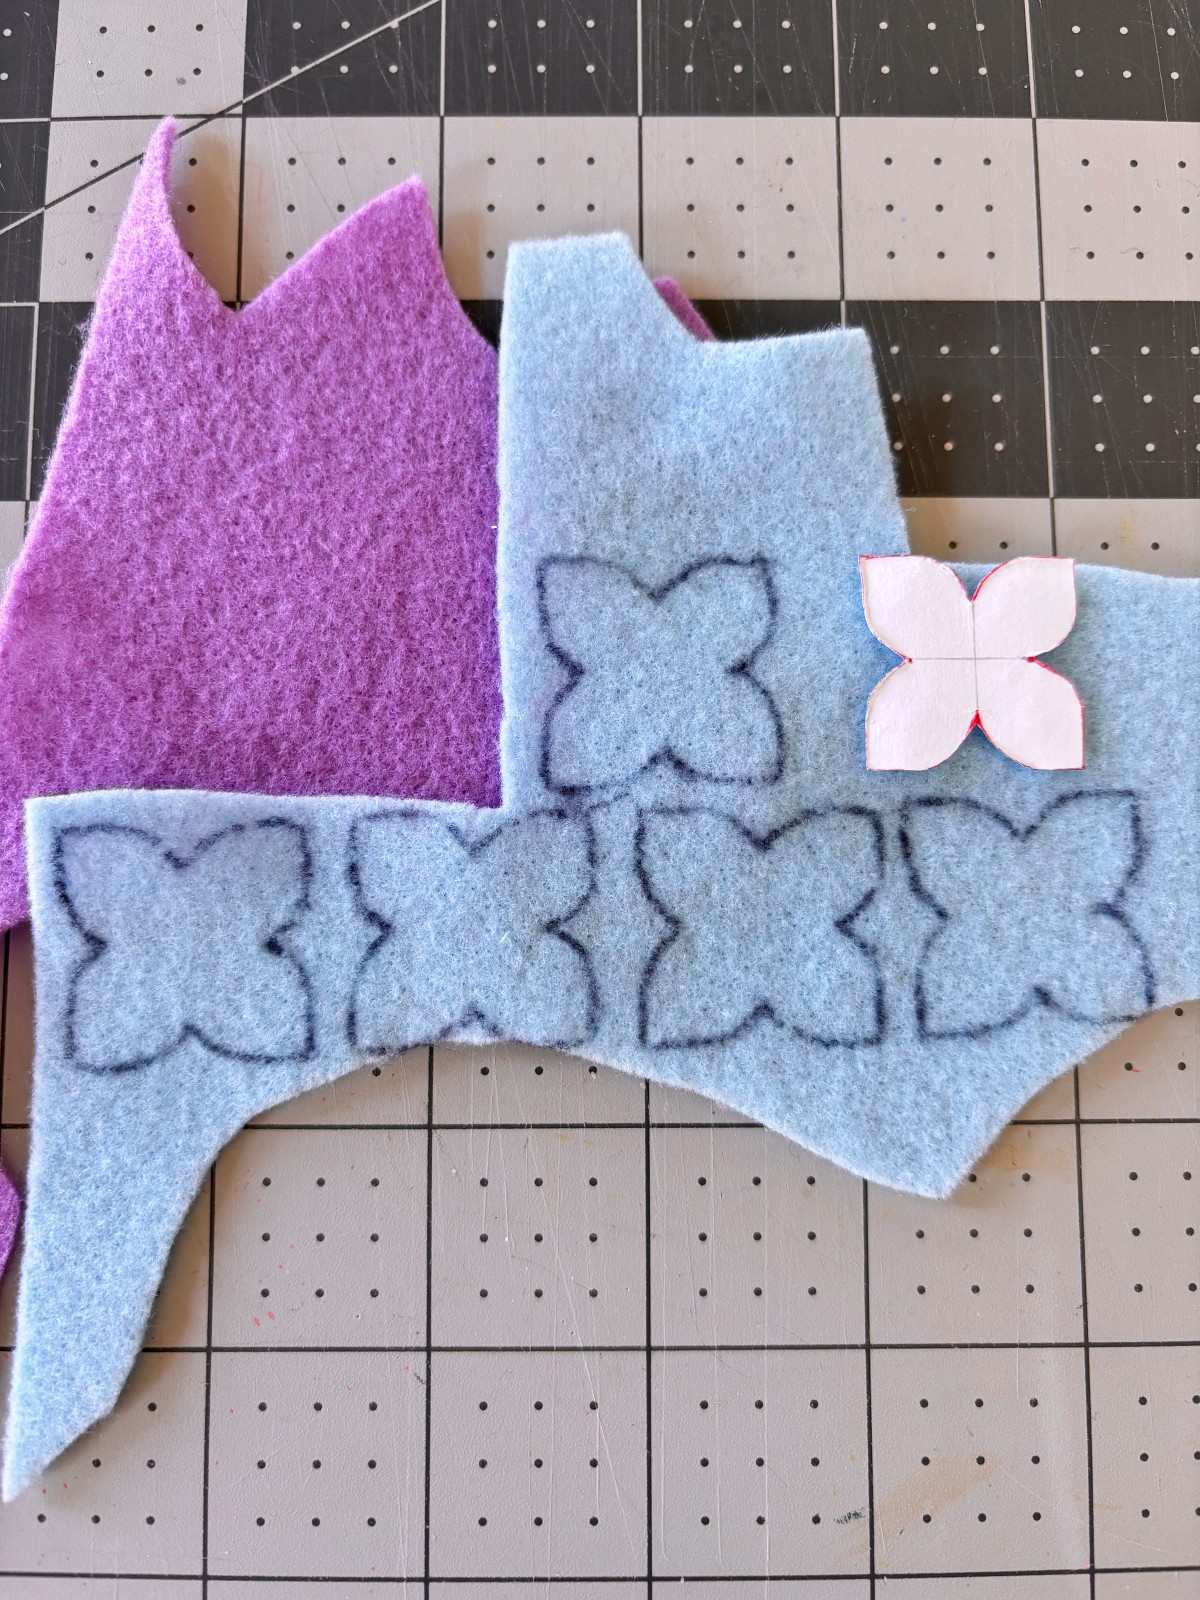
Let’s start by making our own hydrangea flower pattern on paper. Start by drawing a 1 inch square. Next draw a line vertically and horizontally through the middle of the square, creating four equal sections. Now in each section, draw out your flower petal shapes, as indicated by the red pen in the picture below. Cut out the flower shape from the paper and there you have it. A paper pattern template for the hydrangea flowers.
Step 2
Next, trace your flower pattern onto the purple and blue felt pieces with a pen. Trace 6 flowers onto the purple felt, and 5 flowers onto the blue felt. Cut out each flower piece from the felt. Make sure to cut off all of the pen so that the edges are nice and clean.
Step 3
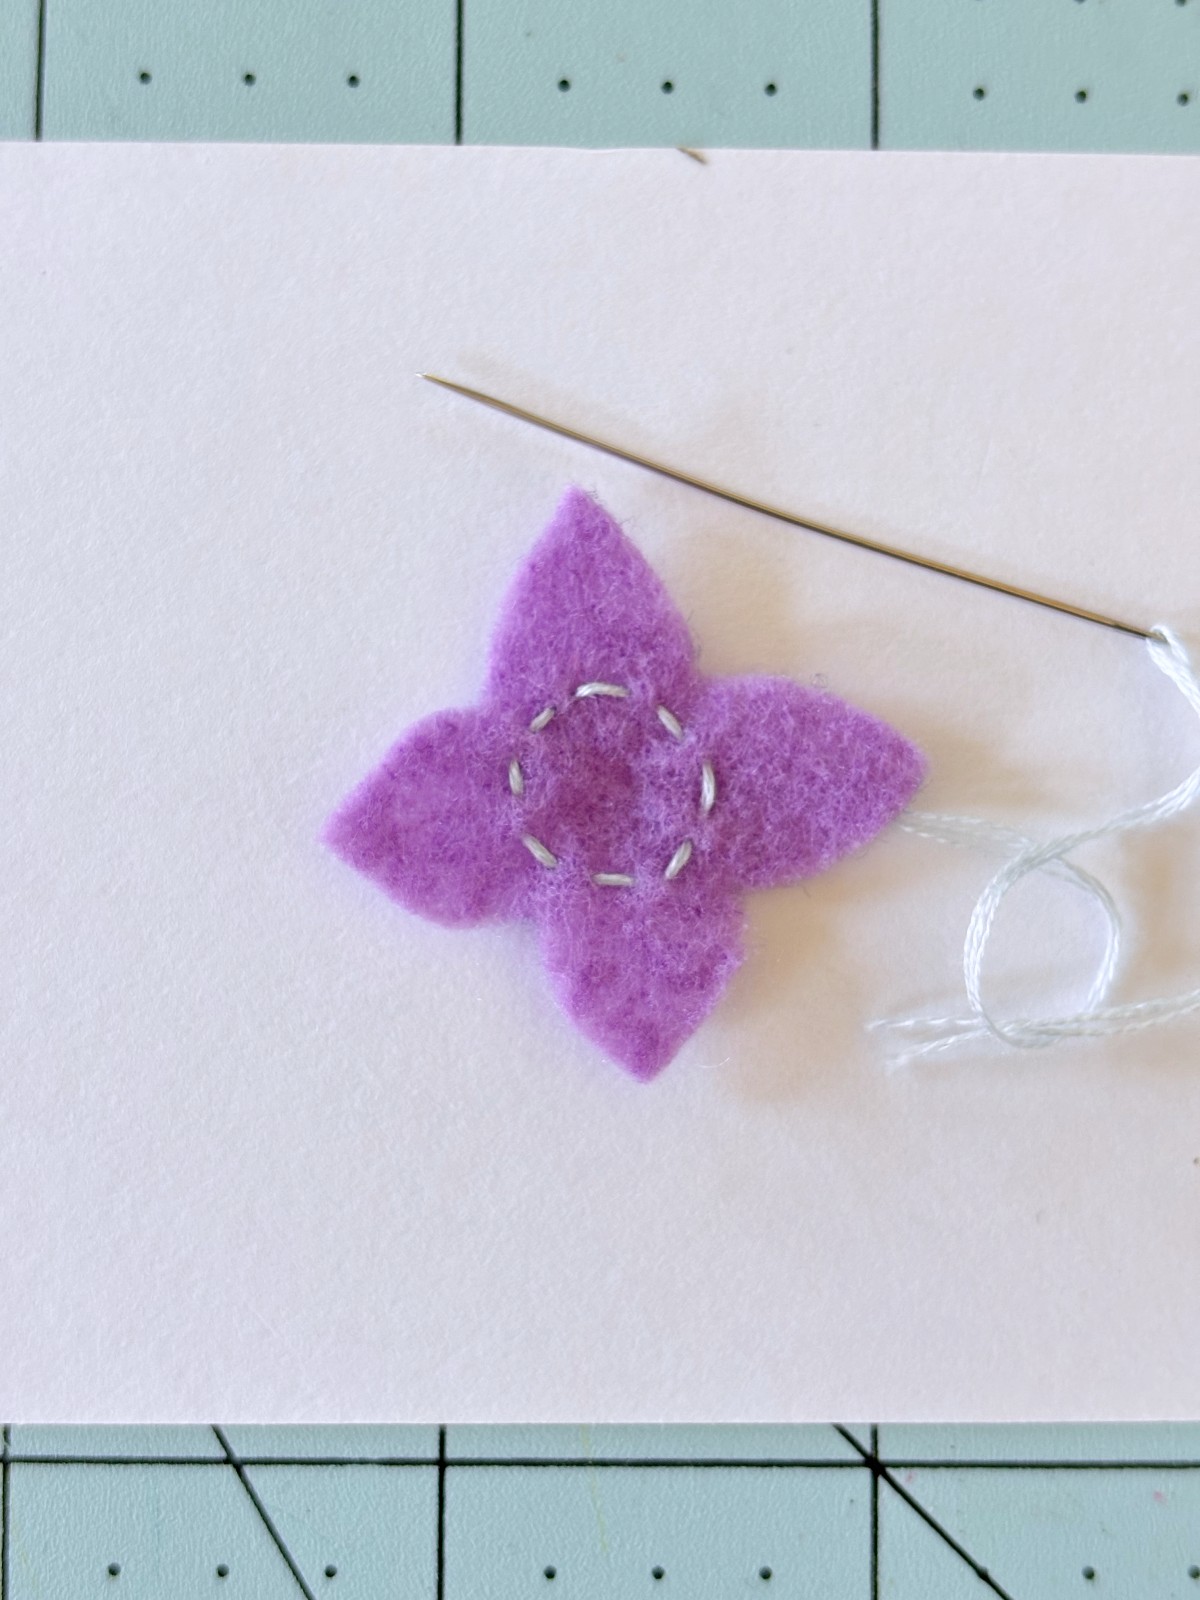
Now we can start sewing each flower. The flowers will be sewn with three strands of embroidery thread. Start by sewing a running stitch in a circle in the middle of the flower, as shown below.
Step 4
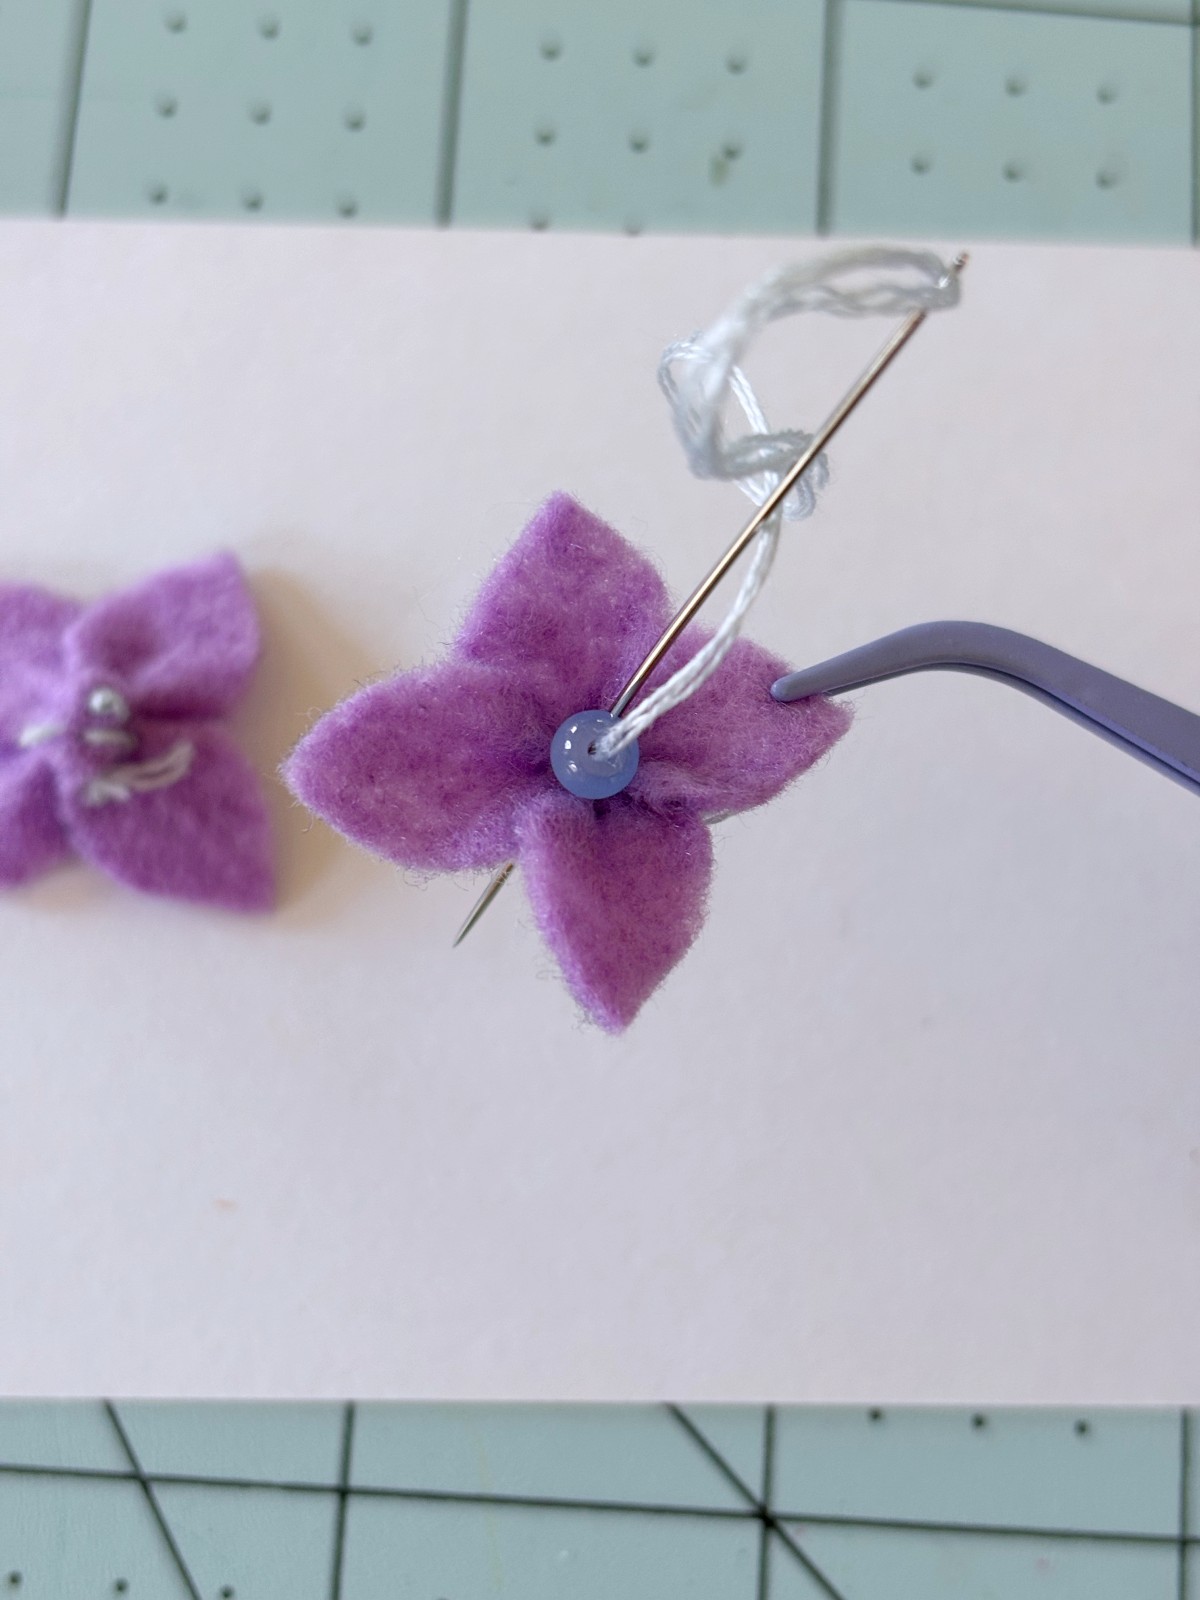
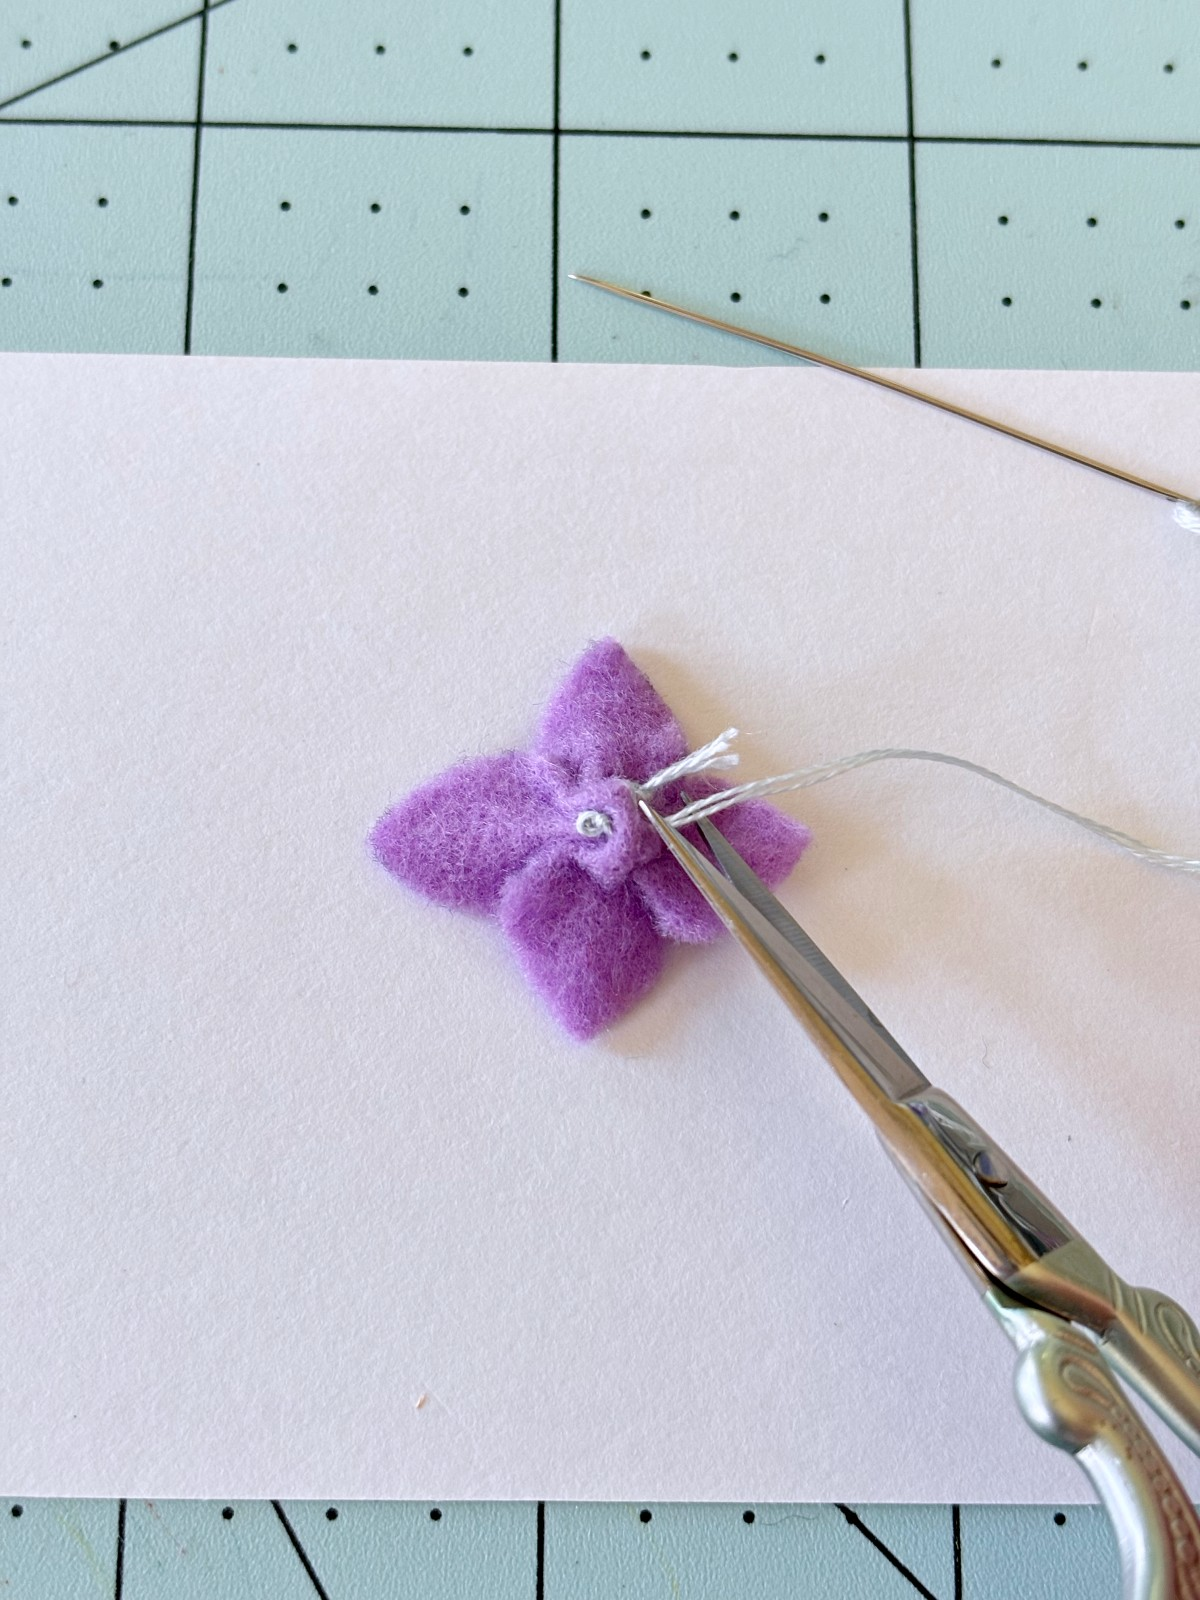
Pull the running stitch to gather the felt. Keep the tension even and tie a knot on the back side of the flower. DO NOT cut the extra embroidery thread yet. Instead, sew back through to the front of the flower in the center and thread a round bead onto the string. Sew back through the center of the flower and tie another knot to secure the bead. Repeat for each flower until you have a total of 11 flowers.
Note: I chose to place a blue bead in the center of each purple flower and a purple bead in the center of each blue flower to add contrast to the flower crown.
Step 5
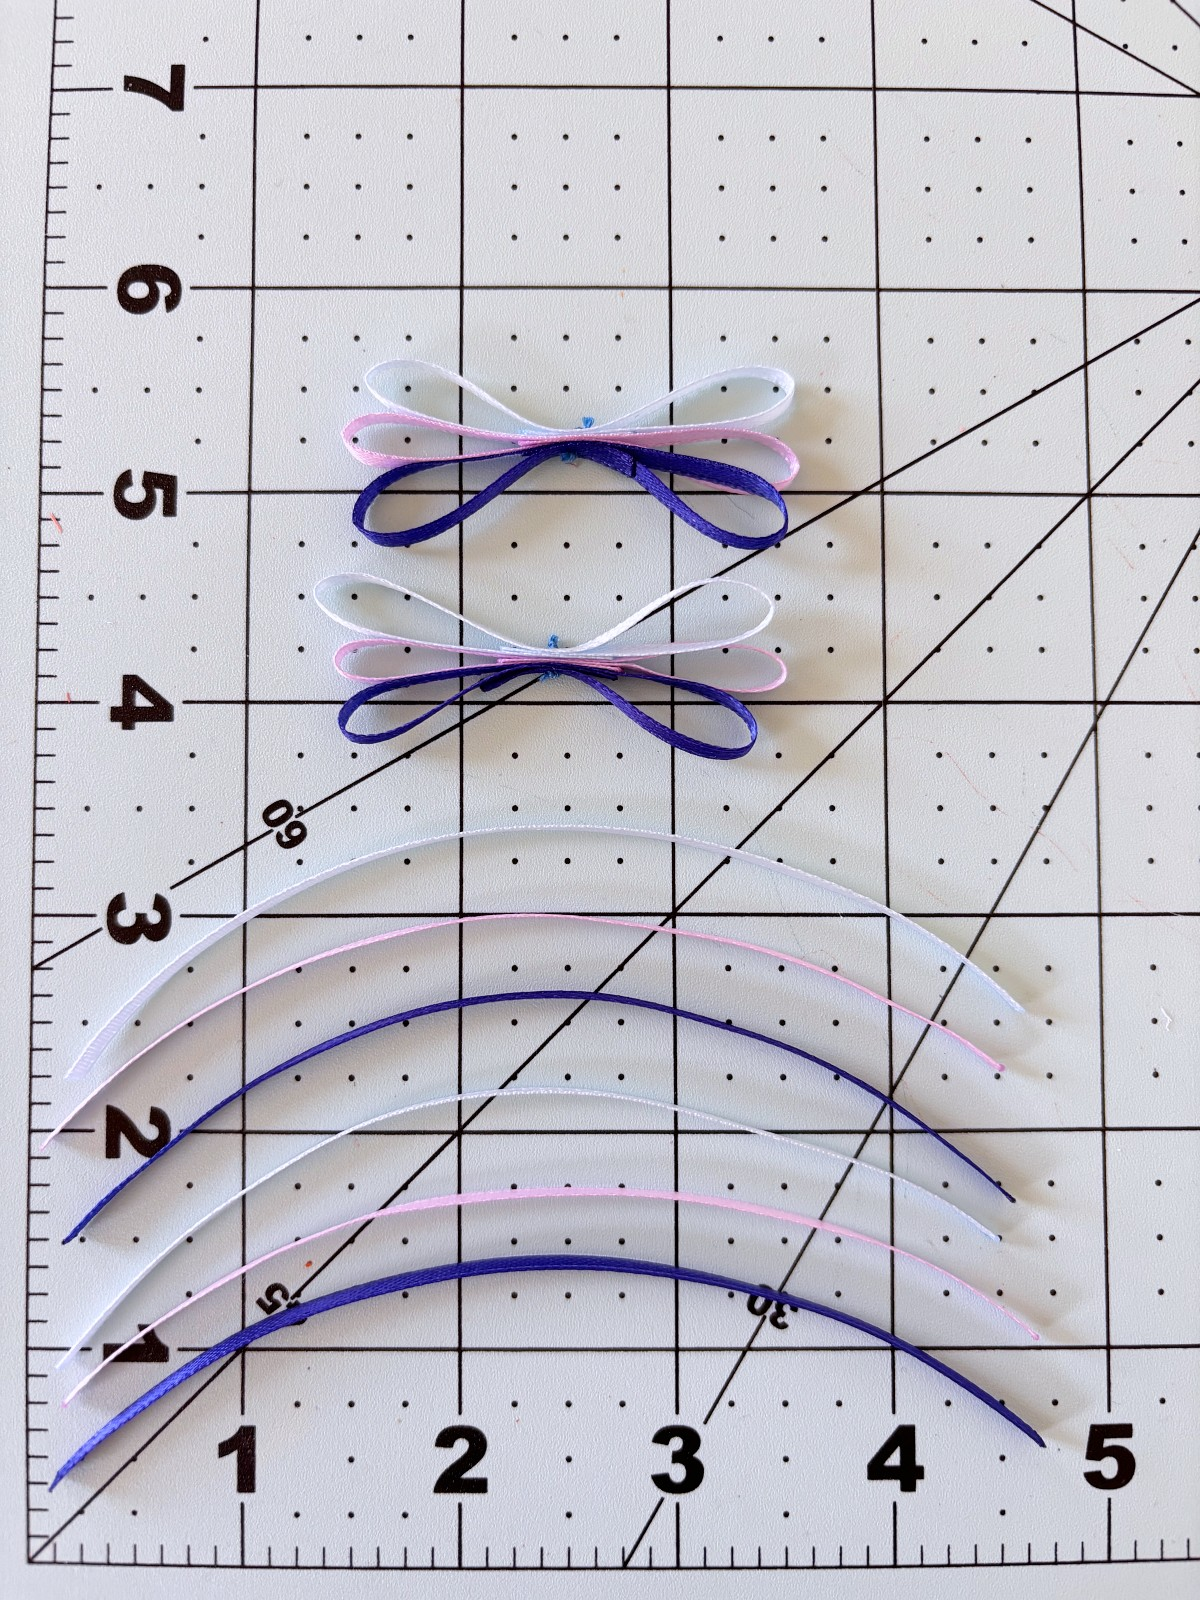
Now that the flowers are prepped, It is time to prepare the ribbon sections for the flower crown. This is the most time consuming part of the project, but totally worth the work. Start by cutting the purple, light blue, and dark blue ribbon into 5 inch strands. You will need 22 five inch strands of each color. I know that is a lot, but that is what makes the flower crown so nice and full.
Note: I chose to lightly burn the ends of my ribbon with a lighter to prevent fraying, but this is optional. If you choose to do so, please be very careful when working with a lighter.
Step 6
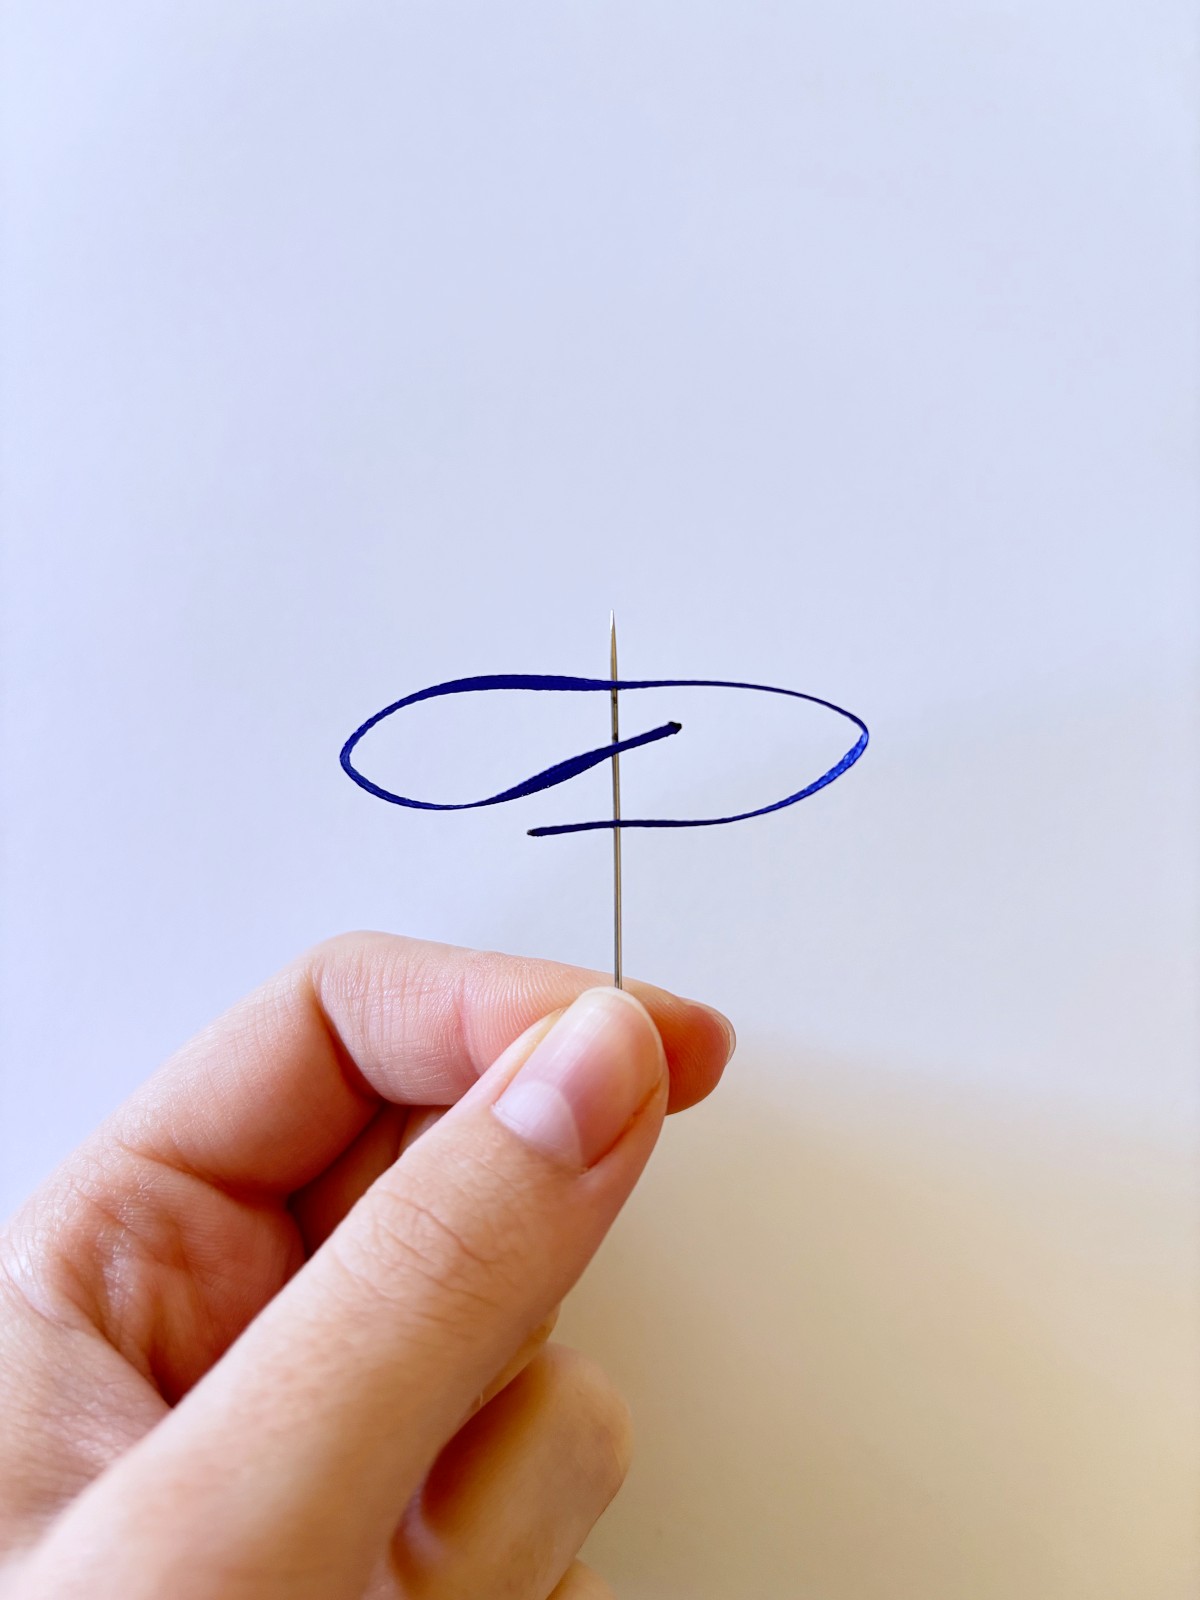
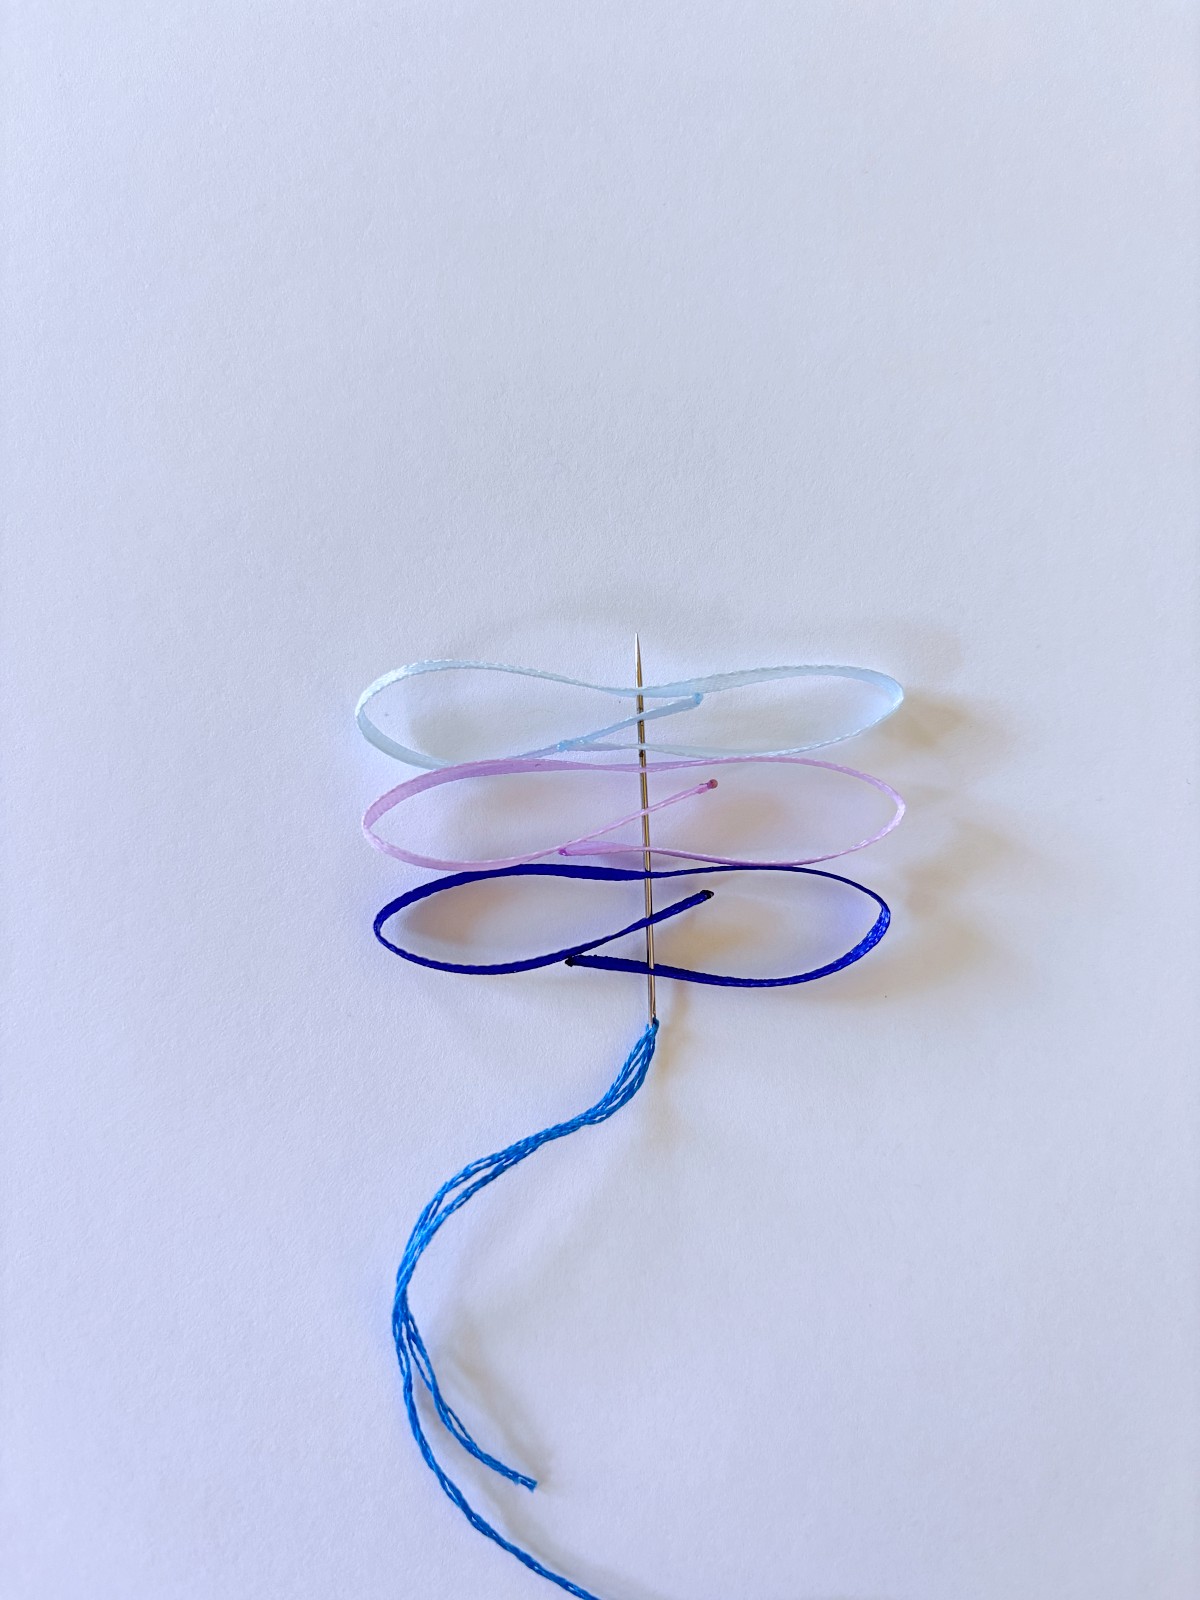
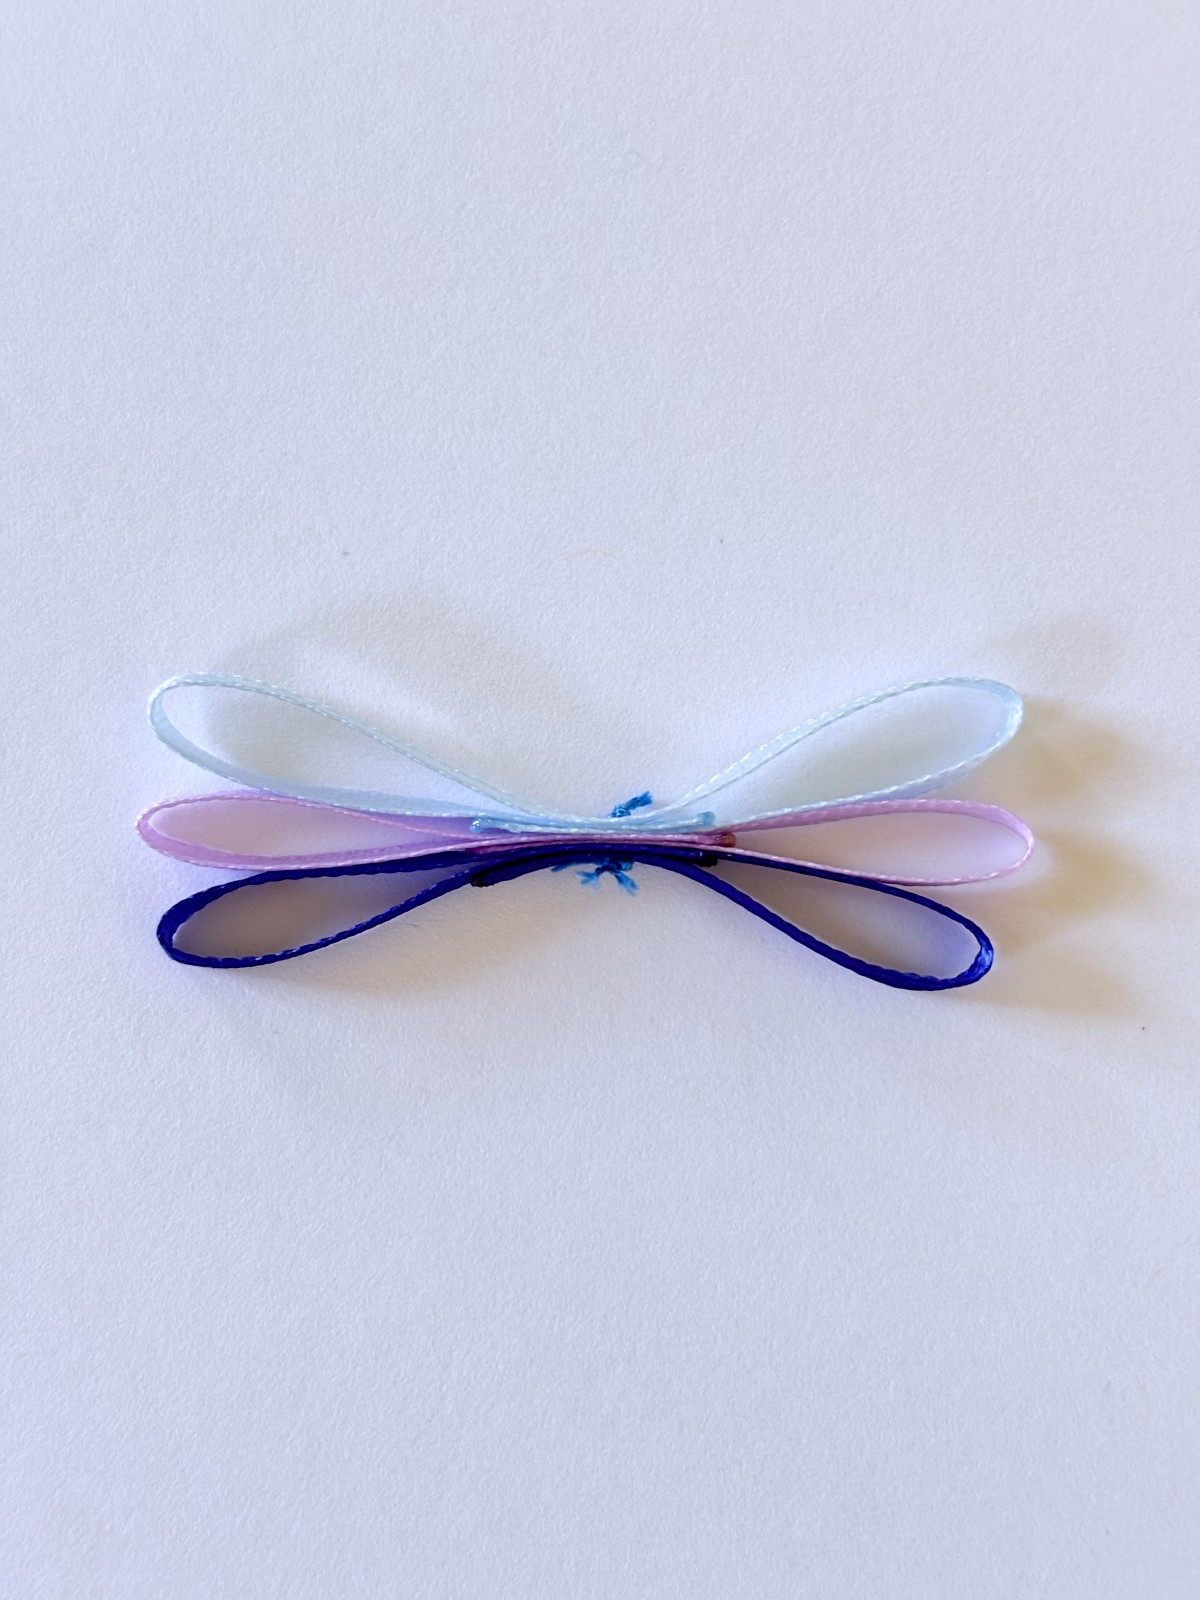
Sewing together each ribbon section. Thread the dark blue ribbon onto the needle first as shown in the picture below. Next add the purple ribbon, then the light blue ribbon in the same way. Pull the thread through all three ribbons and sew back through, up and down a couple of times to really secure the ribbons together. Tie a knot and cut the excess thread. That’s not too bad right? Just 21 more to go and all of the hard work is done, only easy steps next.
Step 7
Let’s start assembling the flower crown! Yay, my favorite part. For this step, cut 27 inches of dark blue embroidery thread. We will be using all 6 strands of the thread this time. Tie a knot 4 inches in from the bottom of the thread.
Step 8
Thread 5 seed beads onto the embroidery thread alternating in color blue, purple, blue, purple, and blue. This is the very start of the flower crown. Follow the seed beads with a ribbon section, sewing through the center. Make sure the dark blue is facing away from the beads.
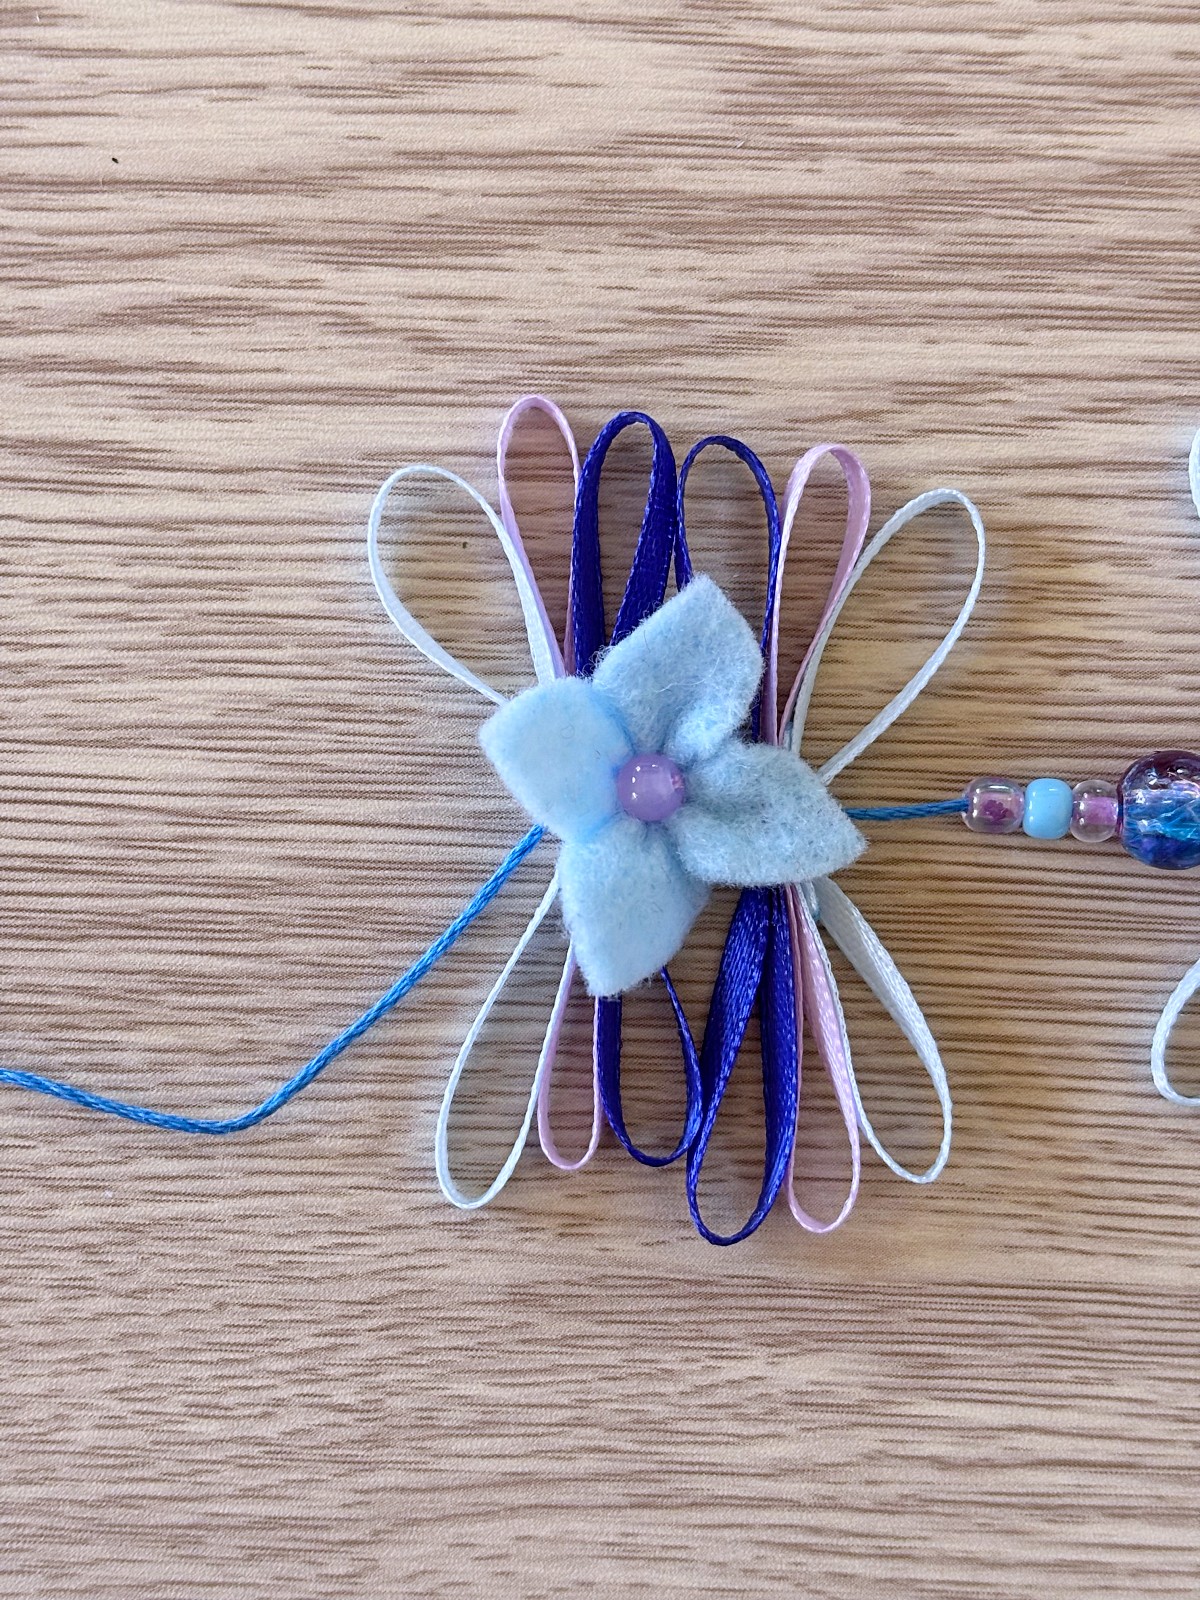
Step 9
Now add a purple flower, sewing through the gathered back side of the felt. Follow that by another ribbon section. Make sure the dark blue ribbon is facing towards the flower, as shown below.


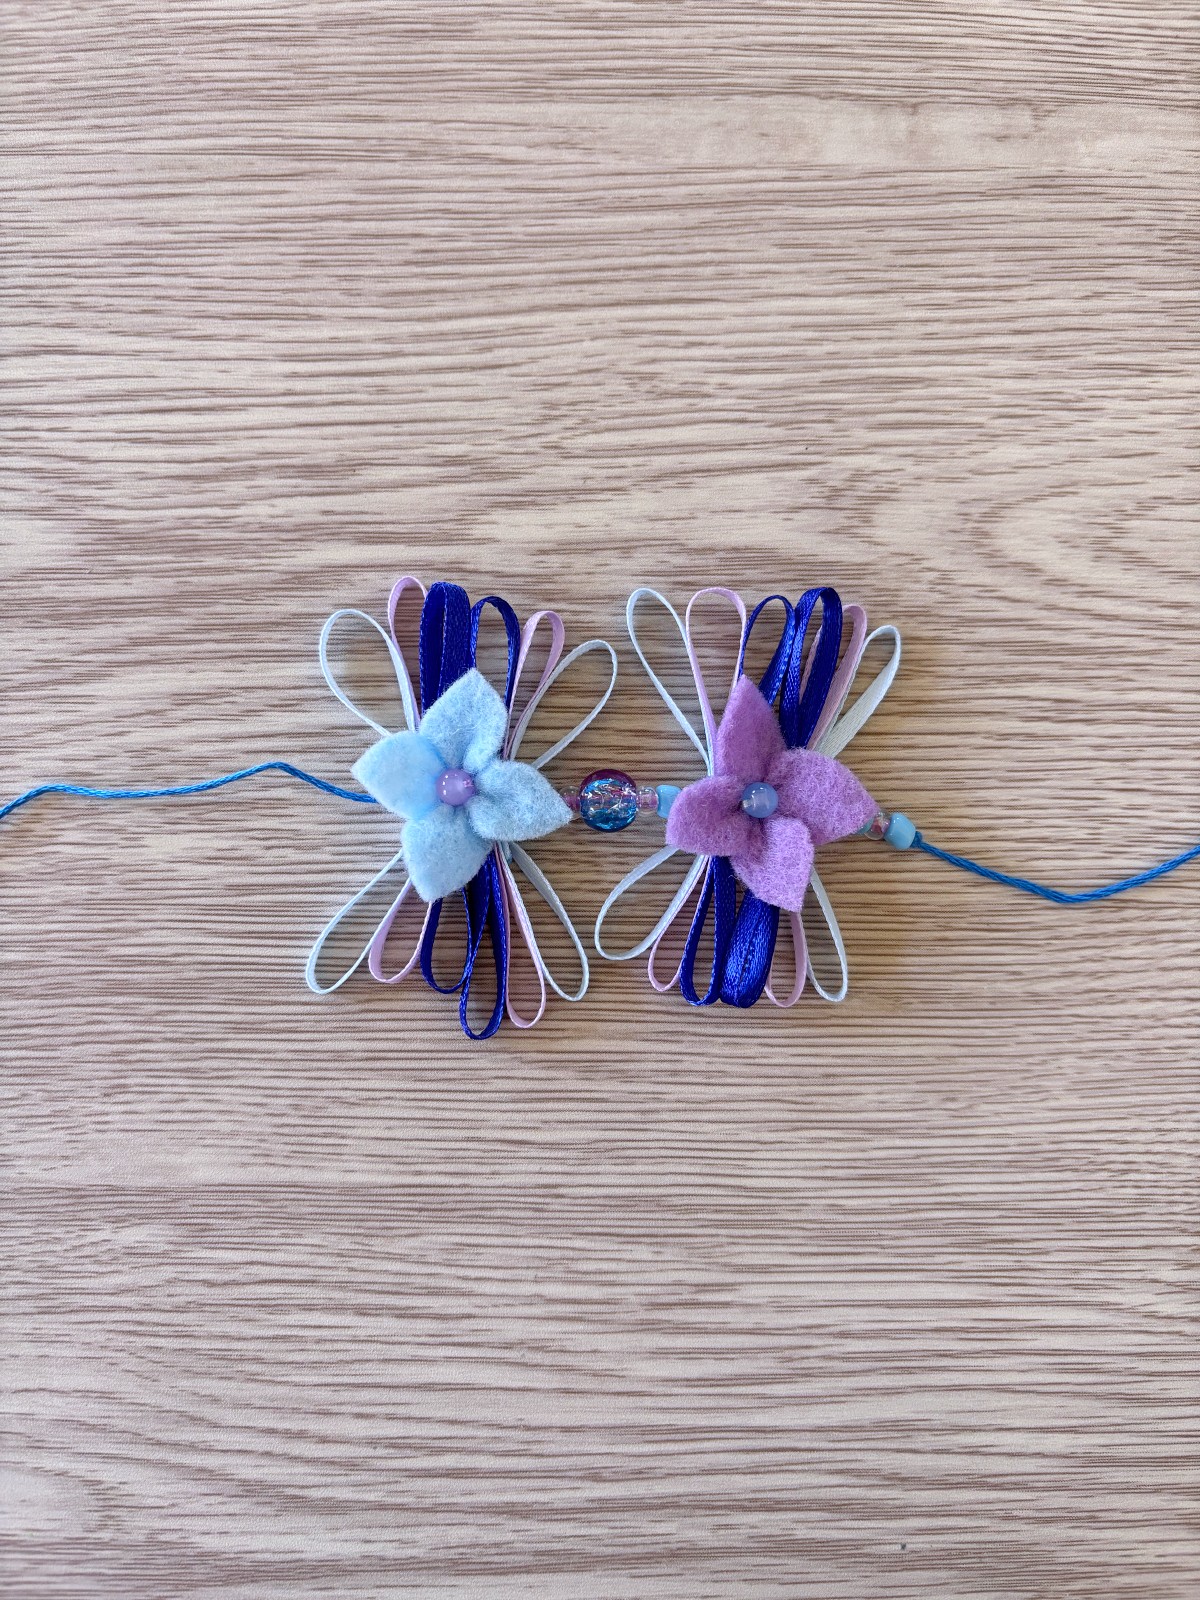
Step 10
Next, we will add the bead pattern that will be separating each ribbon and flower part of the flower crown. Thread three seed beads onto the thread, purple, blue, then purple, followed by your chosen statement bead, mine being a multi colored round bead. Then add another three seed beads, purple, blue, purple.

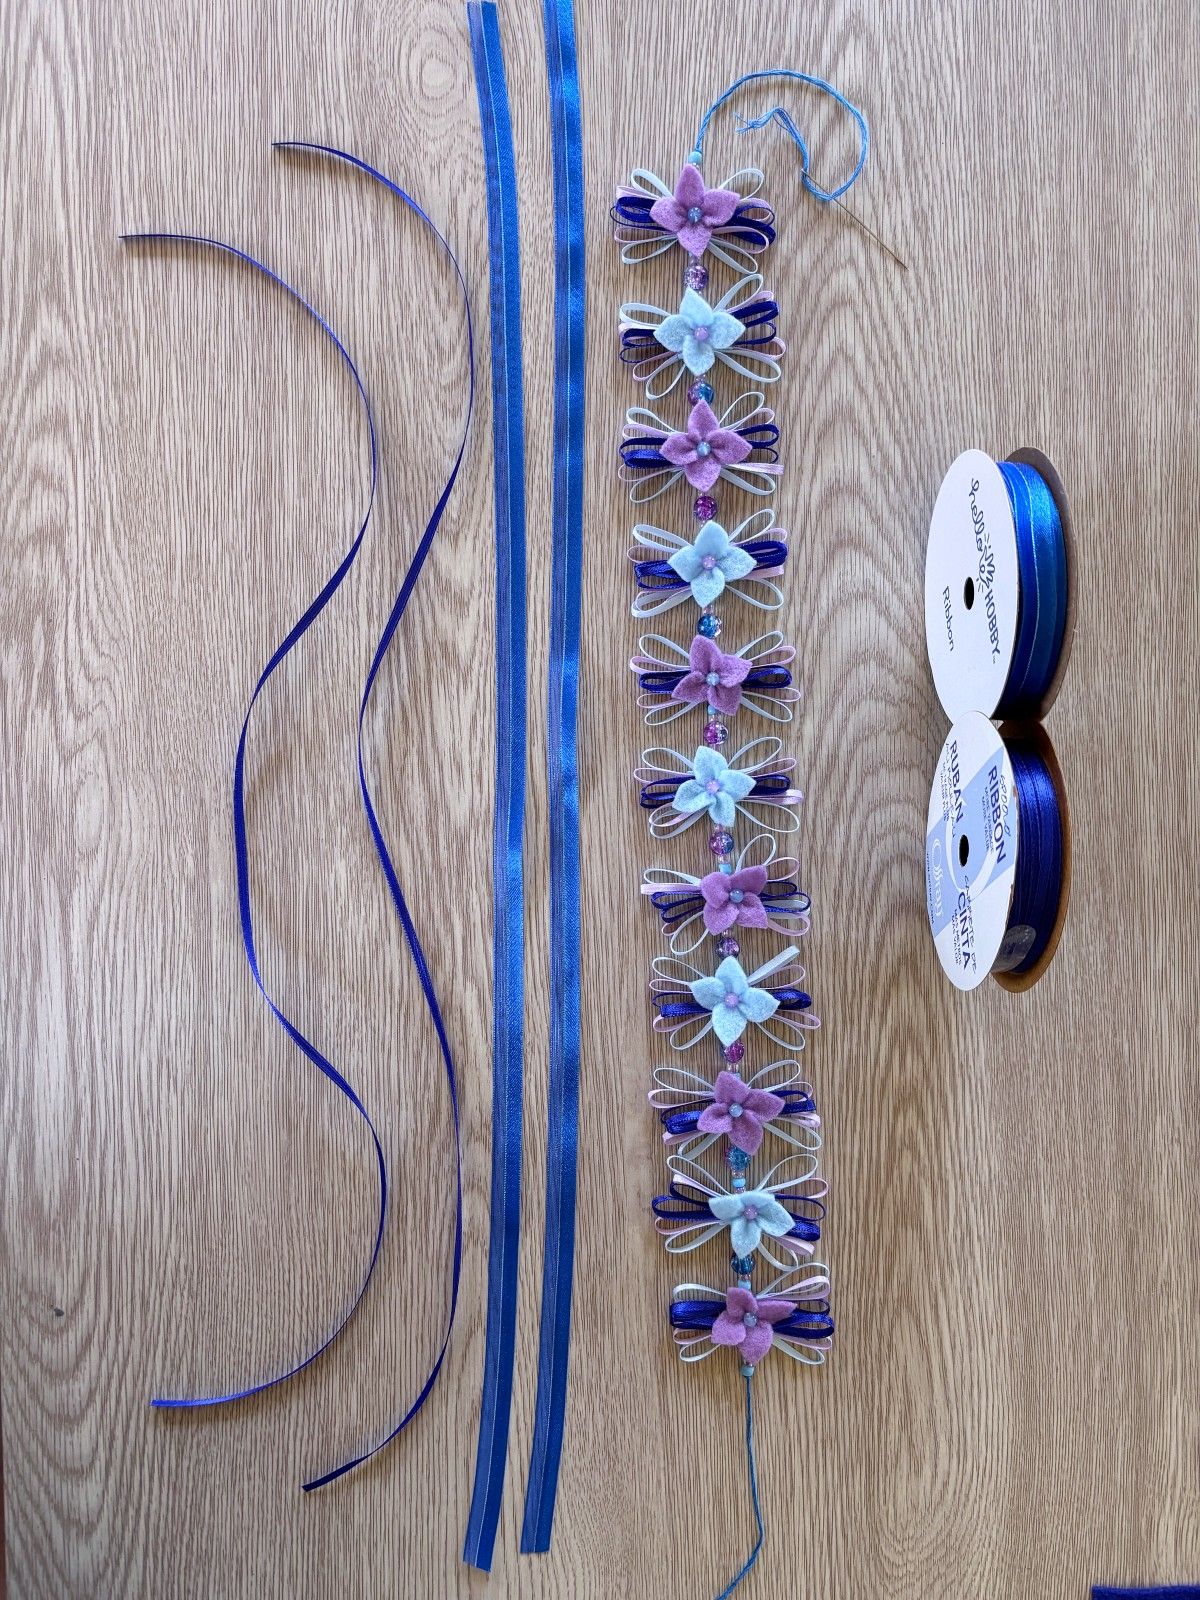
Step 11
Now, sew on another ribbon section followed by a blue flower this time, and more ribbons, as shown below. This is the pattern you will follow for the next 9 flowers. Repeat until you have added all the flowers to the thread. You will end the crown exactly like you started it. With 5 seed beads alternating from blue, purple, blue, purple, and blue. Tie a knot but DO NOT cut the excess thread. We will use that to sew on the ties.
Step 12
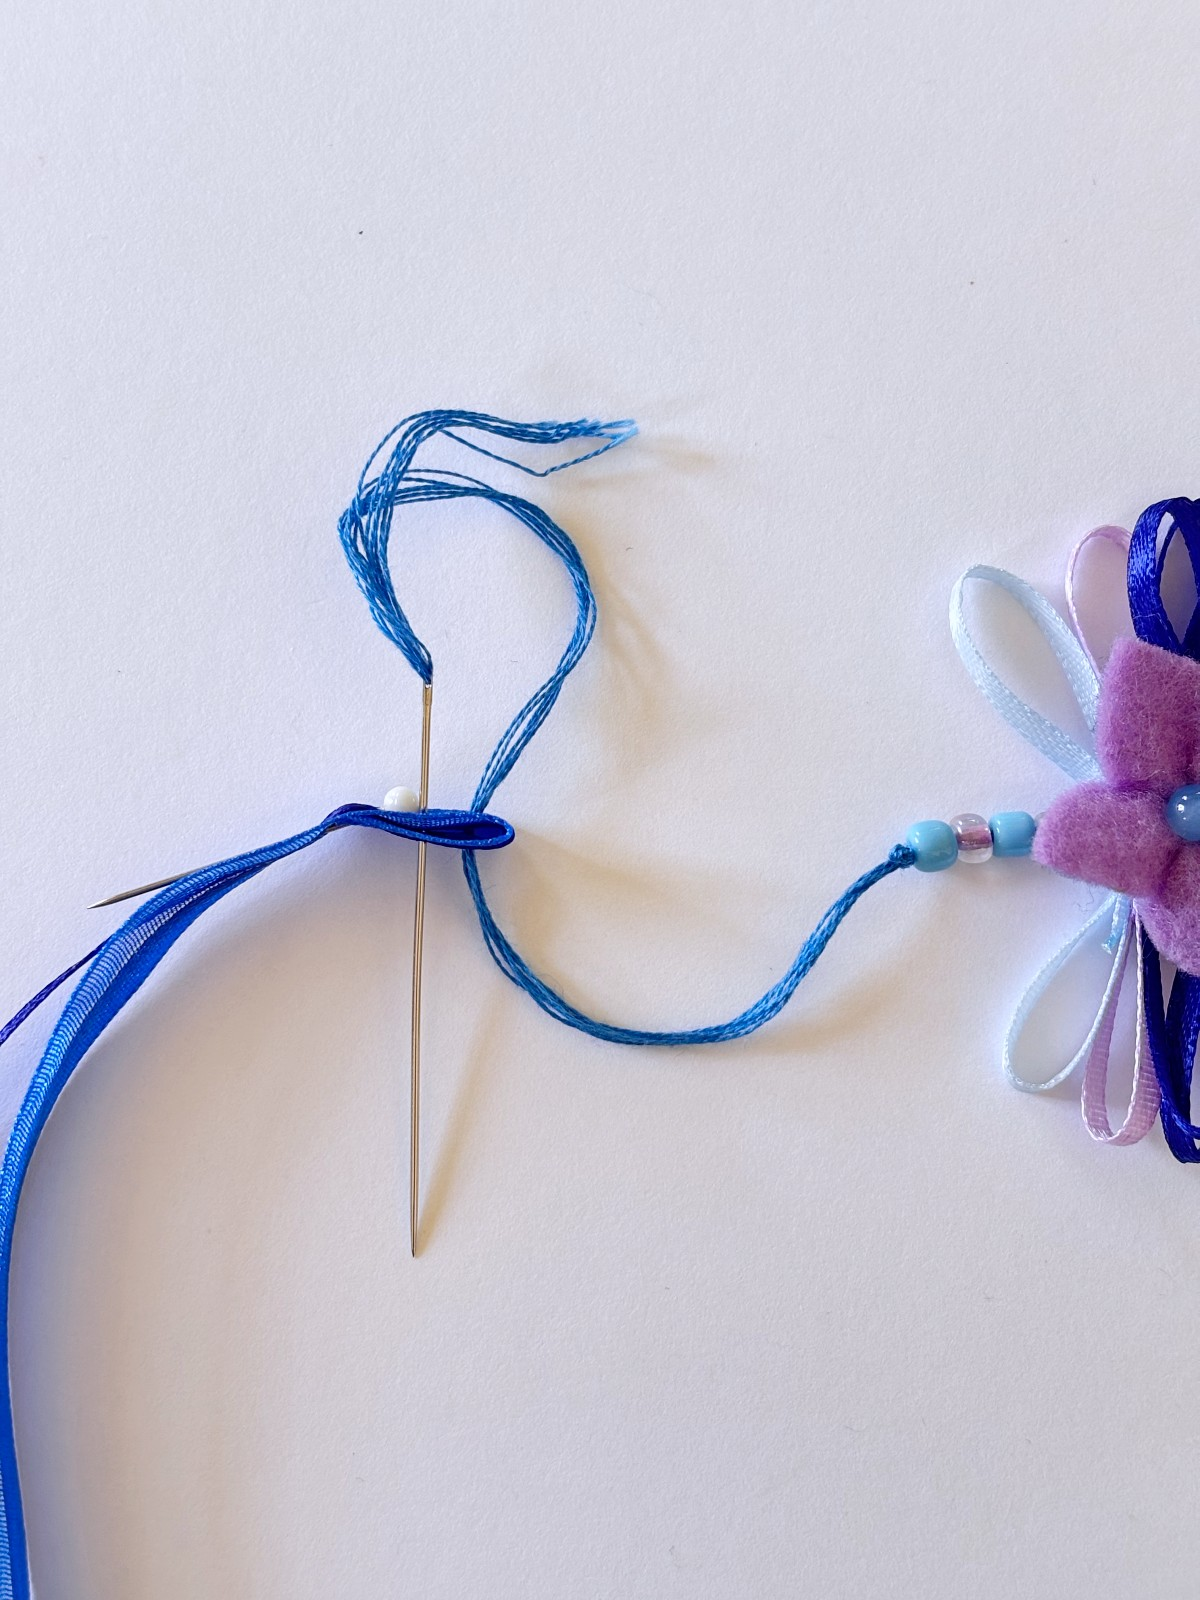
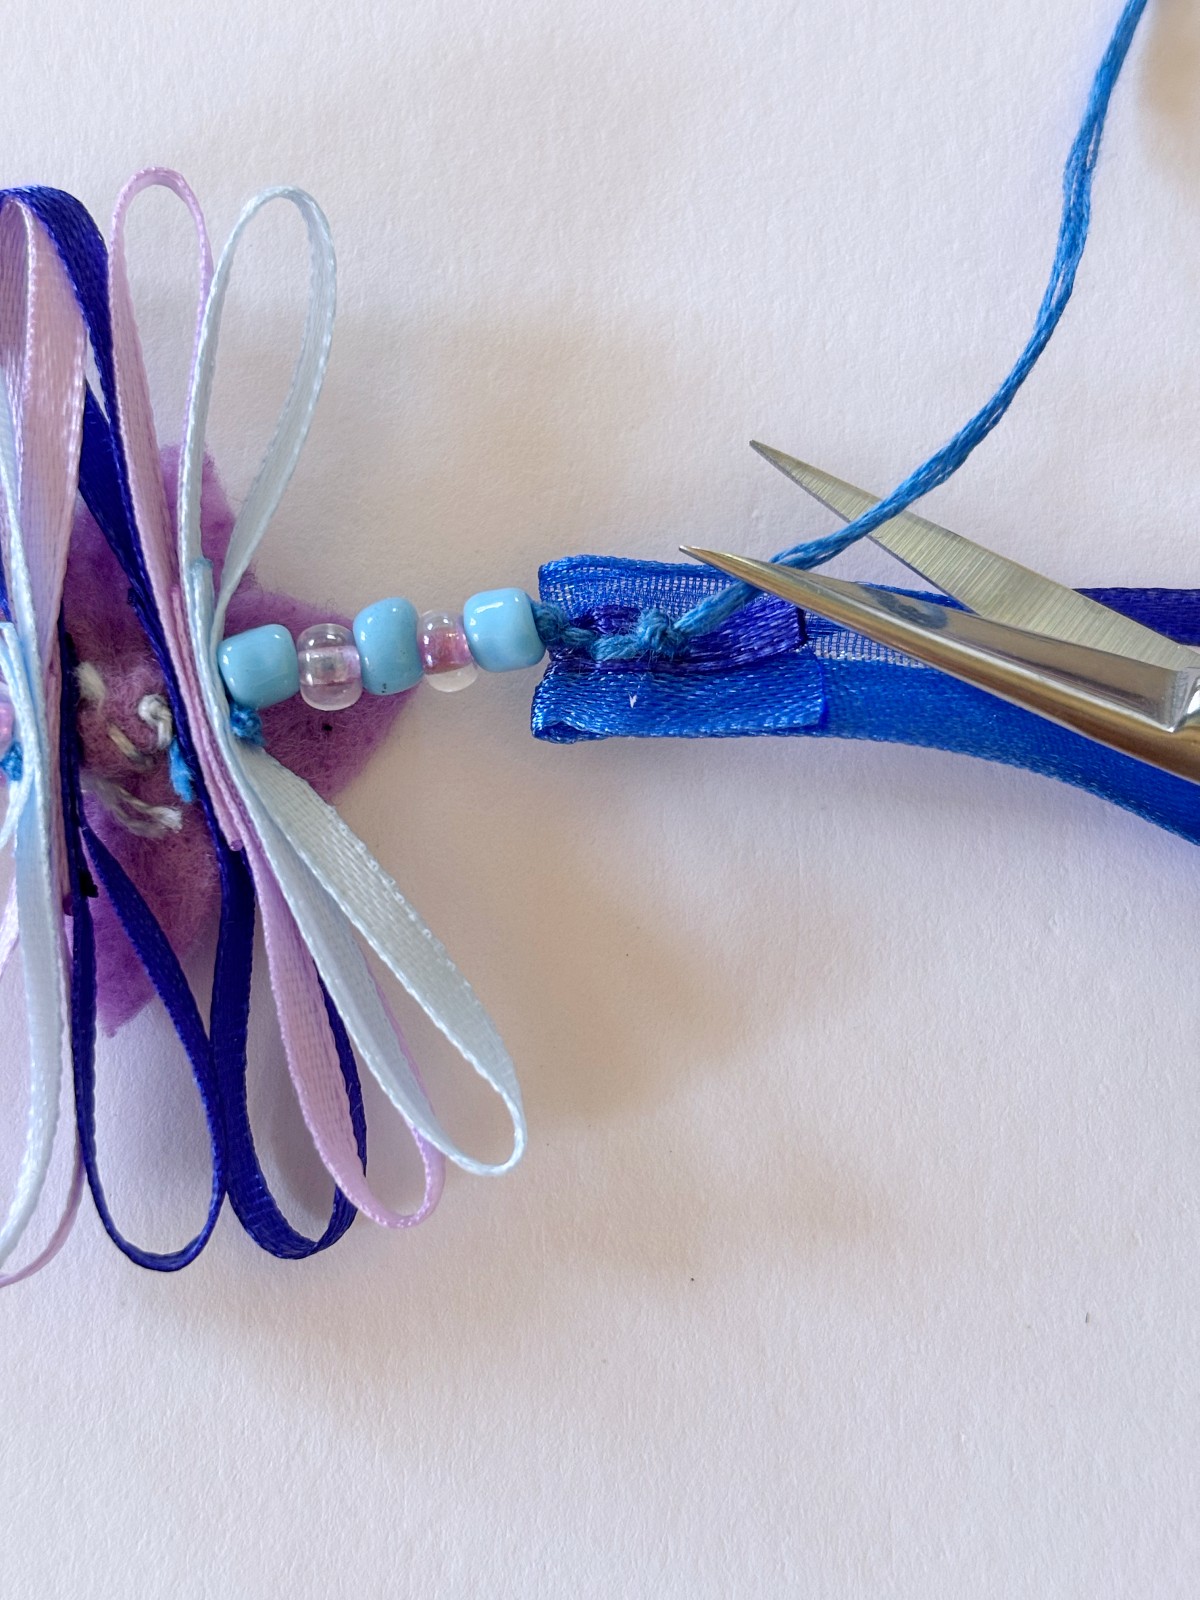
Adding the ties to the flower crown. Cut two strands of thin dark blue ribbon and the other thick dark blue ribbon, each 21 inches in length. Overlap the thin and thicker ribbons and slightly fold over one end. I used a sewing pin to keep it folded while I attached the flower crown. Now, sew up through the folded back side of the ribbon to the front. Sew back through the ribbon up and down a few times to secure the ribbon. Tie a knot on the back side and cut the excess. Repeat to the other end of the flower crown.
step 13
Celebrate! You did it. Pat yourself on the back because you deserve it. If you made yourself this whimsical hydrangea flower crown, we would love to see it. Tag us on instagram @mirrortwins.studio and we will share it on our story. Thank you so much for crafting with us today. I look forward to sharing more projects soon.