Beginners guide to polymer clay. Sculpey 101
If you are thinking about crafting with polymer clay, you are in the right place. Before you start dabbling in this crafting medium it’s important to understand the basics. In this beginners guide to polymer clay, I want to share all of the tools I use to craft a variety of different projects. I will also share a few tips and tricks I wish someone would have told me when I first started out.
I have been using polymer clay for the last three years in my handmade craft business and have learned a thing or two along the way. There are many different ways to use polymer clay, and I want to share with you how I use it to create clay charms, earrings, plant sticks, and more. This has been a staple medium for my art business and sells well at markets. I hope by the end of this post you feel confident to try polymer clay out for yourself and start creating some awesome crafts.
*This post contains affiliate links meaning I get a commission if you purchase through my links, at no extra cost to you.
Table of contents
- Polymer Clay (what brand I use and why)
- Conditioning Polymer Clay
- Sculpting tools
- Clay cutting tools
- Cleaning the clay
- Painting/decorating
- Baking Polymer Clay (tips and tricks)
- Sealing Polymer Clay Projects
- Final thoughts
Polymer Clay (What brand I use and Why)
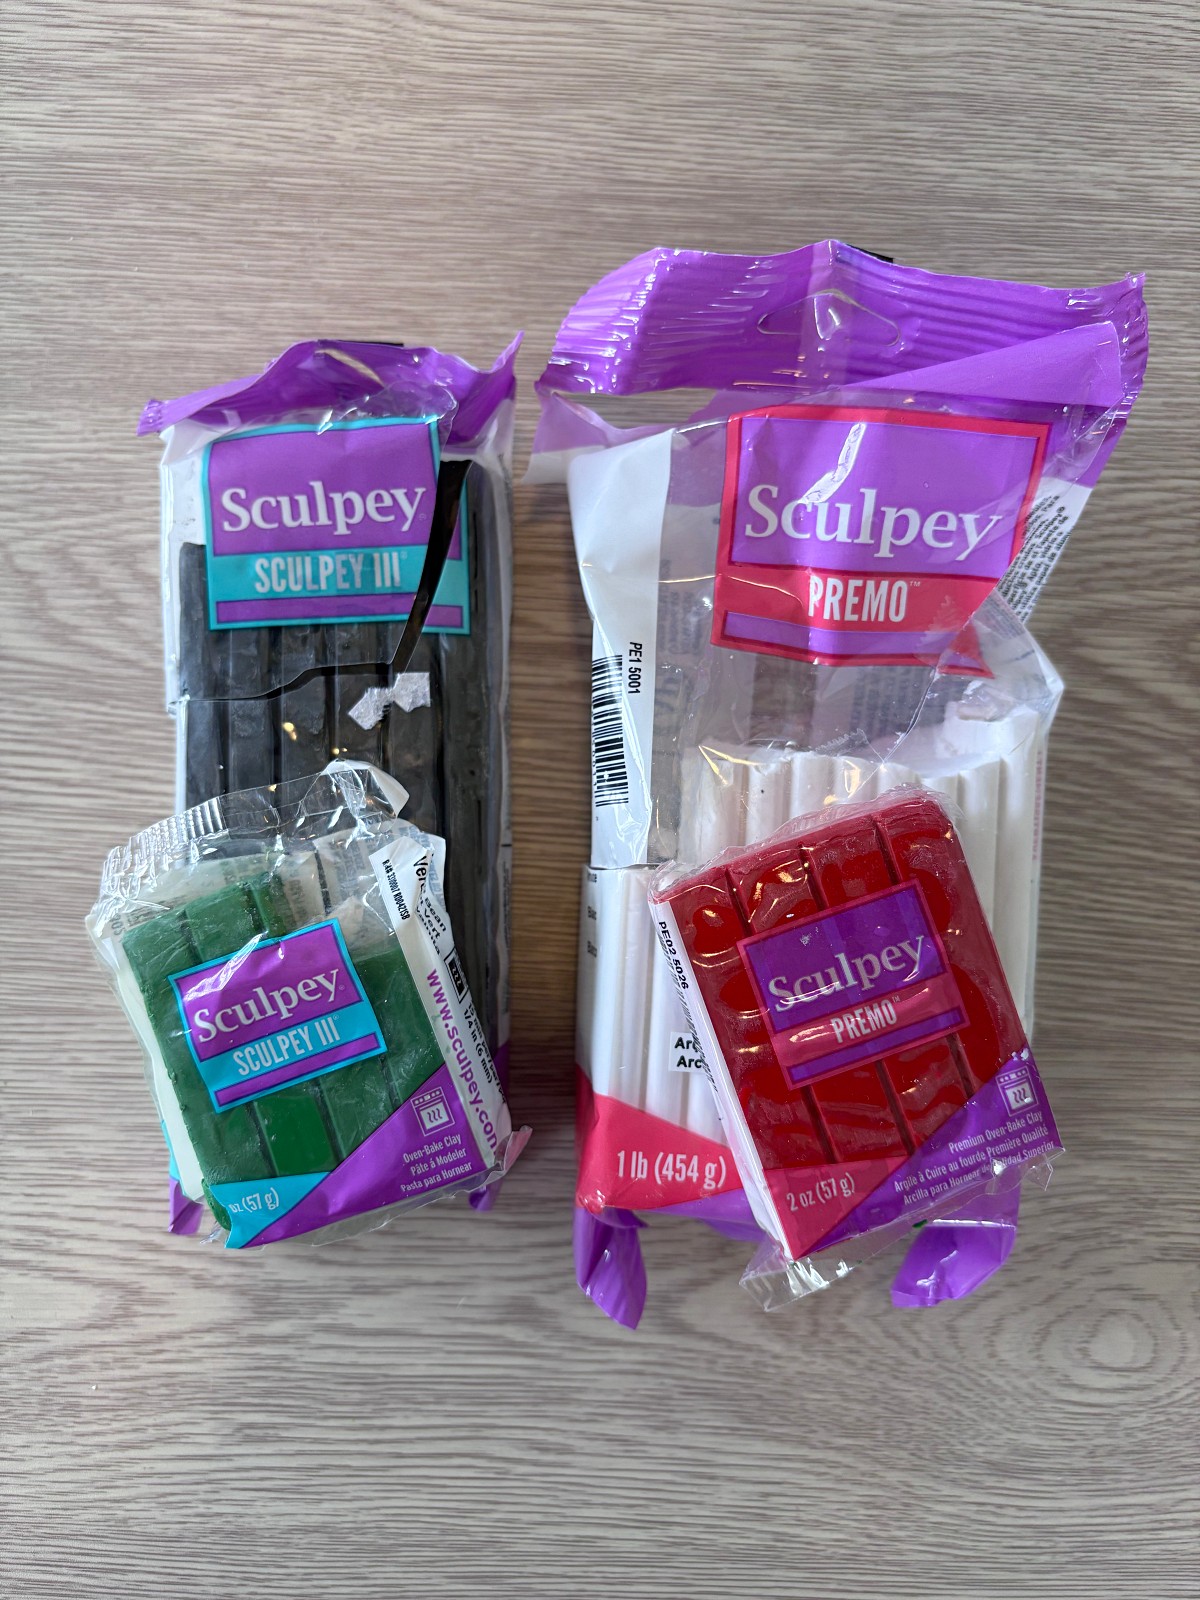
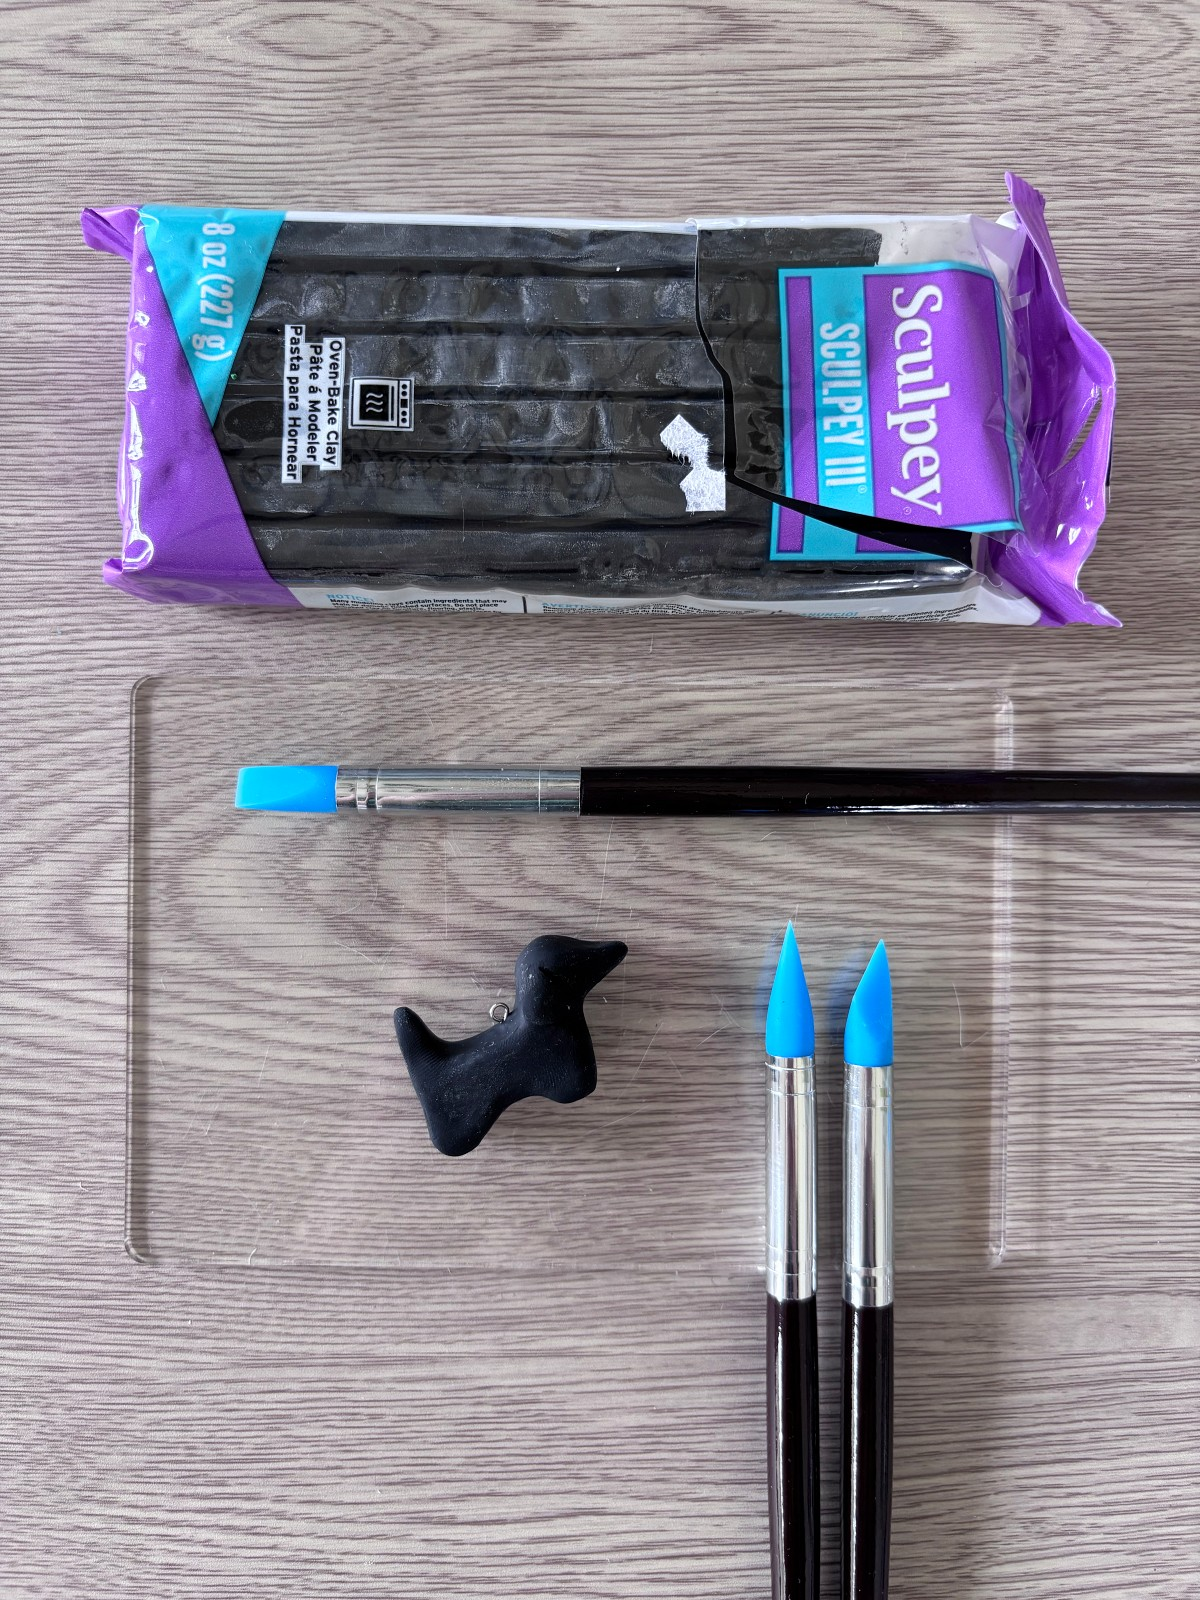
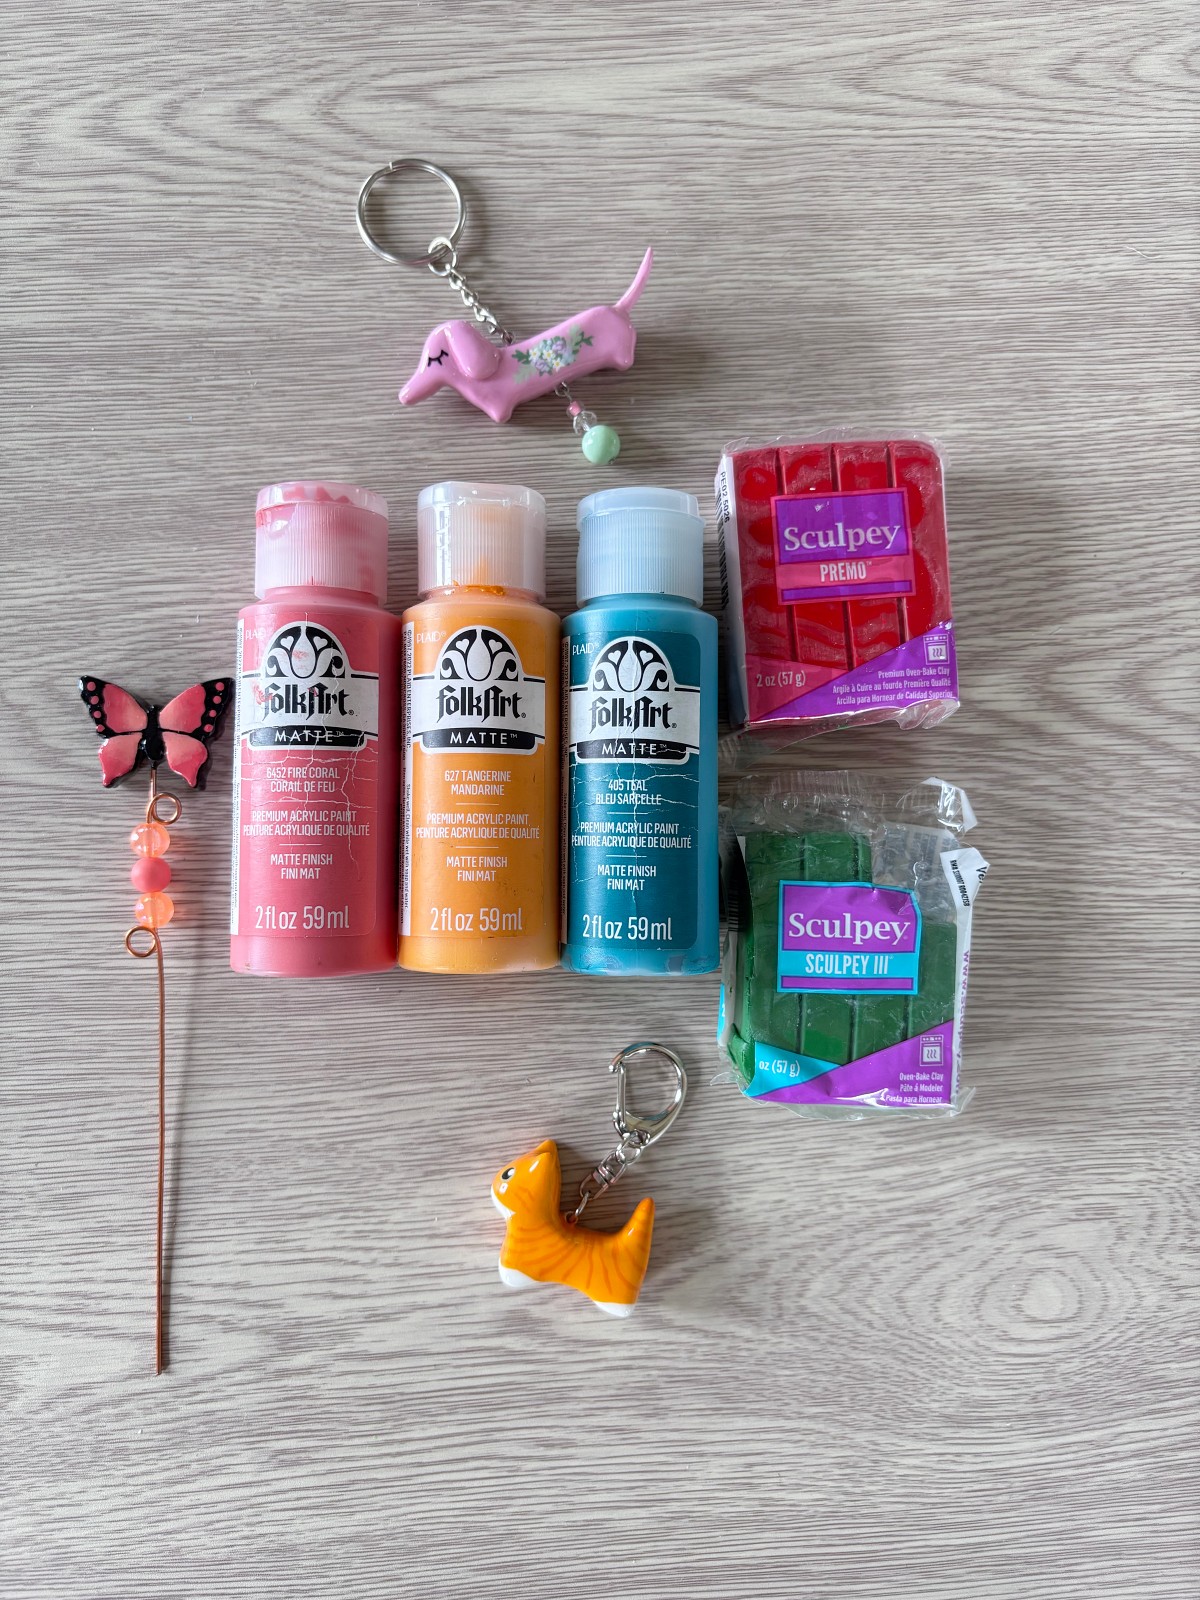
I have tried a variety of polymer clay throughout the years, but my favorite brand to work with is Sculpey. There are two specific types of Sculpey clay that I use which are Sculpey III and Sculpey Premo. Let’s start with Sculpey III. This clay is easy to work with and soft enough to mold with your hands so I like using it for my clay charms because I do a lot of hand building. Sculpey comes in a wide variety of colors and finishes as well, including transparent clay. I can almost always find it at my local craft stores.
Sculpey Premo is stronger than Sculpey III, but much harder to condition or mold by hand. That is why I like to use it for making my own clay beads and for making slab or cane earrings. Because this clay is much harder, I often use a clay roller to flatten it, which I will talk more about next. Sculpey Premo is also available in a wide variety of colors. A similar polymer clay that I have found to also be very strong and good for clay beads is Kato Polyclay, though I have not used it as much as Sculpey Premo. Either way, it is good to experiment with different clays to find one that works well for you and your specific project. I would recommend starting out with Sculpey.
Conditioning Polymer Clay
After you choose a clay to use, you need to condition the clay before crafting with it. Conditioning clay means to knead and warm up the clay, making it softer and more pliable so that you can shape it easier. This process also helps to expel air trapped in the clay and give it a consistent texture to work with, especially when mixing multiple colors of clay together. This is always the first step when using polymer clay.
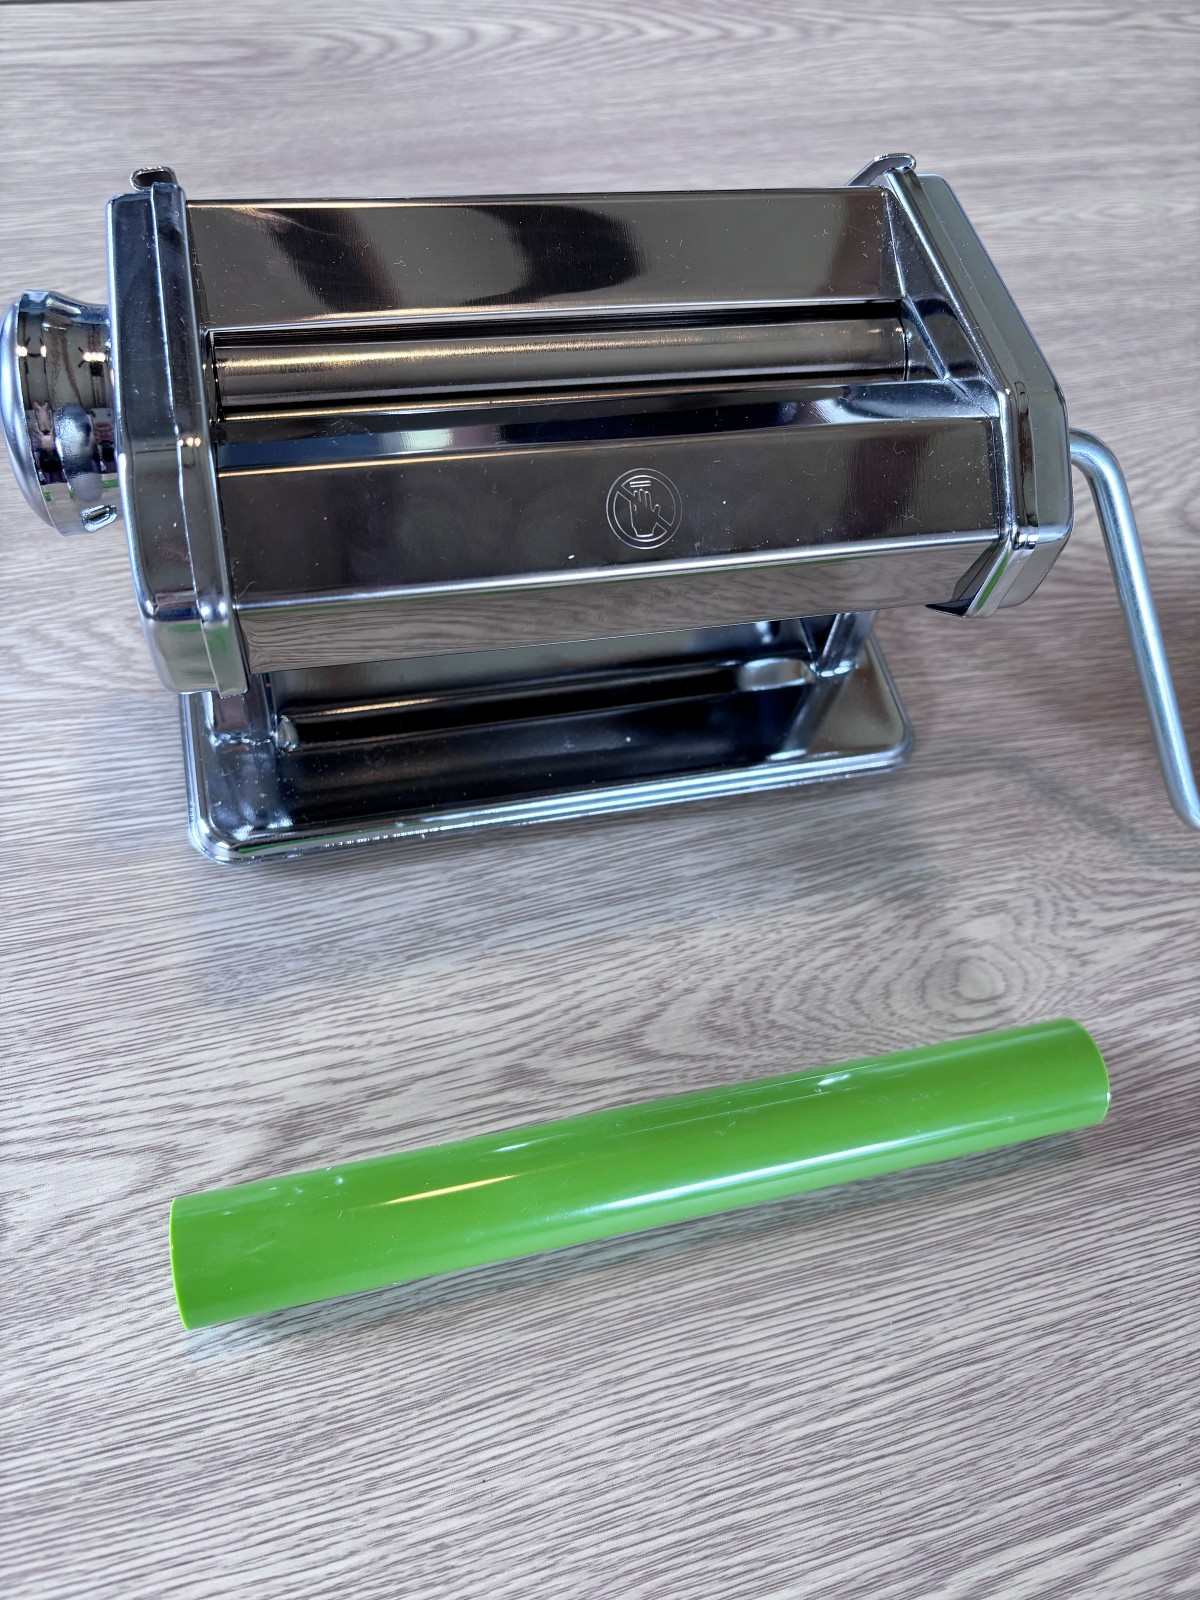
I always start by kneading the clay with my hands and rolling it with a rolling pin, repeatedly kneading, rolling, kneading, rolling, until I feel like the clay is warm enough and soft enough to mold with my hands. If you are creating a flat clay project, such as earrings, I highly recommend using a clay rolling machine to help create a nice flat sheet of clay with a consistent thickness. You can do this with a rolling pin by placing two sticks or rulers of the same thickness on either side of the clay and rolling it out. The clay machine however saves a lot of time and strength.
Sculpting Tools
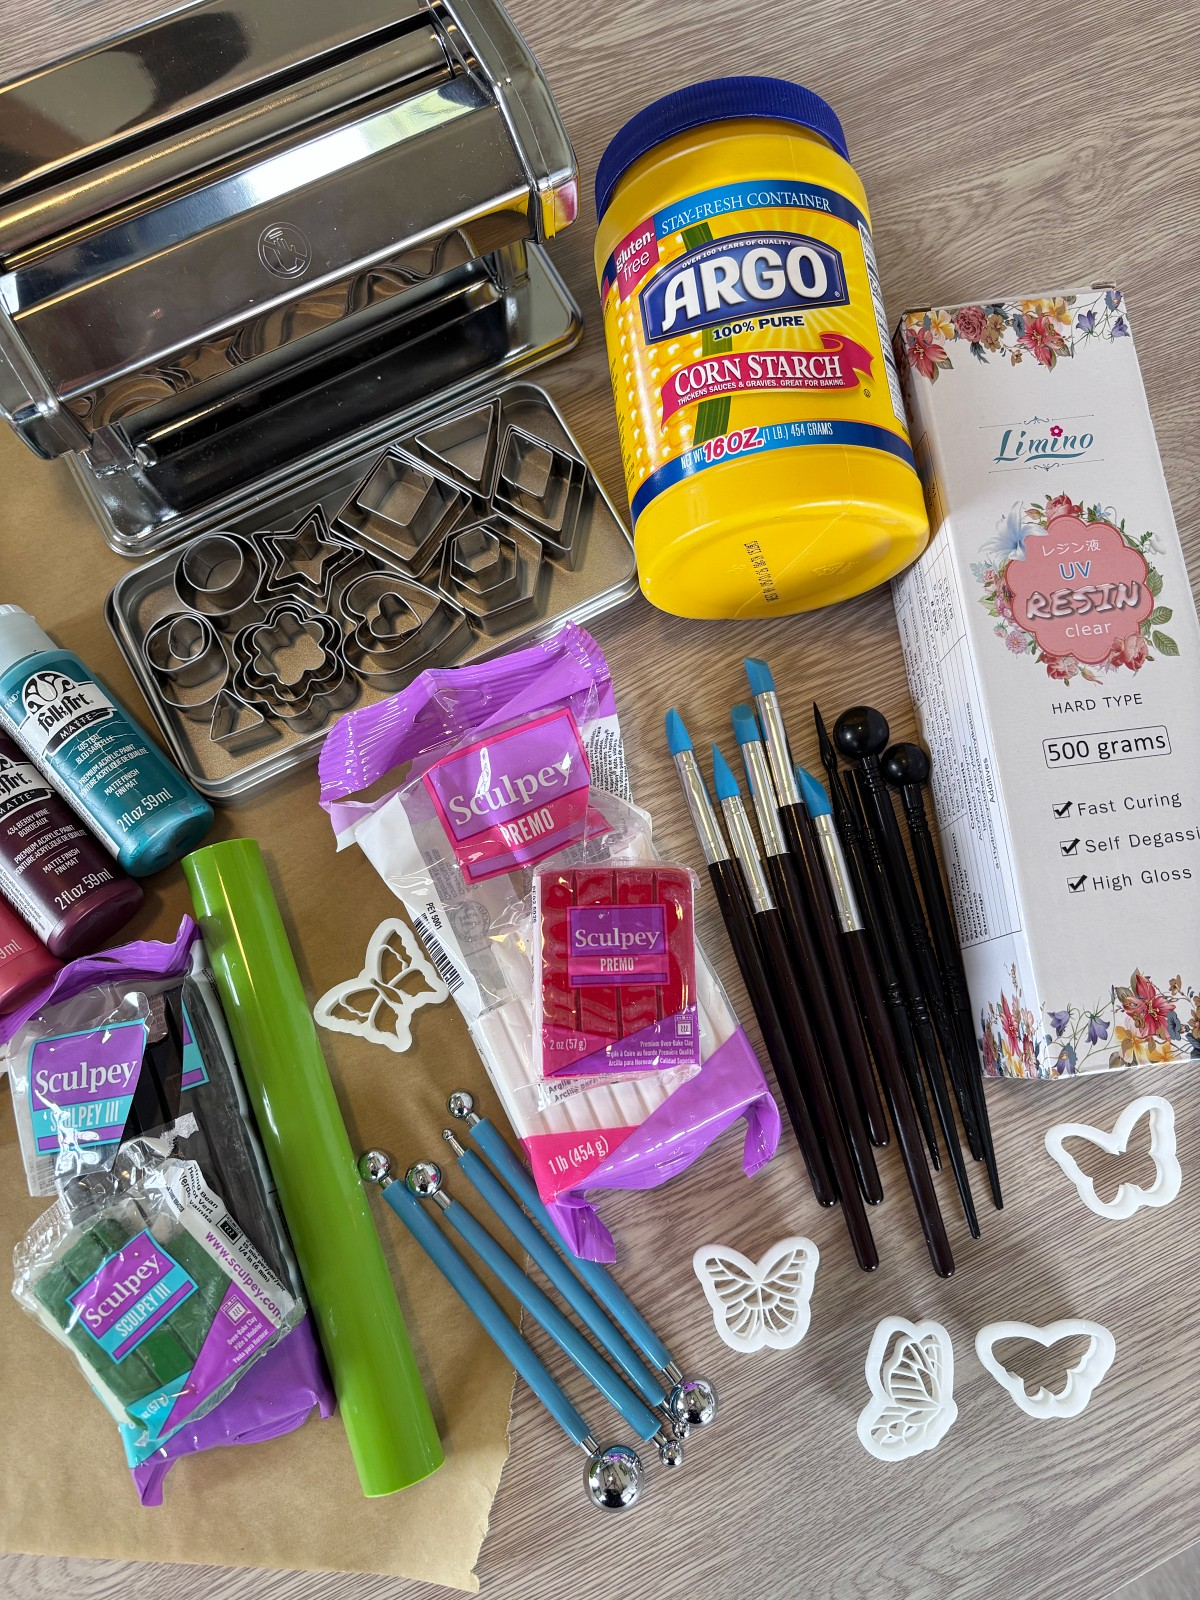
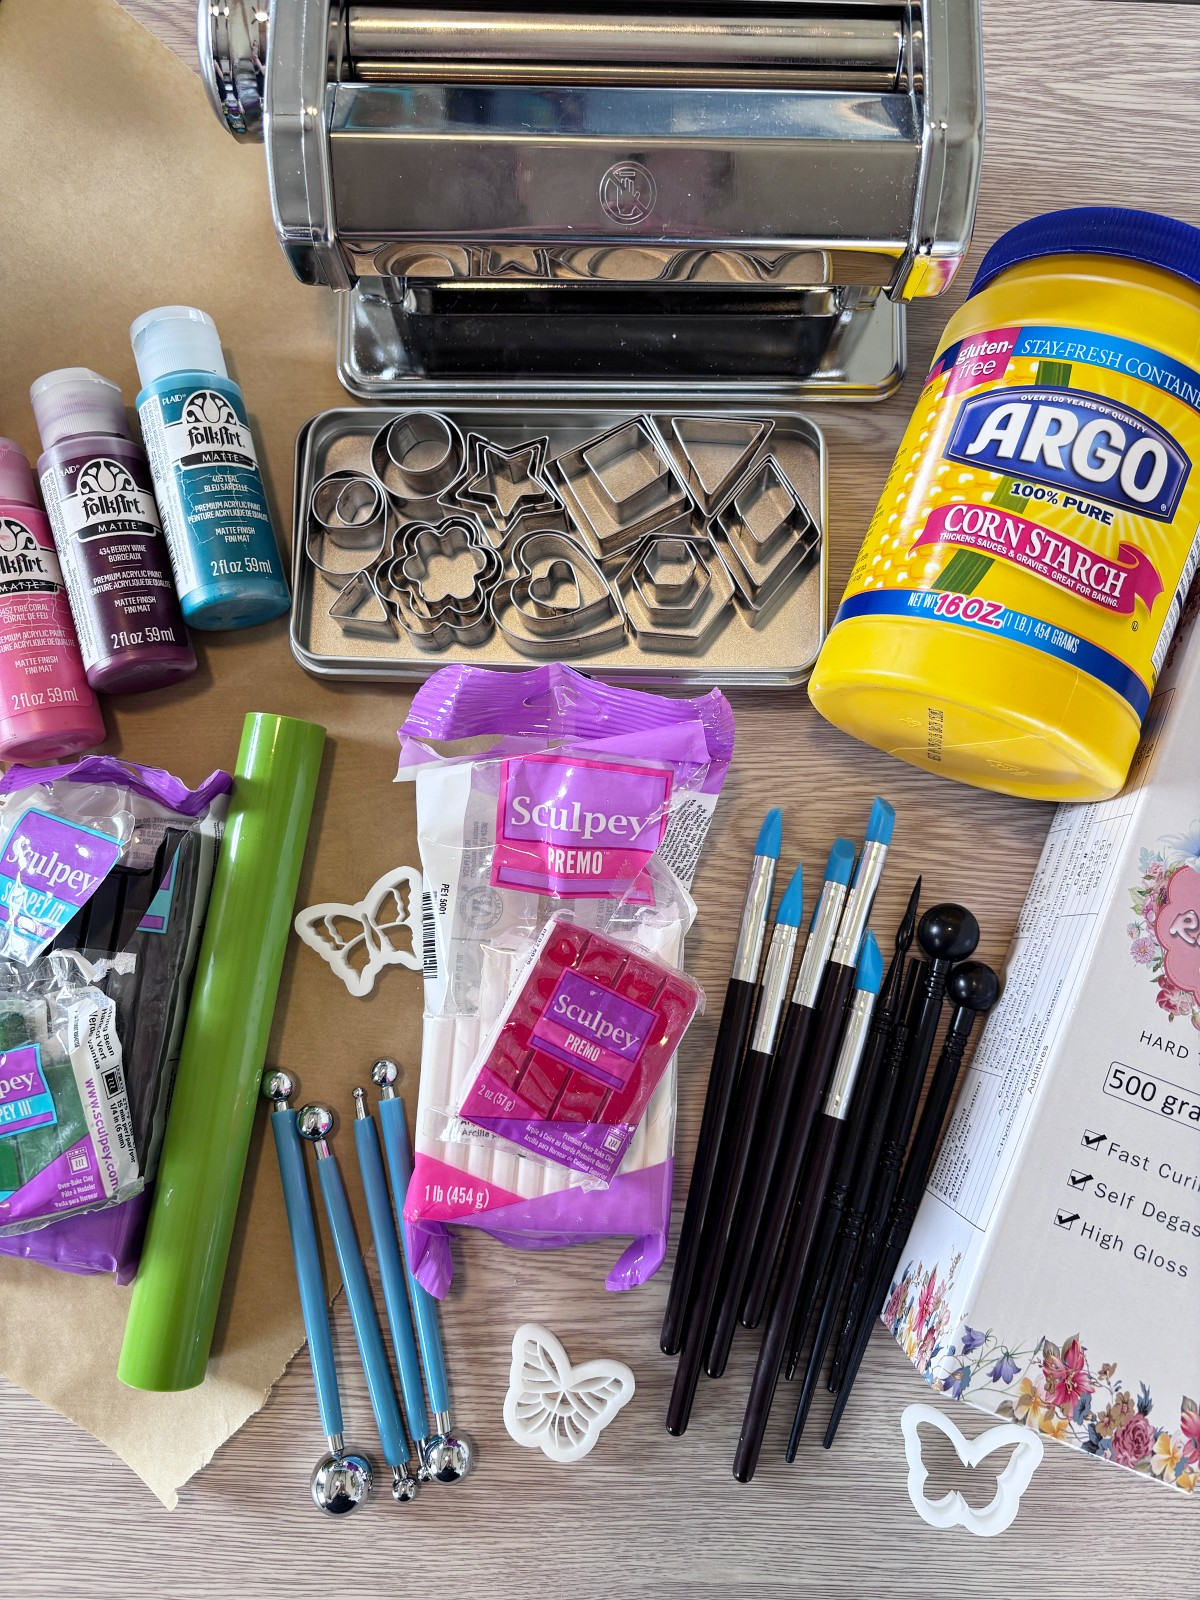
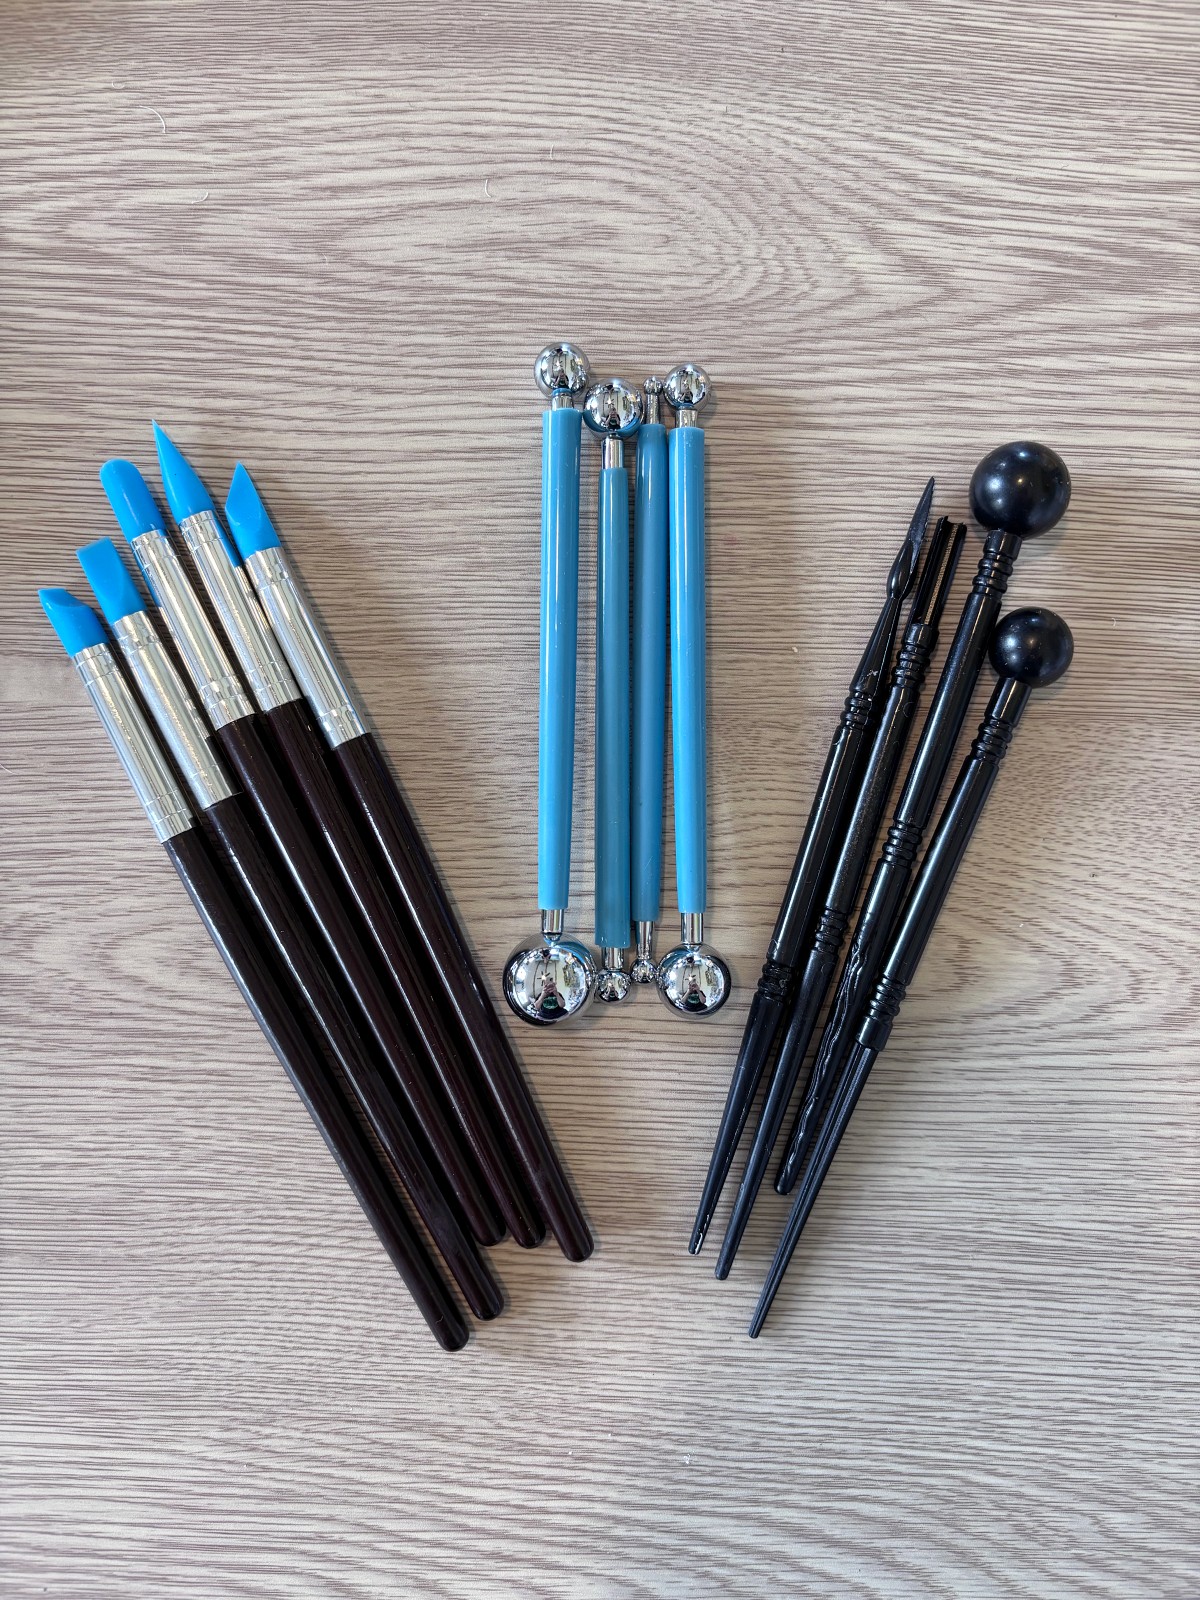
In all honesty, the best tool for molding and sculpting polymer clay is your own hands. When making clay charms I always start by sculpting with my hands. You don’t need anything fancy to start crafting with Sculpey. I do however rely on a few key tools to help me clean up any small details or corners. The best beginner clay tool kit that I have used for years includes my favorite rubber pens, plastic stylus texture tools, and metal ball stylus tools.
The rubber pens are a vital tool for me when making my clay charms. They help me smooth out the clay without leaving finger prints. They also help me reach in between smaller crevices, such as between the feet of my clay cat charms, or around the delicate thin ears of my dog charms. I also like to use these tools to press details onto my slab earrings, such as leaves of a flower, or different shapes to create a pattern. These are definitely my go to tools when making anything with polymer clay.
The plastic stylus tools are great for adding texture to my clay projects. They are very versatile, as I use both ends. The carving and pressing tools on top, as well as the pointed textured ends, when molding my polymer clay creations. I like to use them to create and add interesting shapes to my smaller clay beads.
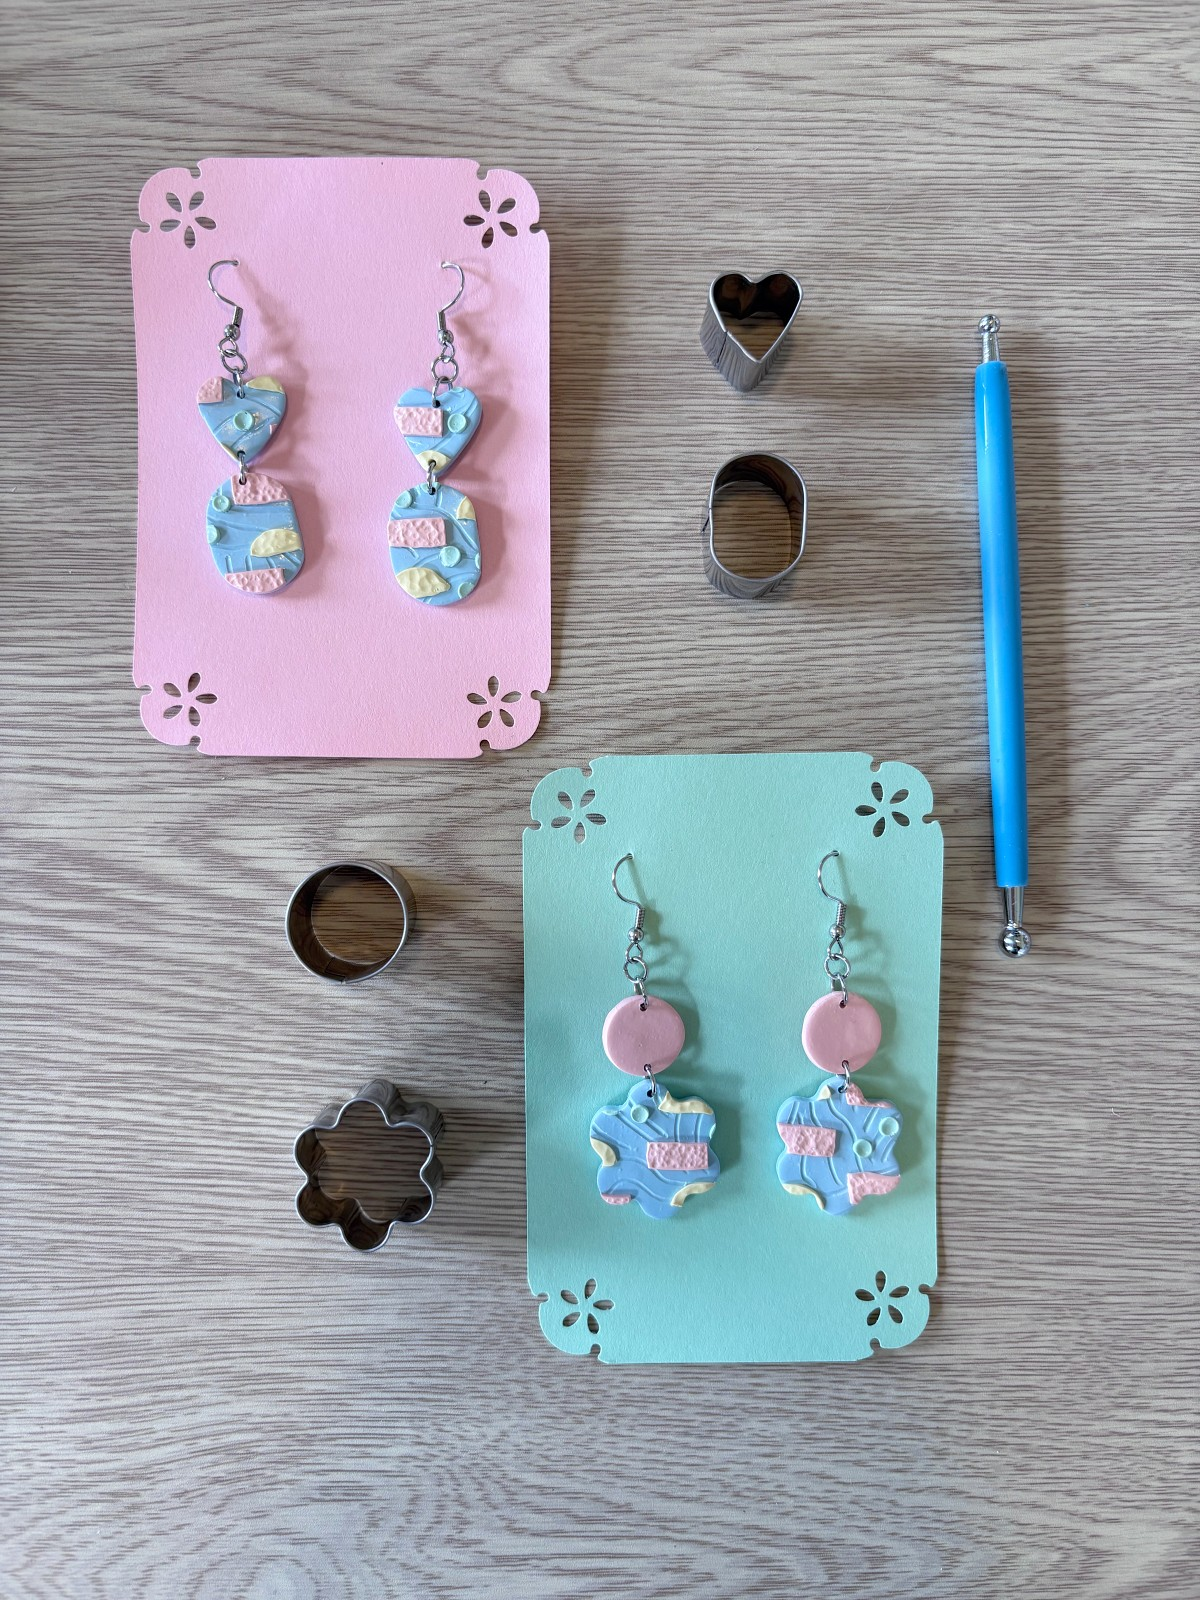
Lastly, the metal ball stylus is perfect for pressing down different shapes onto my clay slab earrings. They are heavy enough that you don’t need to apply very much pressure to mold the clay. This makes it very easy to create texture in the clay. I have used the small ball stylus many times when making fruit beads, including strawberries and oranges. This gives them a more organic looking dimpled surface. It is so much fun to experiment and play around with these clay tools.
Clay cutting tools
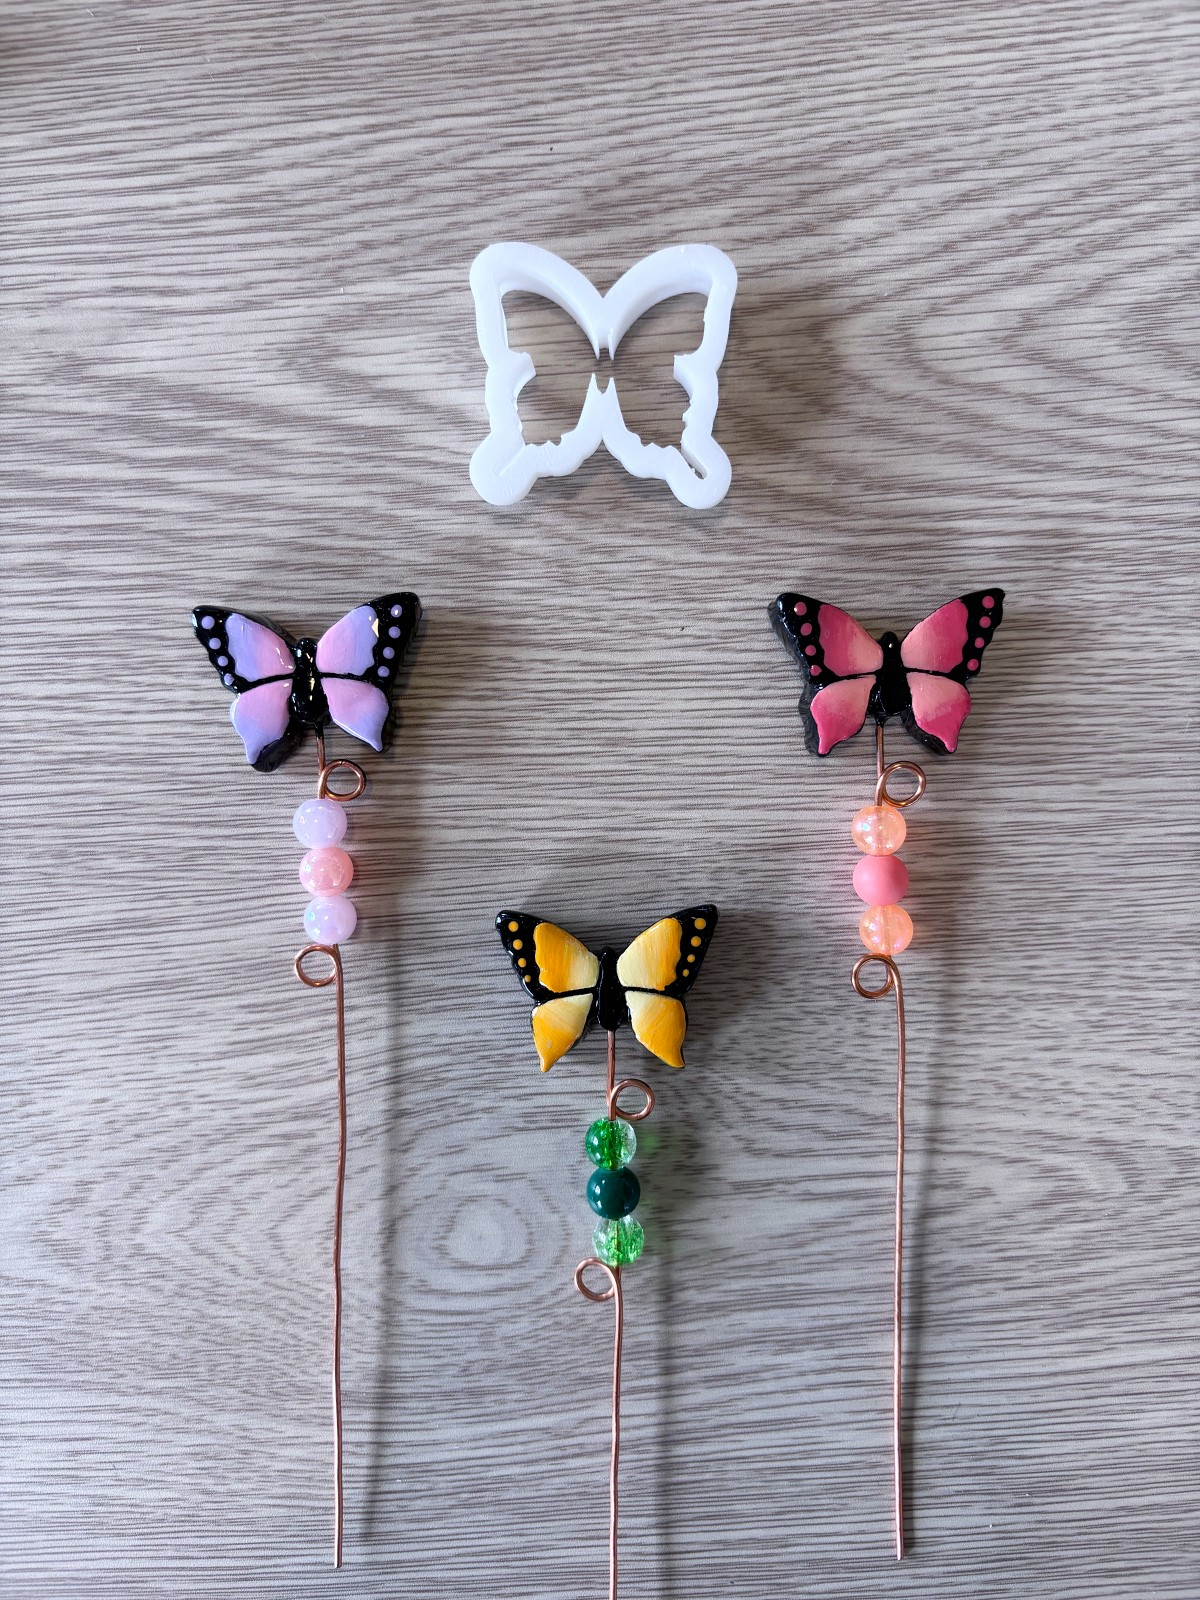
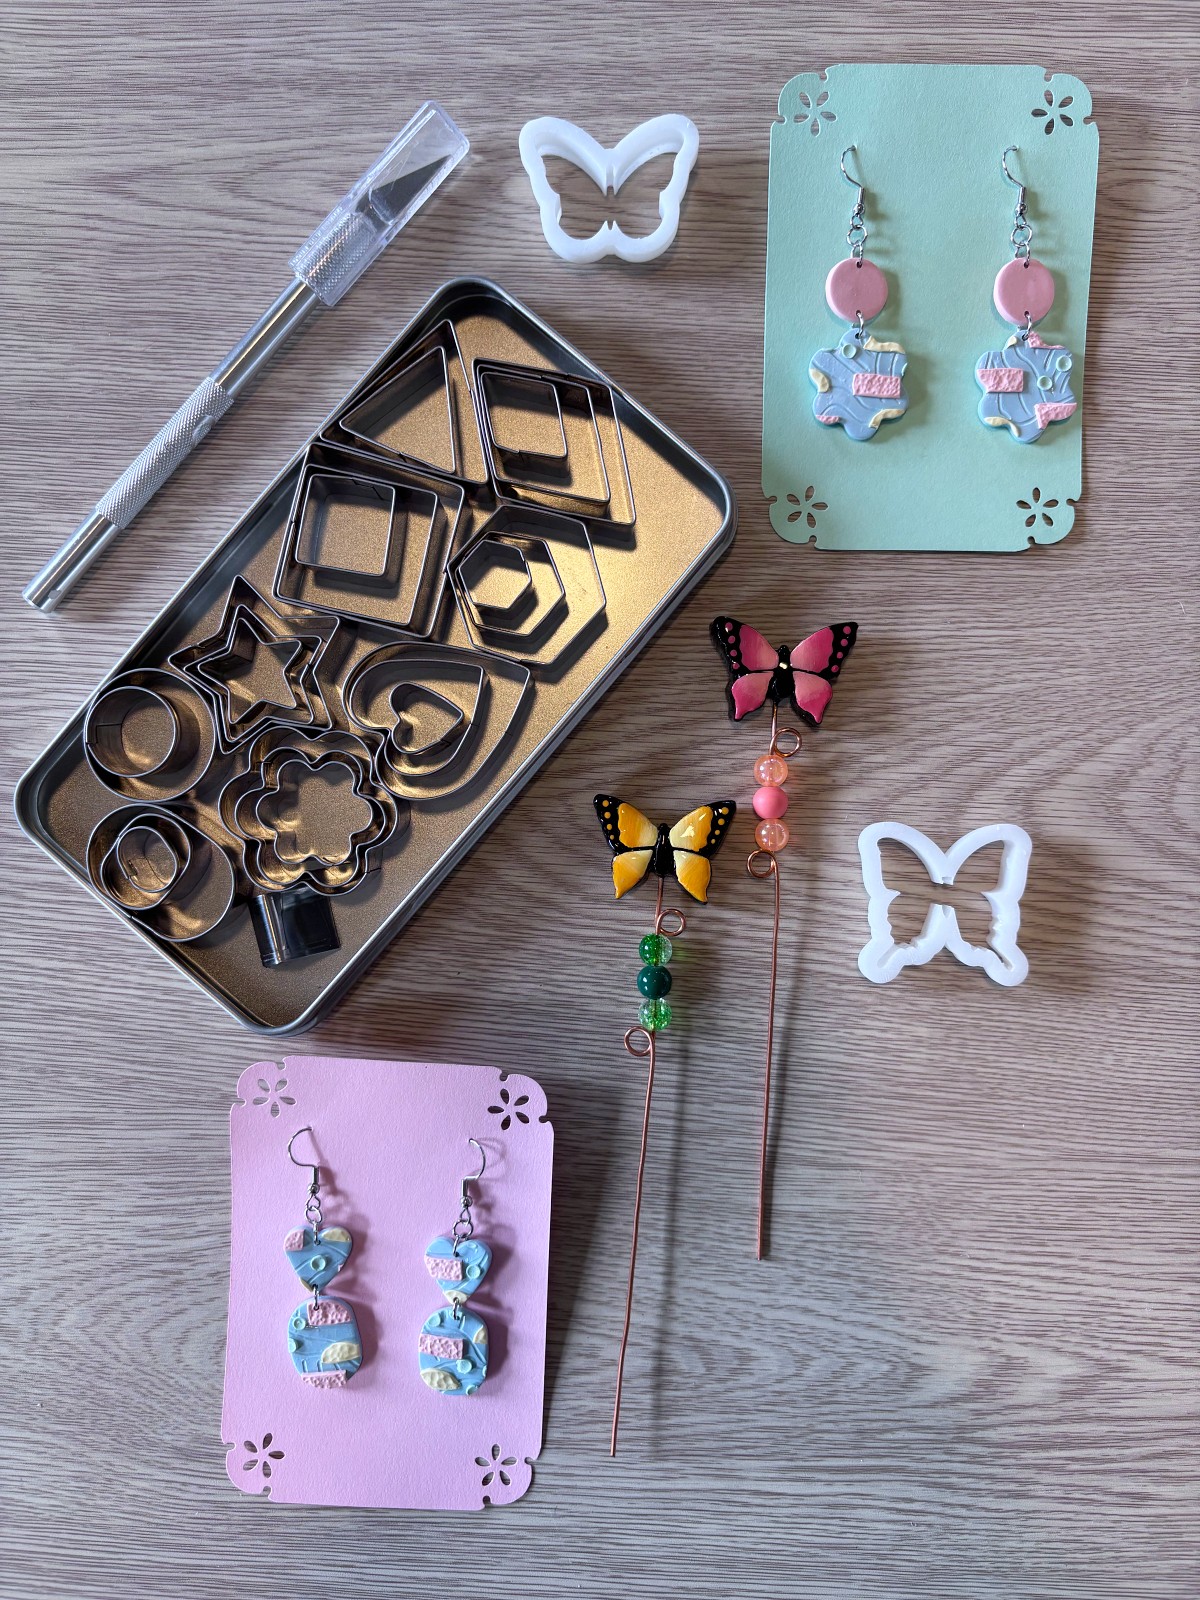
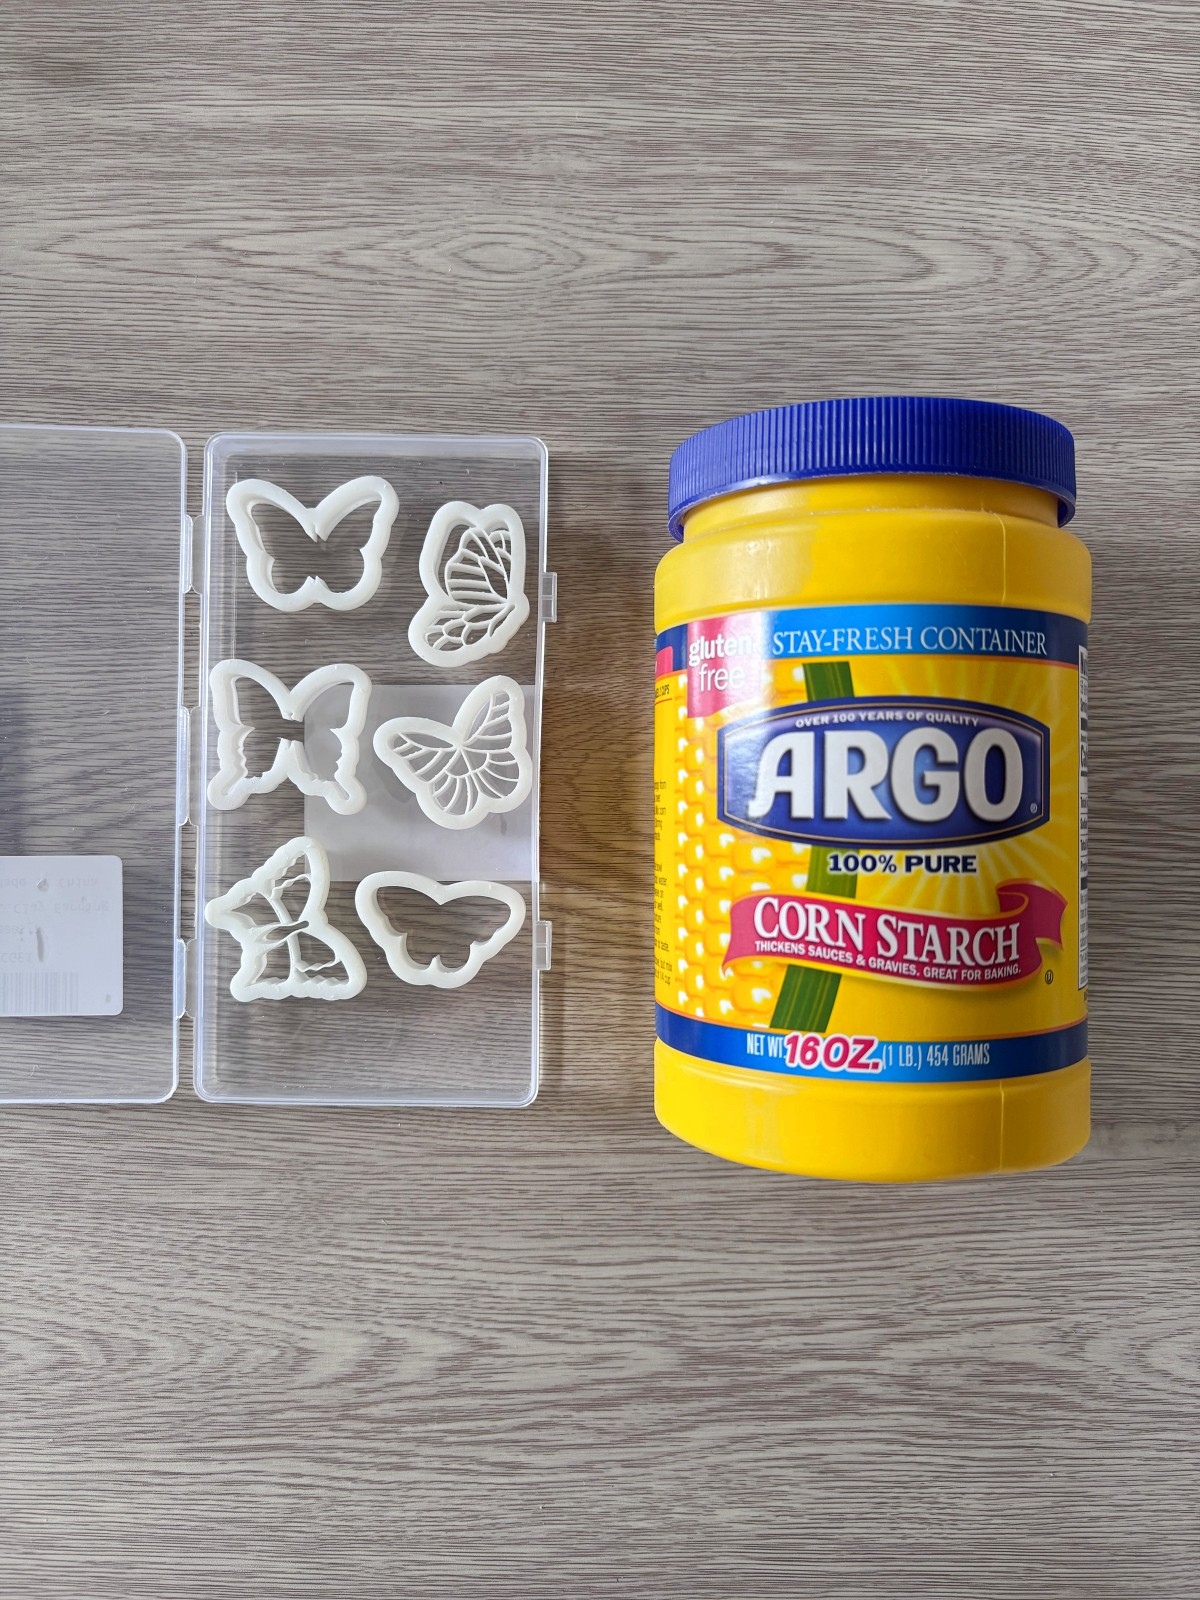
There are so many different clay cutters out there, it can get overwhelming. As I have said, I like to hand sculpt my clay charms, but clay cutters are a great tool when making things like earrings, keychains, necklaces, and more. I used these adorable butterfly clay cutters to make both butterfly earrings, and butterfly plant sticks. Pro tip, when using clay cutters dip them in corn starch first to help the cutter not stick to the clay. Also, if you want the piece you are cutting out to have a more beveled look, try placing a layer of plastic wrap down over the clay before using the cutter.
My butterfly plant sticks had to be quite thick so that the wire stick could be placed in them. For this project the clay cutter was used as a stencil that I could cut around with an X-Acto Knife. These craft knives work great for cutting clay but are extremely sharp, so use at your own discretion.
Another great option for cutting shapes out of polymer clay are cookie cutters. That’s right, cookie cutters work like a charm! I love using this set of mini cookie cutters to make some fun geometric earrings. You could also look around your local thrift store and find fun cookie cutters to make some earrings or coasters. The possibilities are endless.
Cleaning the clay
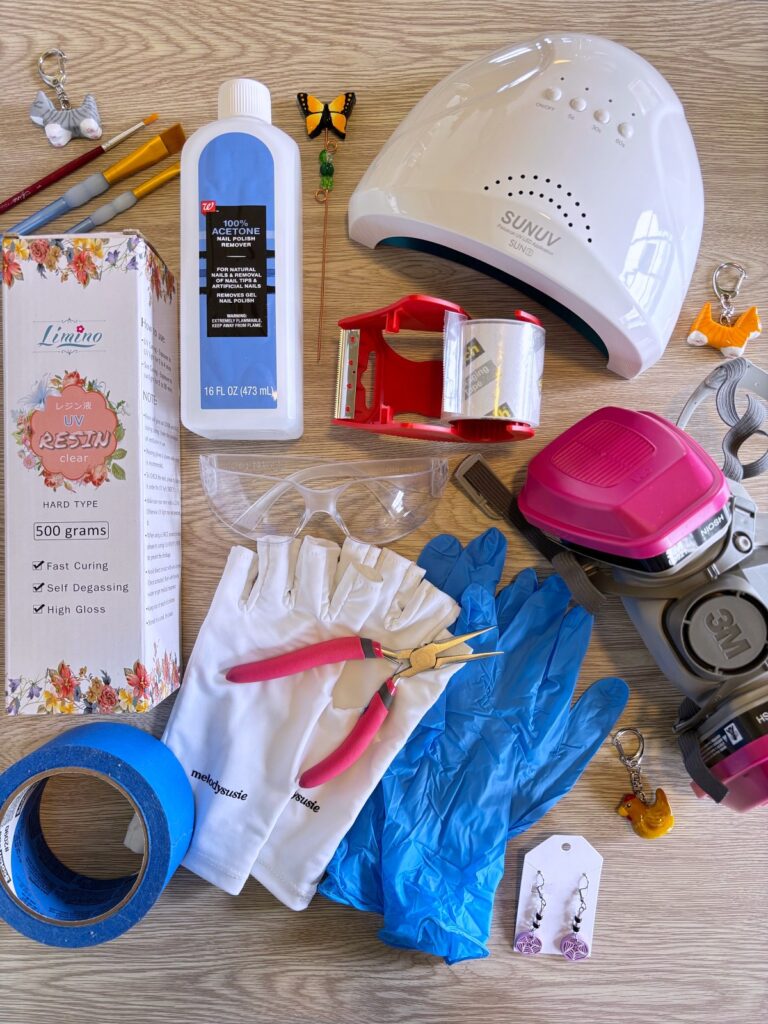
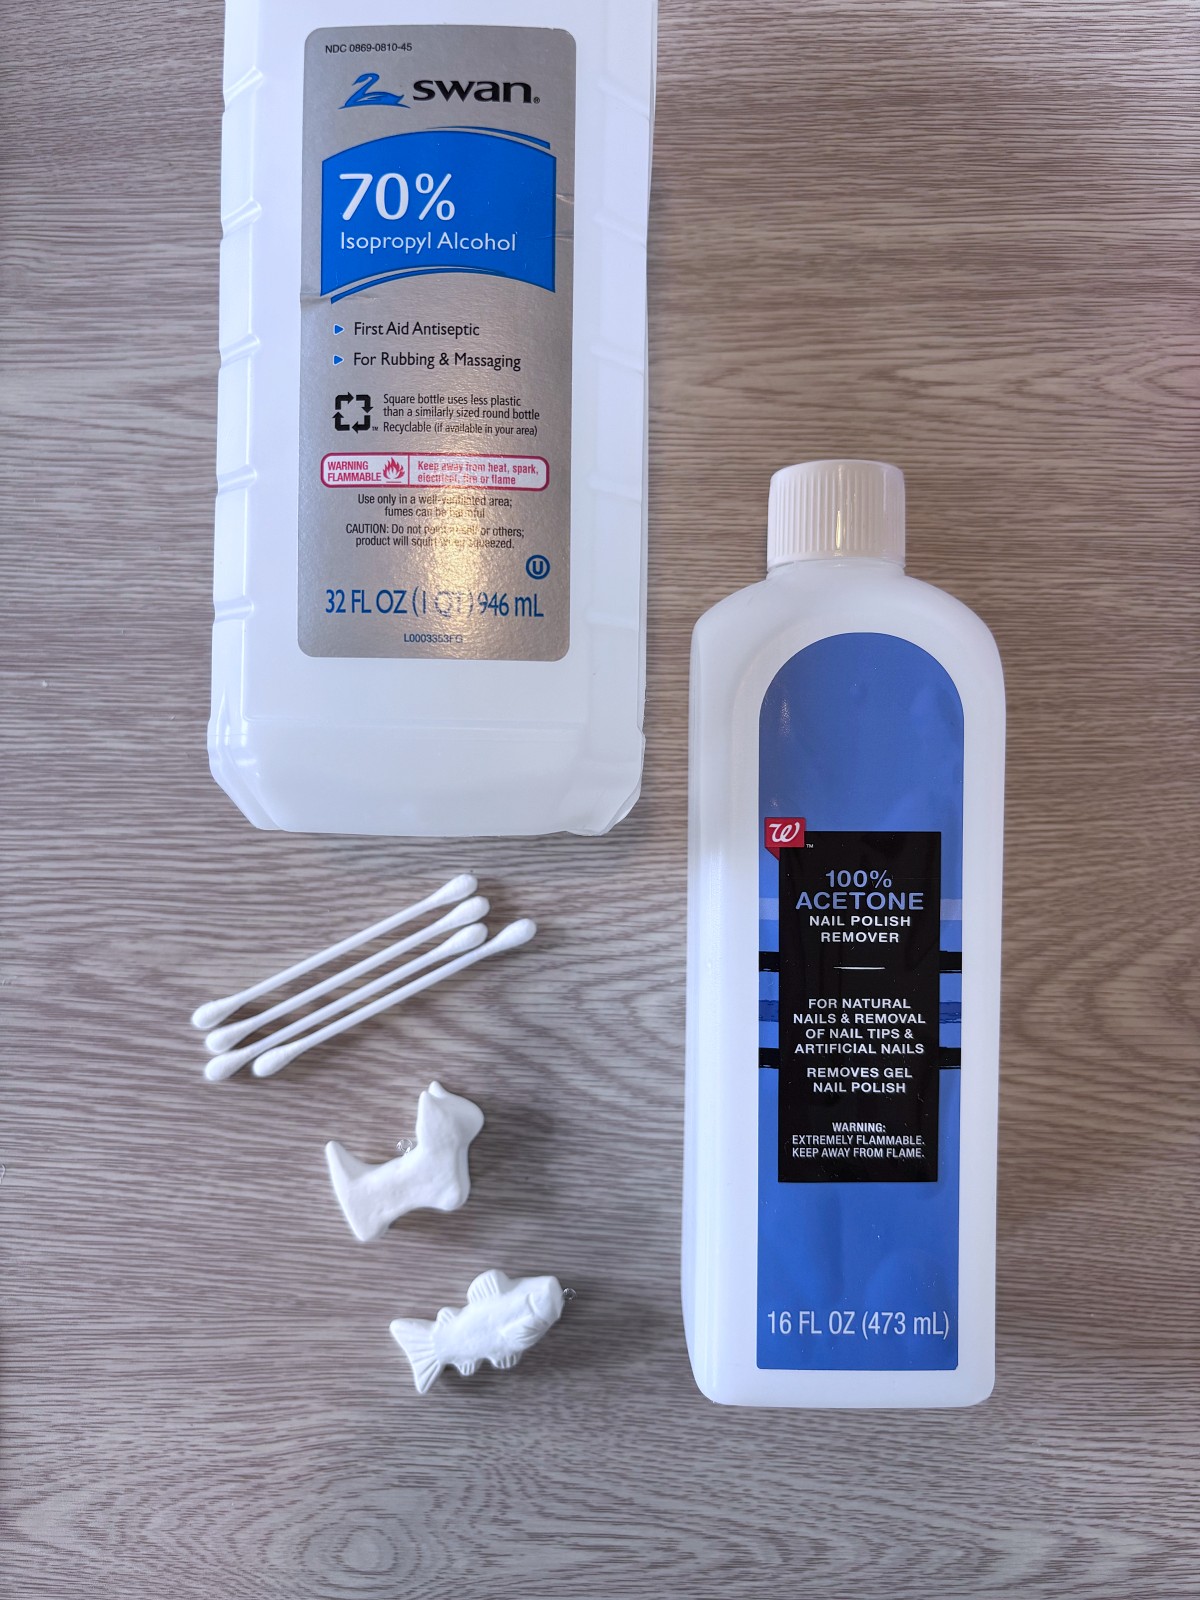
There are two important steps to cleaning your polymer clay projects. One is cleaning your clay pieces before you bake them, and the other is cleaning after they are baked. Before you bake your clay craft, after it is all smoothed, you can use a few cotton swabs soaked in rubbing alcohol to remove dust and smooth any fingerprints left in the clay. After the piece is baked, you can use 100% acetone to gently clean the surface before painting or sealing. However, if you are using colored clay, the acetone might remove a little of the color and rub off onto the cotton swab, so use with caution and a light hand.
Painting/decorating
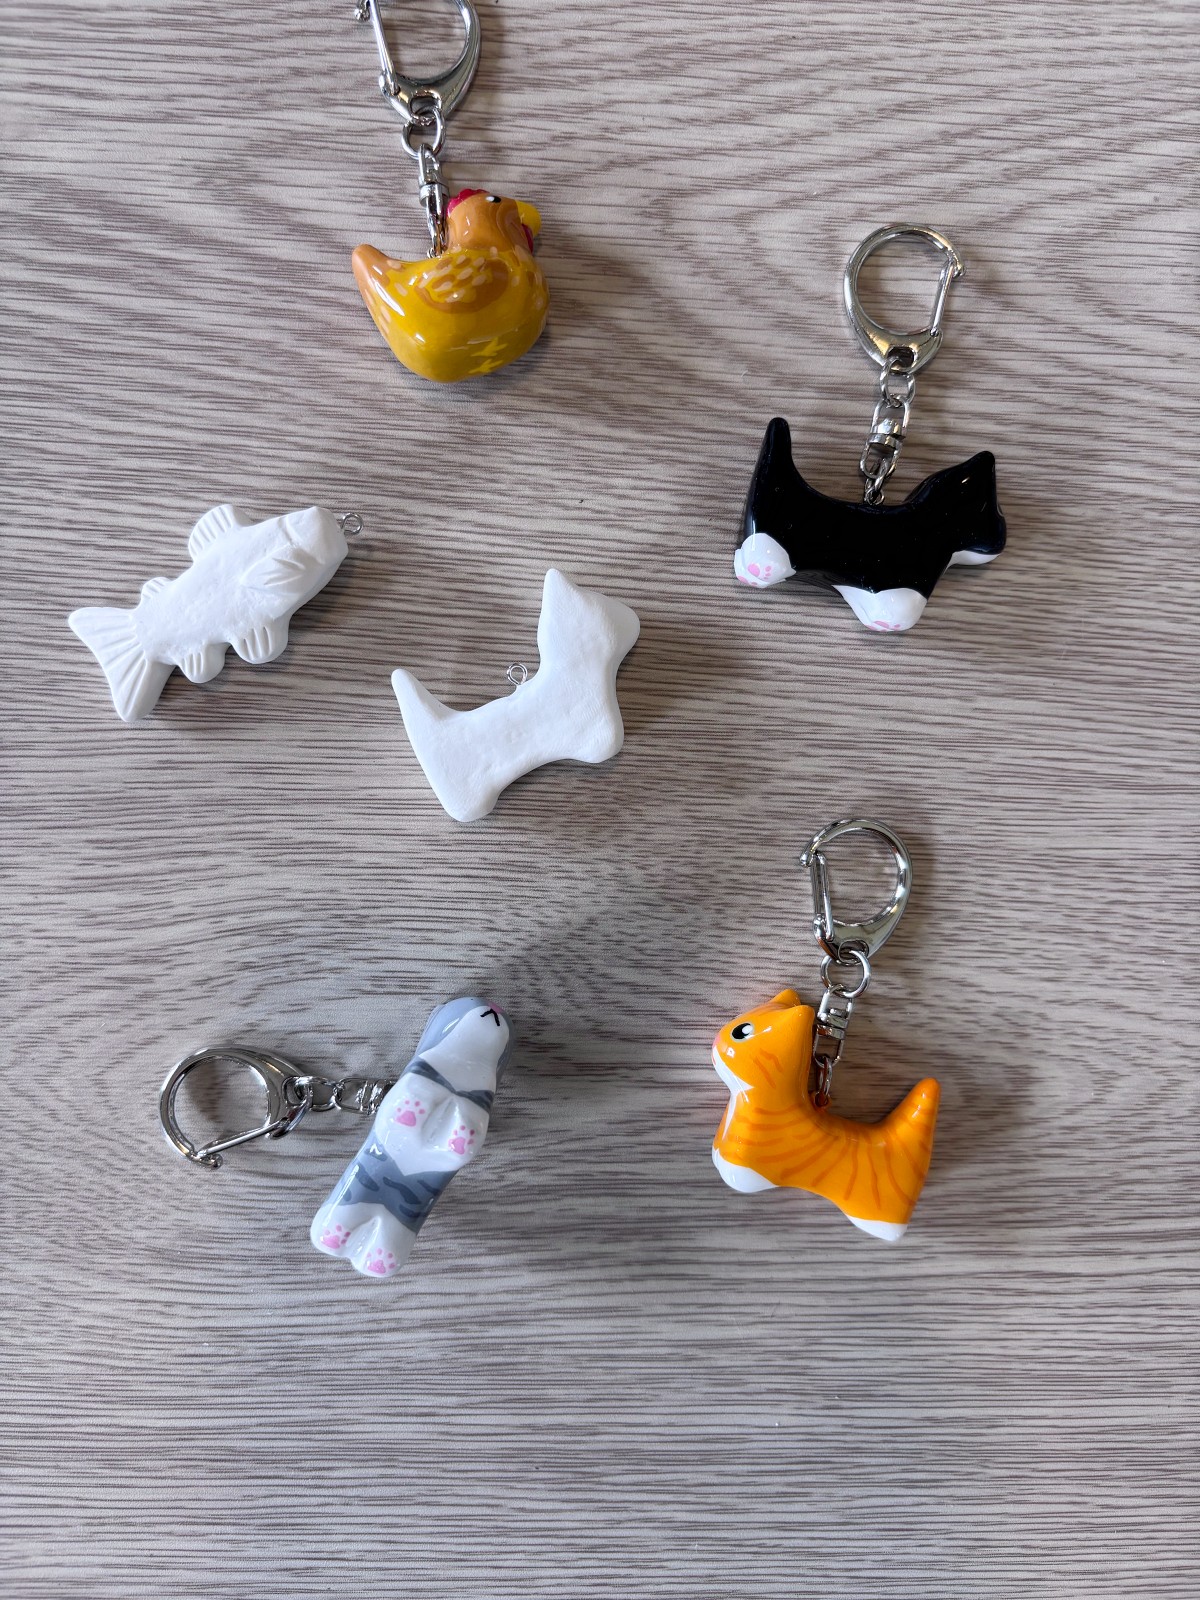
My favorite way to decorate my polymer clay charms is by painting them with acrylic craft paint after they’re baked. This way I save a lot of time by using white clay only for the base of my charms and painting whatever pattern I want on the top. This works especially well when making my clay cat charms. They have very small details including the stripes for the tabby cats, which would be very strenuous to make out of little strips of clay. It is a personal decision, but I really enjoy hand painting my clay charms.
The alternative of painting the clay is to use colored clay to create the details. I actually prefer this method when crafting slab earrings. This is where you layer different shapes of clay to form a pattern, such as flowers or geometric shapes, onto a base slab of clay then cut out different shapes to use in earrings or other jewelry. I think using colored clay for the details here helps create a clean finished look. Adding three dimensional elements to the jewelry.

Baking Polymer Clay (tips and tricks)
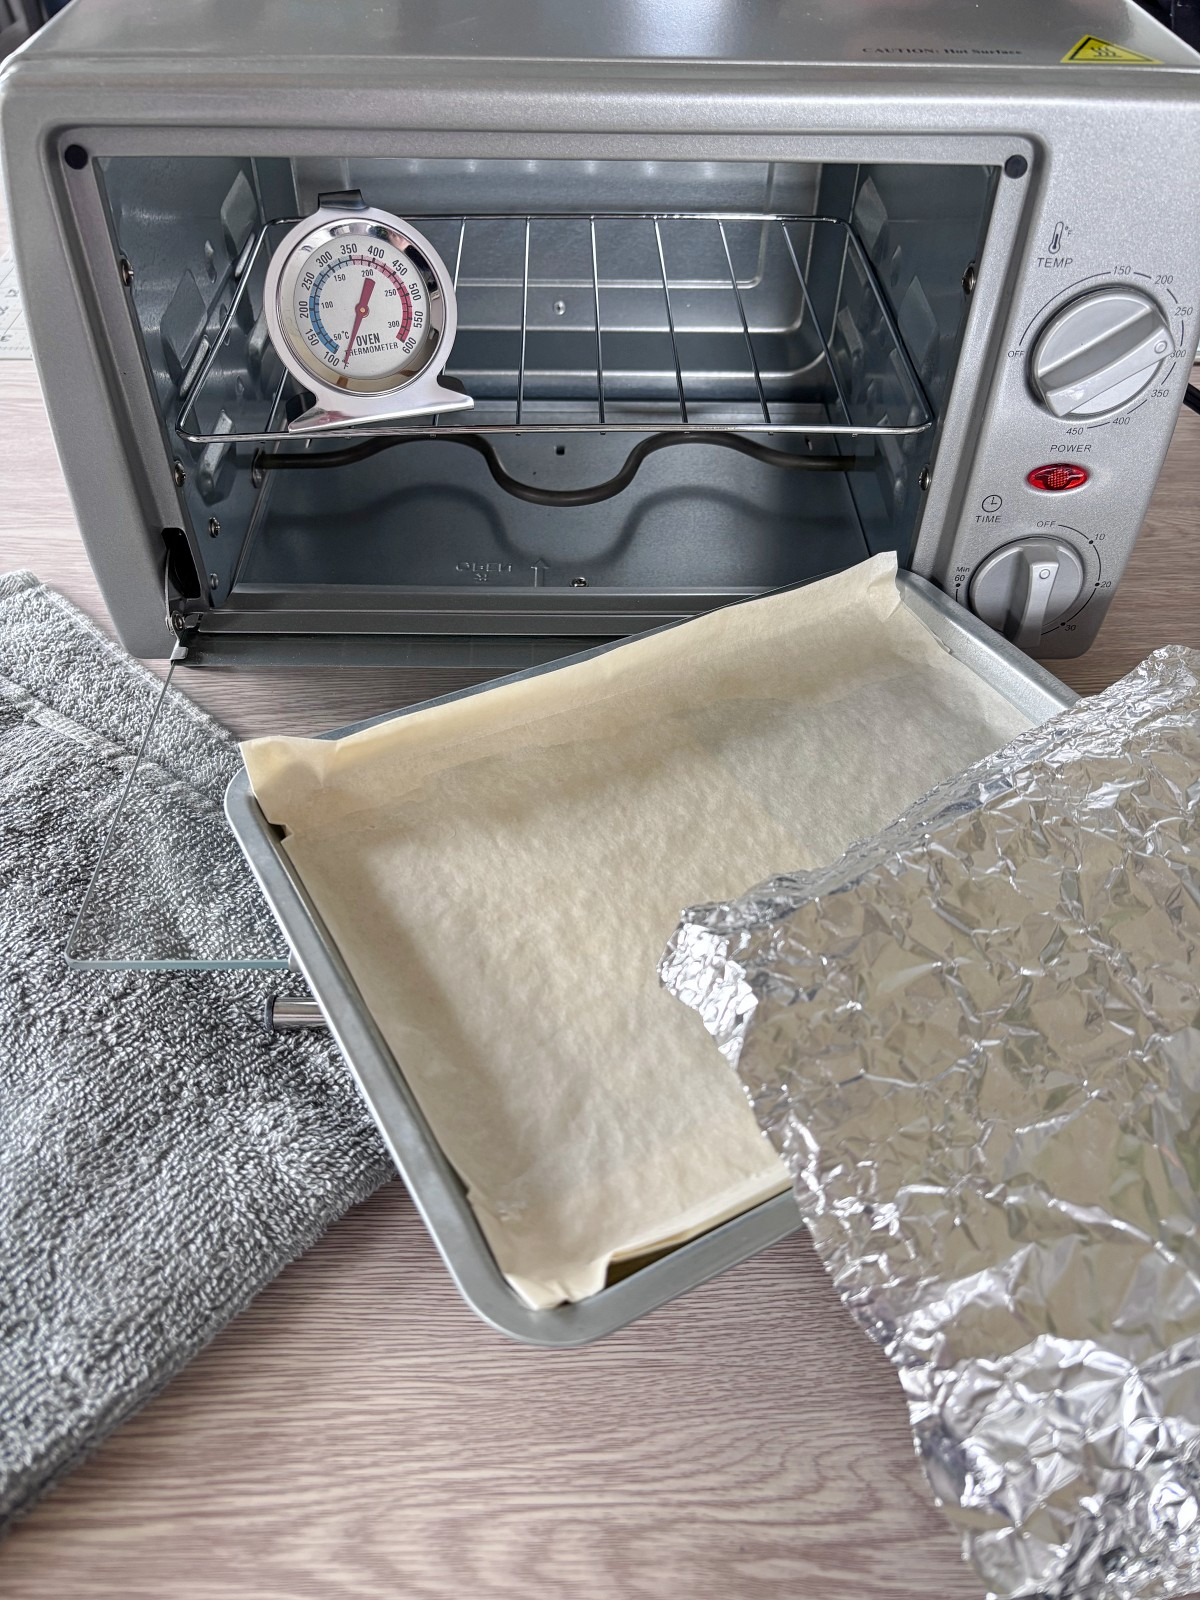
Every type of polymer clay has its own specific baking directions including time and temperature. I always follow the directions on my clays packaging. You can always use a standard oven to bake your polymer clay projects. I personally like to use a crafting toaster oven I picked up from my local craft store. To make sure the oven is at the right temperature I use an oven thermometer.
I have burnt a few polymer clay crafts in my day. I want to share a tip that helped me never burn my crafts again. First, always set a timer on your phone as well as the oven. Second, place parchment paper on the pan before putting clay pieces down. Most importantly, use aluminum foil to make a little tent over your clay when baking. This really has helped me be able to bake certain projects longer without burning them. I also always bake my pieces on the middle rack and let them cool on the pan after baking.
Sealing Polymer Clay Projects
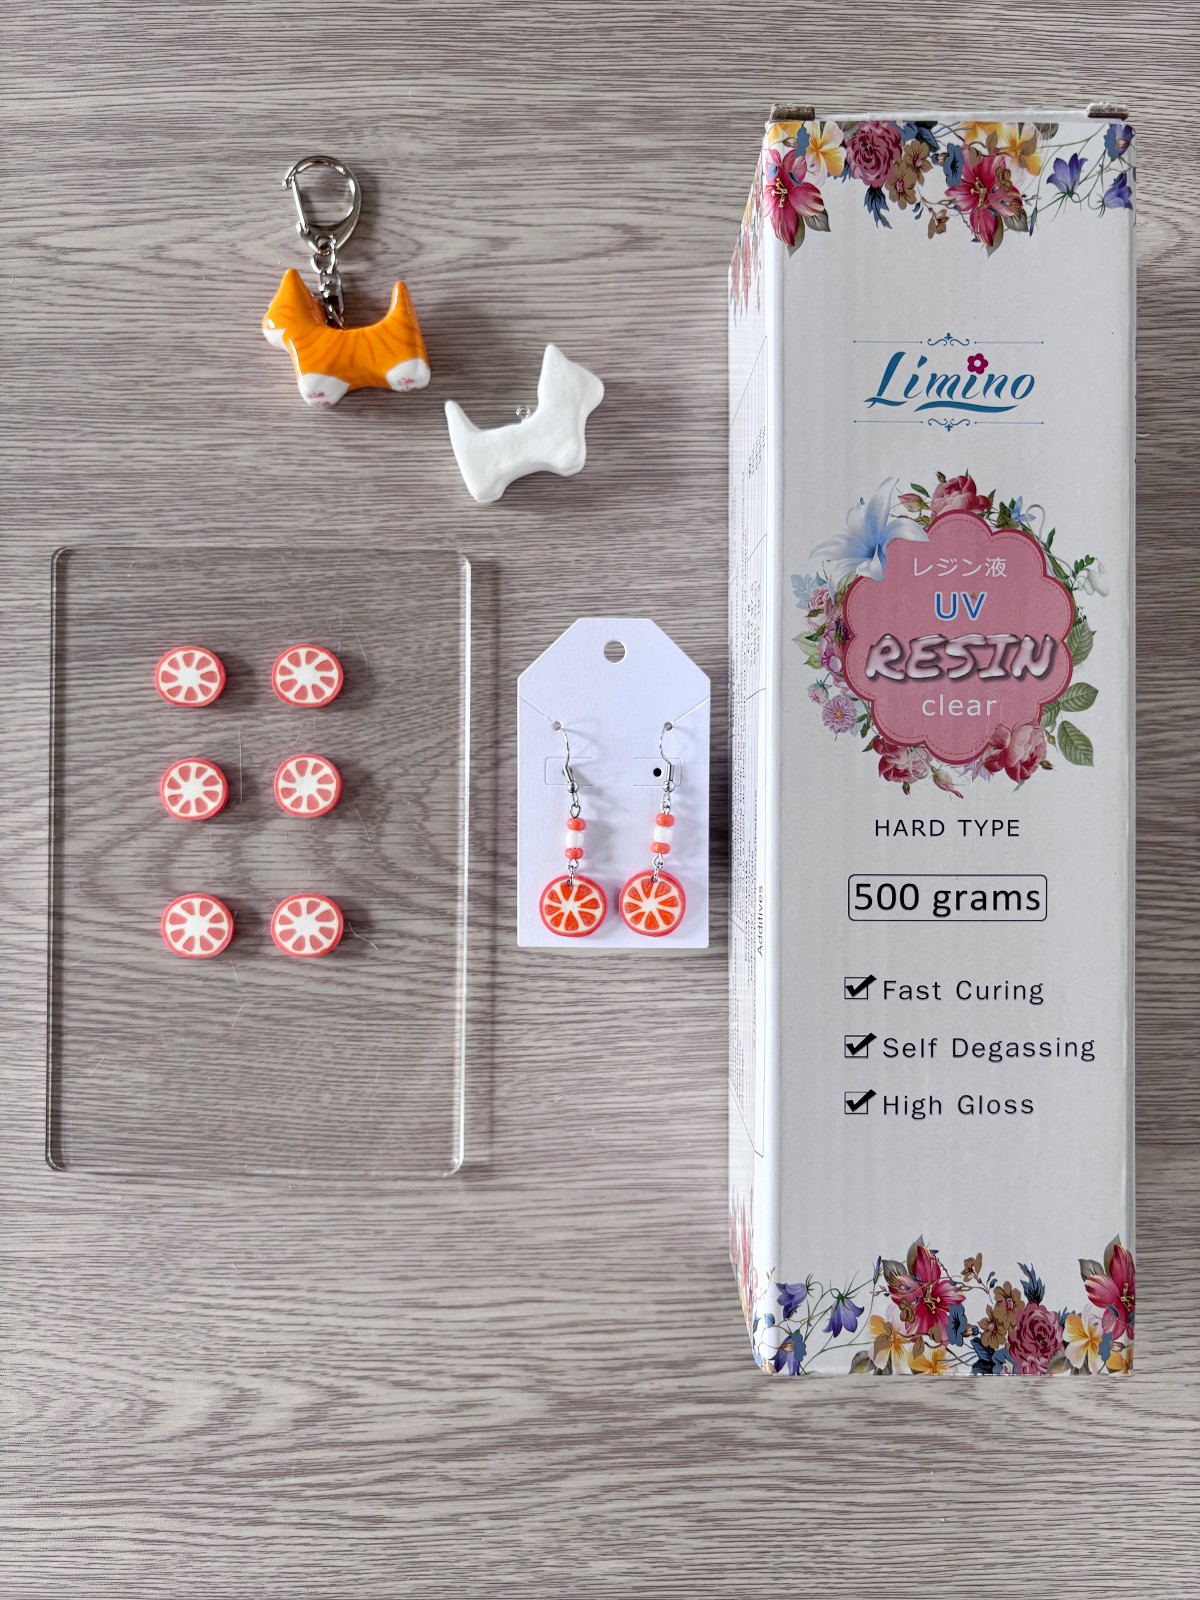
There are two ways I personally seal my polymer clay projects. I either leave them as they are after baking, or I cover them in a layer of UV resin. There are reasons to do both. When I use colored clay to build and decorate slab earrings, I like to leave the 3D elements as their clay, matte finish. Polymer clay seals itself after baking, so you do not have to seal it further if you don’t want to. When I decorate polymer clay projects with acrylic paint, I use UV resin to seal and protect them from the elements and help them last longer.
I love the glossy look of UV resin on my clay charms and cane earrings. If you want to know more about how to use UV resin with polymer clay, check out our beginners guide to using UV resin with polymer clay. You could also choose to varnish your clay pieces, but this method will not be as shiny of a finish. I would suggest experimenting with a few sealing options and choosing your favorite.
Final thoughts
Polymer clay is such a fun and versatile craft medium. You can get creative by crafting jewelry, charms, coasters, Keycaps, and so much more. Whether you want to craft with polymer clay as a hobby or are looking to create a handmade art business, polymer clay makes a great medium to truly make some beautiful crafts. The number one seller for myself at art markets has always been my clay charms and earrings. This beginners guide to polymer clay is really a collection of my knowledge from working with polymer clay over the past few years and my favorite tools to use with the medium, but you can always start very simply with clay, your hands, and an oven. I want everyone to feel confident enough to just get out there and let your creativity fly. Good luck and happy crafting.