Beginners guide to using UV Resin with polymer clay. Resin 101
If you are interested in using UV resin with polymer clay then you are in the right place. Resin is a great way to seal polymer clay projects and adds a nice professional look to your crafts, especially if you are thinking of selling them online or at art markets.

This is a beginners guide to using UV resin. I want to share with you how I personally use resin to seal my polymer clay projects. This includes all the products I use, safety equipment, tips and tricks, and how I clean up. It is very important to understand how to be safe using resin before jumping into a project. This is not a strict guide that you have to follow but I hope by sharing my knowledge and experience I can help you take the right steps to using UV resin safely.
*This post contains affiliate links meaning I get a commission if you purchase through my links, at no extra cost to you.
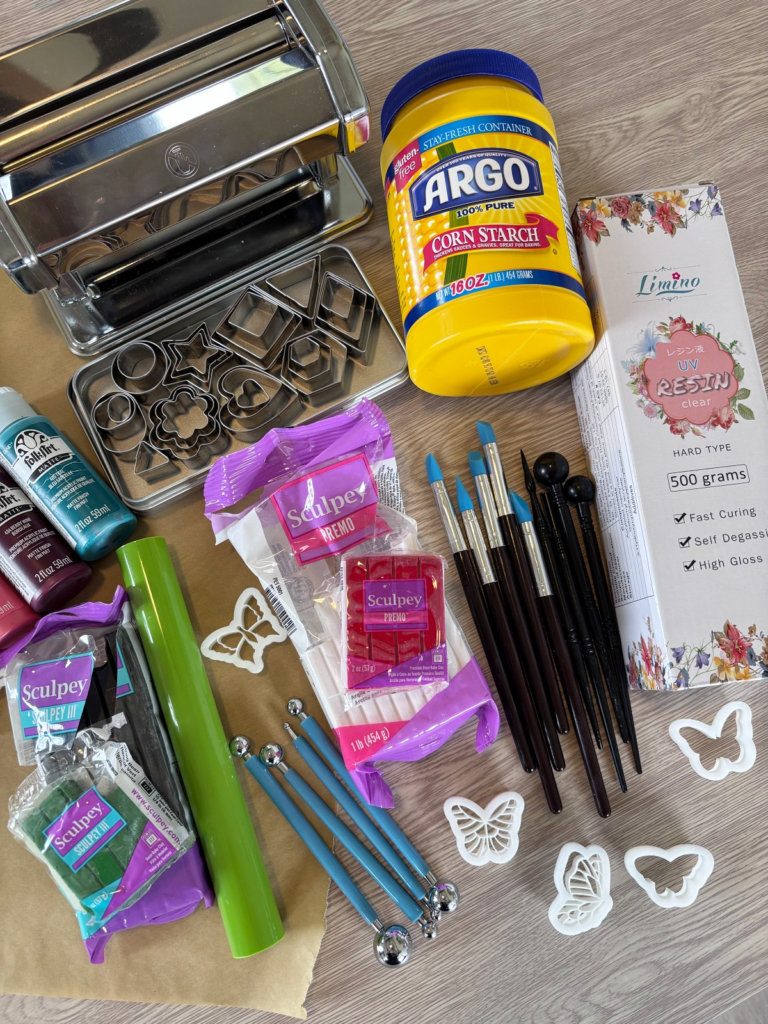
Everything I Use, Resin 101
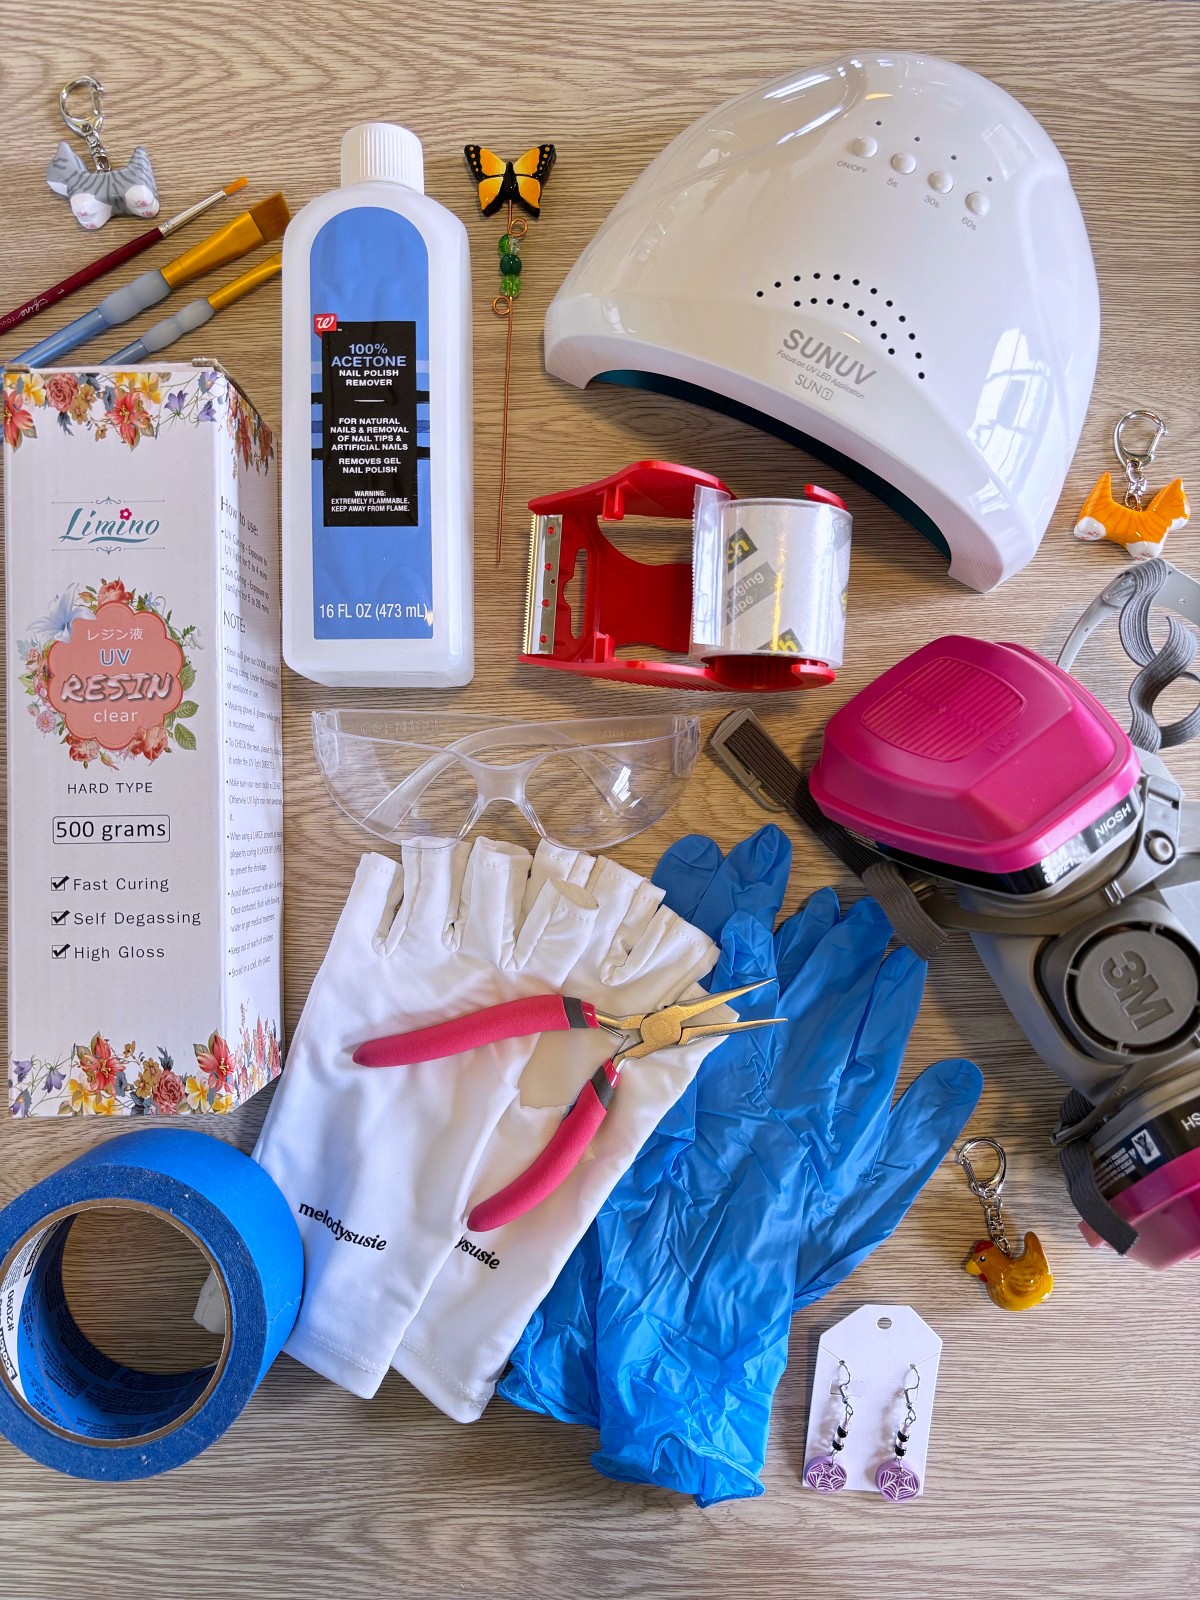
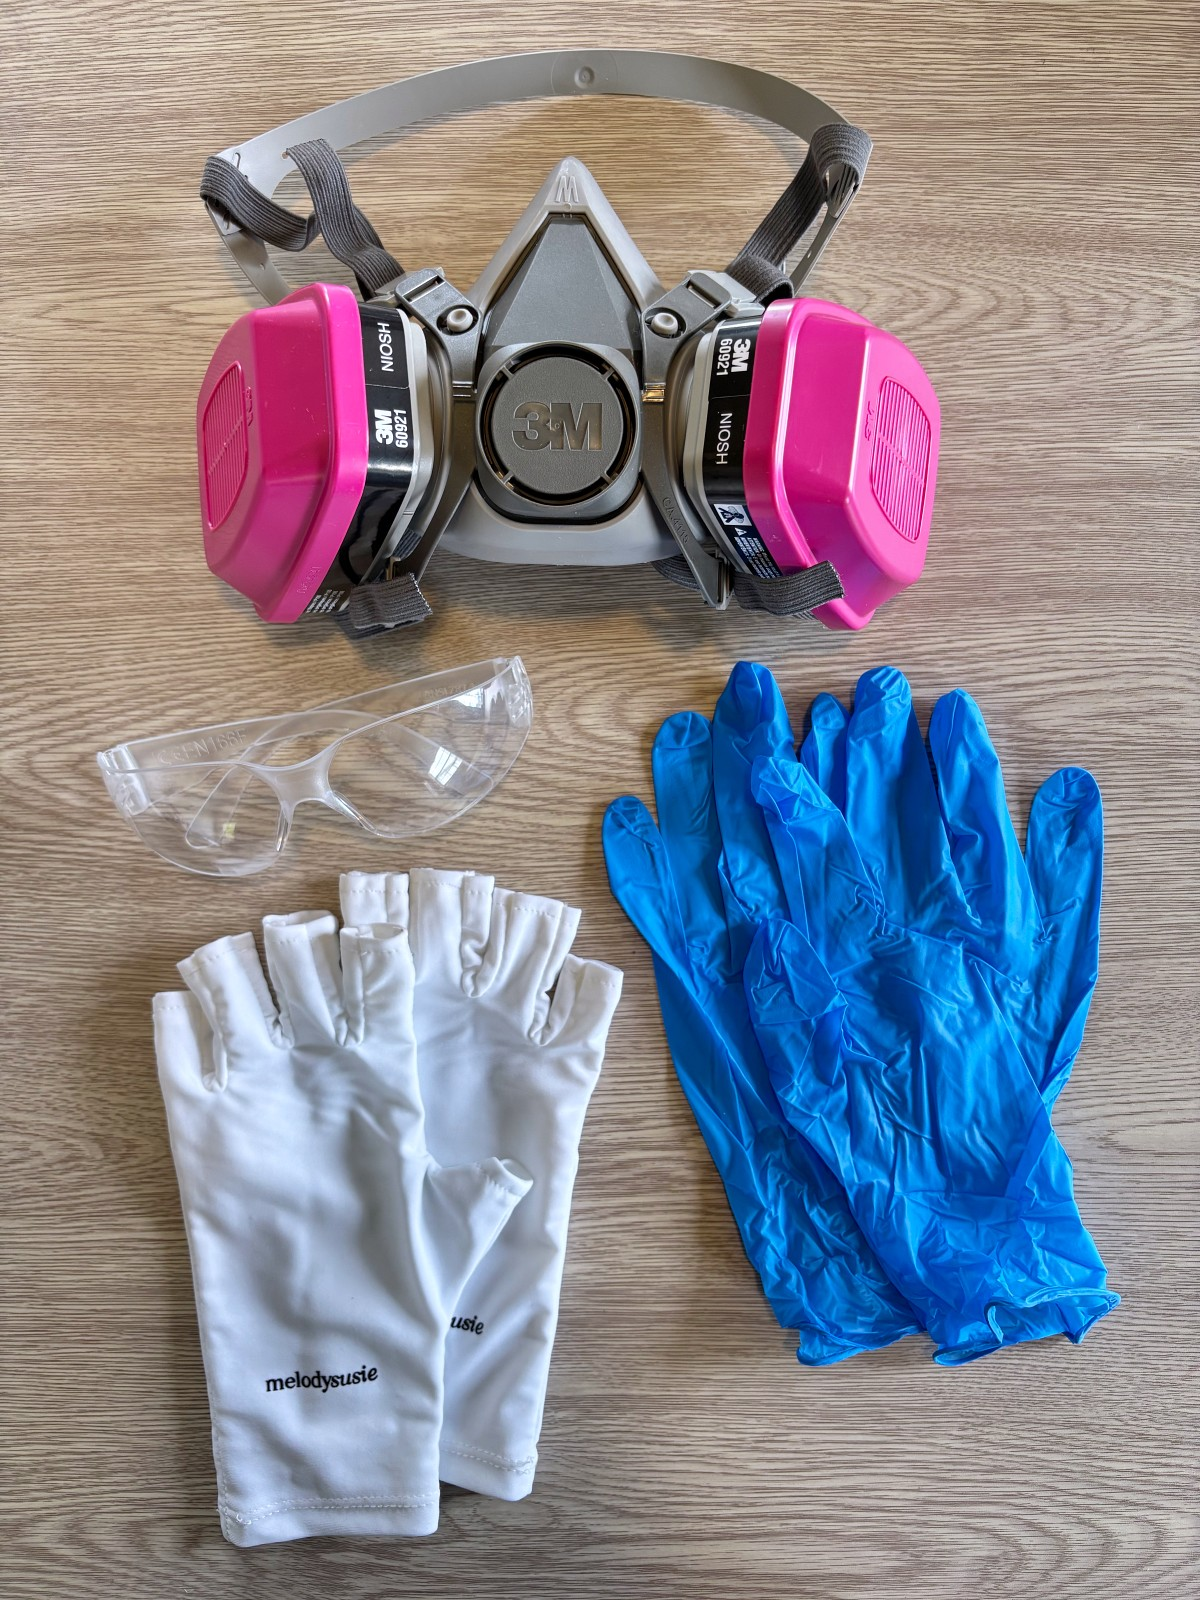
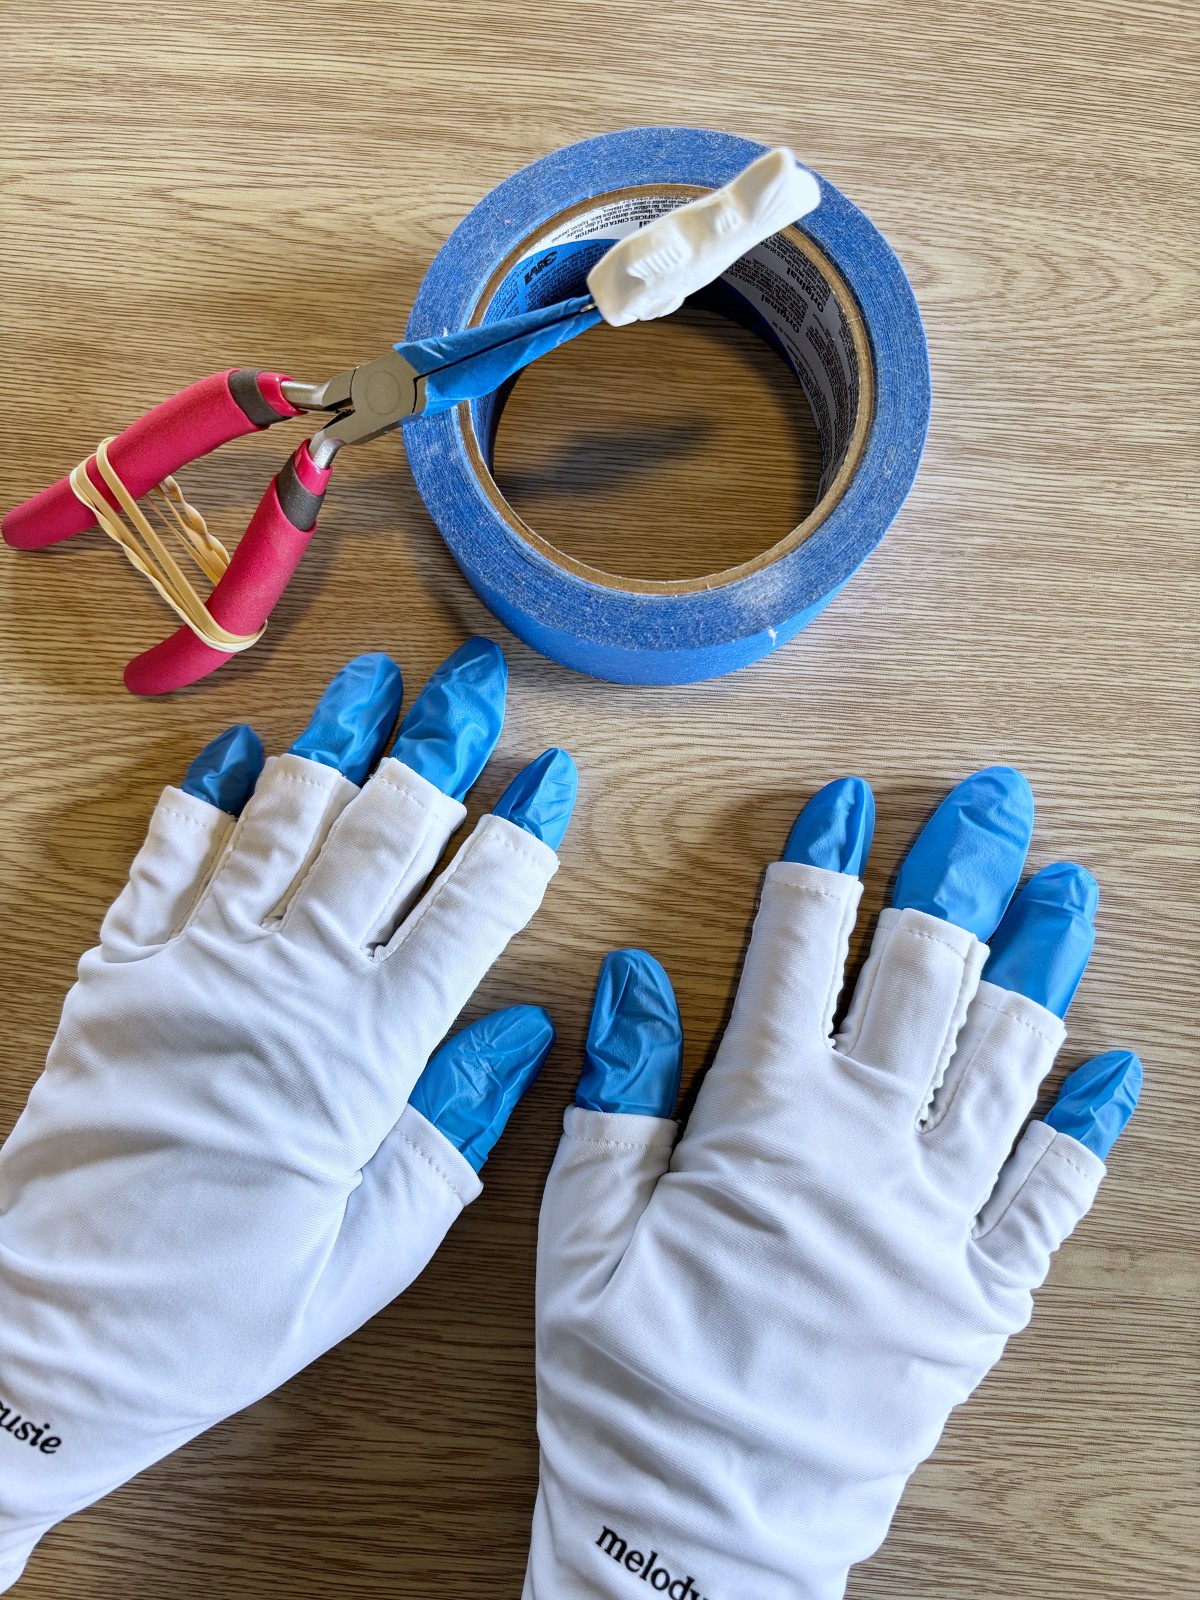
When using resin, there are a few important things to consider. First is the safety equipment. I always wear latex gloves when working with resin, you don’t want it to touch your skin. This is optional, but I also wear UV blocking gloves when I have to hold a clay piece in front of the UV light for an extended period of time. On my face I wear safety glasses to protect my eyes, a quality respirator, and always make sure to open all my windows to get good ventilation.
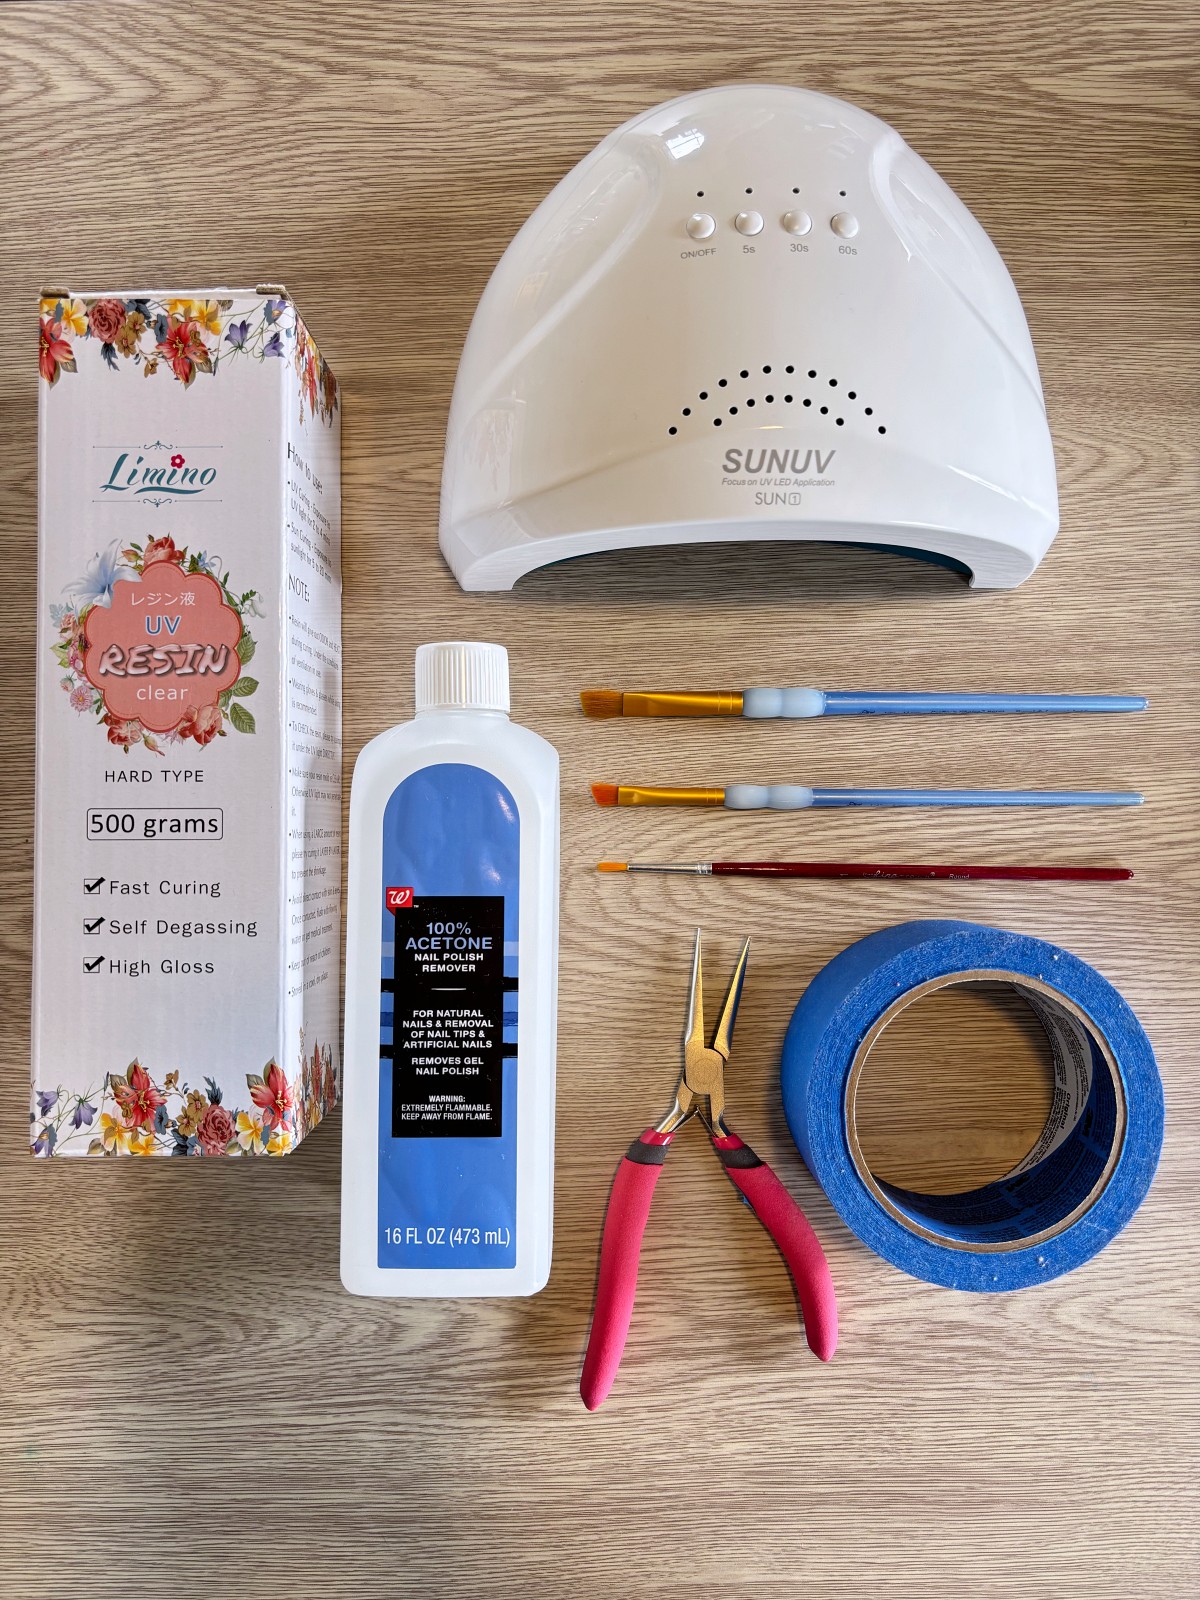
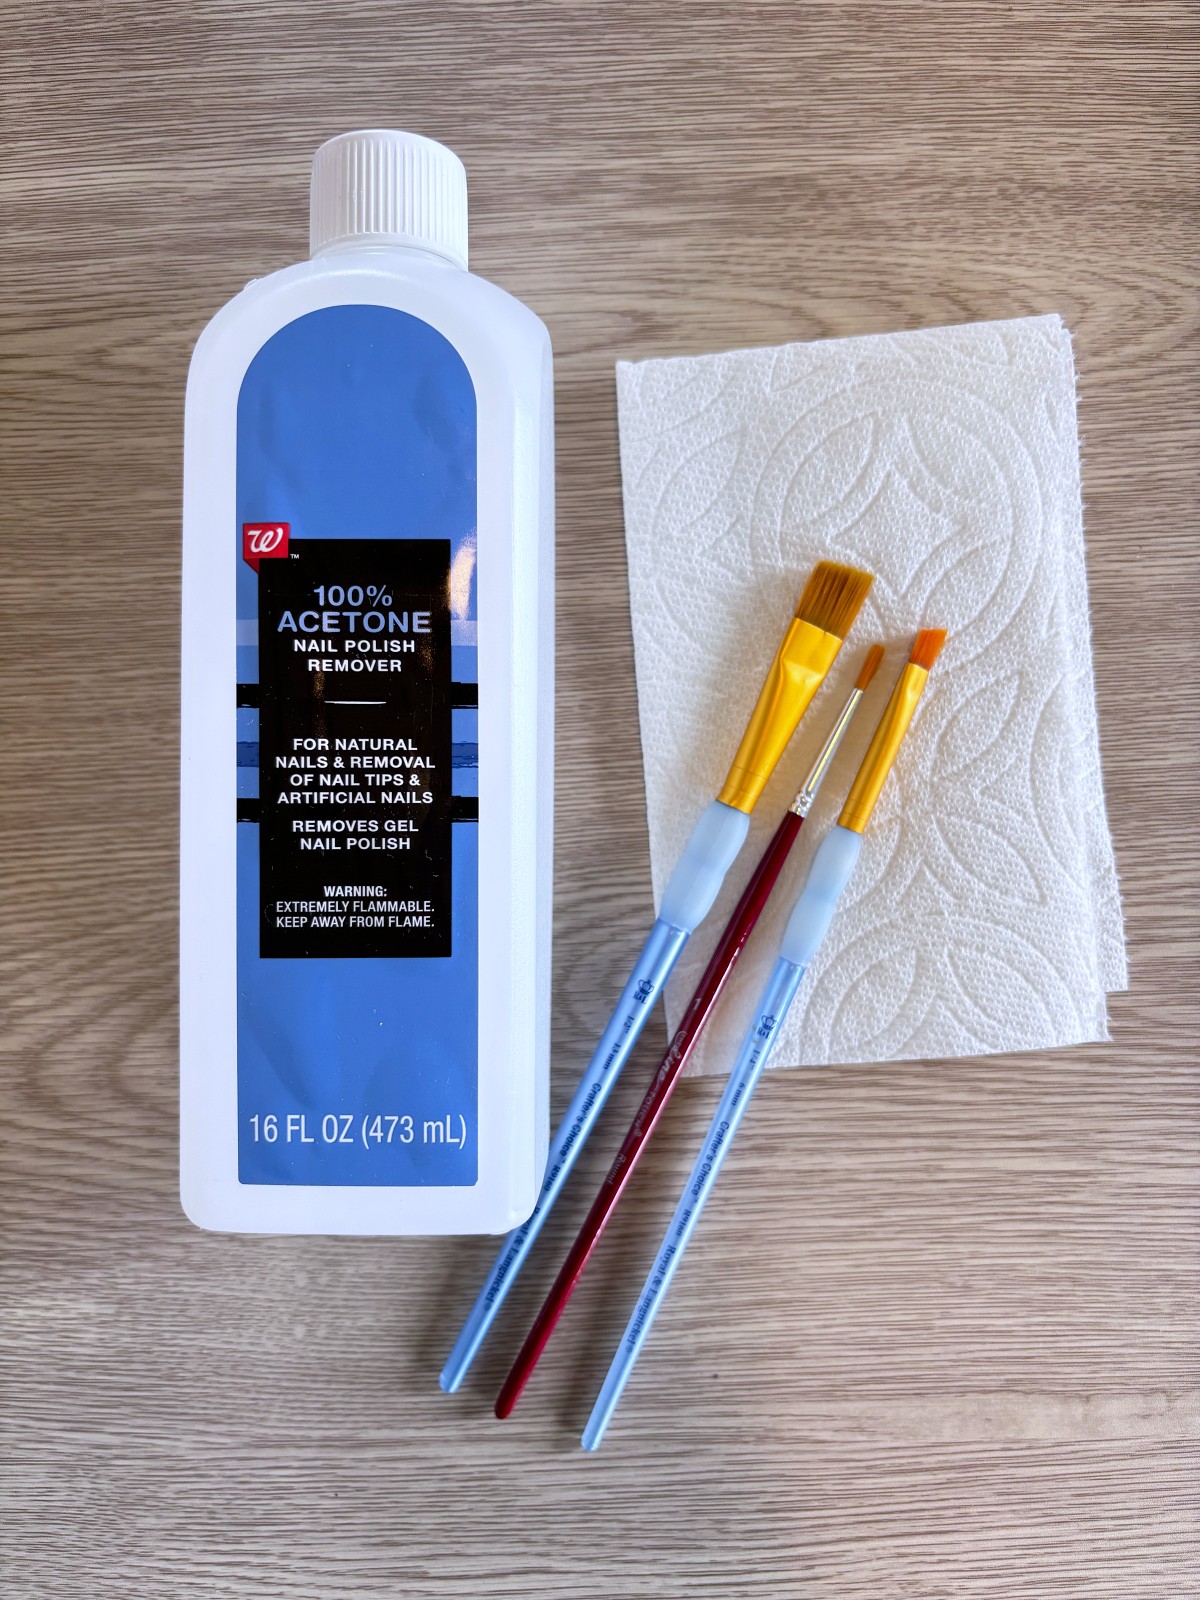
The second thing to consider is the resin, tools, and equipment. I use Limino UV resin, hard type, on all of my polymer clay charm pieces after they have been baked and painted. When it’s time to quickly and efficiently cure my pieces, I use a UV nail lamp. A few more essential tools I use are metal pliers, painters tape, paintbrushes, paper towels, and 100% acetone. I will go into more detail a little later on in this post about how I specifically use these tools.
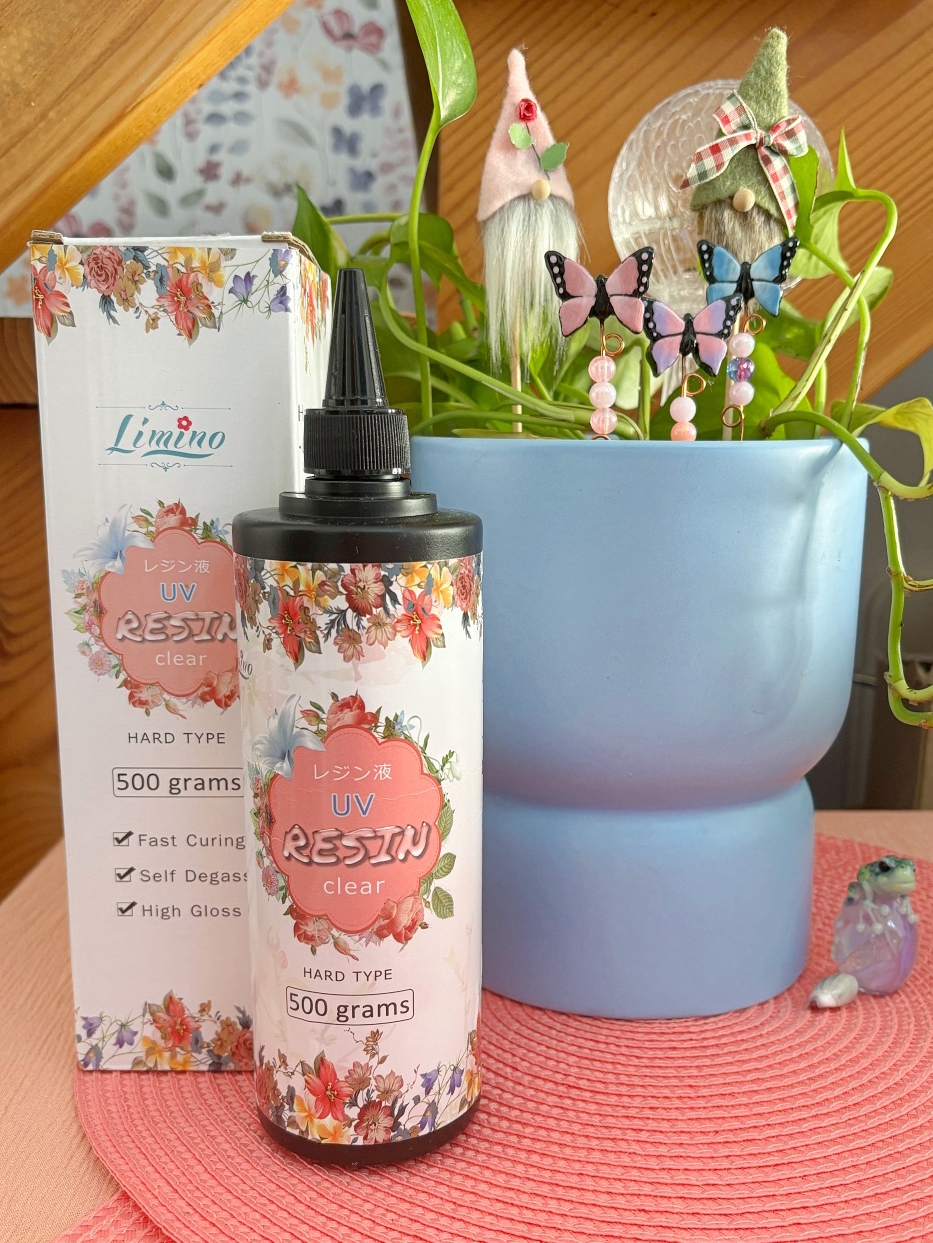
Brand of UV Resin I Use
Let me start with explaining what brand of resin I use. I have always worked with Limino UV resin from Amazon. This resin is very durable, not too odorous, and paints smoothly on my clay charms and earrings. You can use other brands of resin but I would recommend doing some research to make sure you pick a resin that doesn’t yellow easily and has good reviews.
Using UV Resin and How I clean up
Now I will tell you what I use to apply the resin to my clay pieces. I start by squeezing a few small drops of resin. Then using a paintbrush I smooth out the resin into a nice even layer. You can always add more resin but it’s a fine line between too much and too little.
You need a thick enough layer of resin so that it doesn’t pull away from the edges or get too thin as it cures. However, if there is too much resin it will also struggle to cure properly. I highly recommend doing a few tester pieces to really get the hang of it.
While each clay charm or batch of earrings are curing in the UV light, I clean my brush with a paper towel and 100% acetone. Make sure to wear gloves while cleaning the brushes. The acetone breaks down the uncured resin on the paintbrush and wipes away leaving a nice clean brush ready to use on the next piece. If you don’t clean the paintbrush then you risk the resin partly curing on the brush, making it a lot harder to use again.
Curing the Resin
The next question to think about is how do you want to cure your resin pieces. Some people place their pieces in the sunlight outside, but I don’t like having to rely on the weather being sunny. I personally prefer to use a UV nail lamp. The UV nail lamp is large enough to fit a hand so I haven’t had any problems fitting any of my earrings or clay charms inside.

When curing the resin, it is important to keep your skin and hands safe. I wear latex gloves as well as UV blocking gloves when handling the resin in the UV light. The UV blocking gloves are important when I have to hold a clay charm in the light while it cures, guarding my skin from the harsh UV rays.
Tips and tricks
Tip #1: If I want resin to cover my entire clay charm, including the bottom, then I use metal pliers to hold the charm by its eye hook. There are a few things I do to prepare my pliers before I start resigning a charm. First things first, I wrap my pliers in blue painters tape. This way when I get done all I have to do is take the tape off and my pliers are clean. Next, I get a rubber band to wrap around the handle of my pliers. This is a great way to save your hand a lot of strain because the resin takes about four minutes to fully cure under a UV lamp.
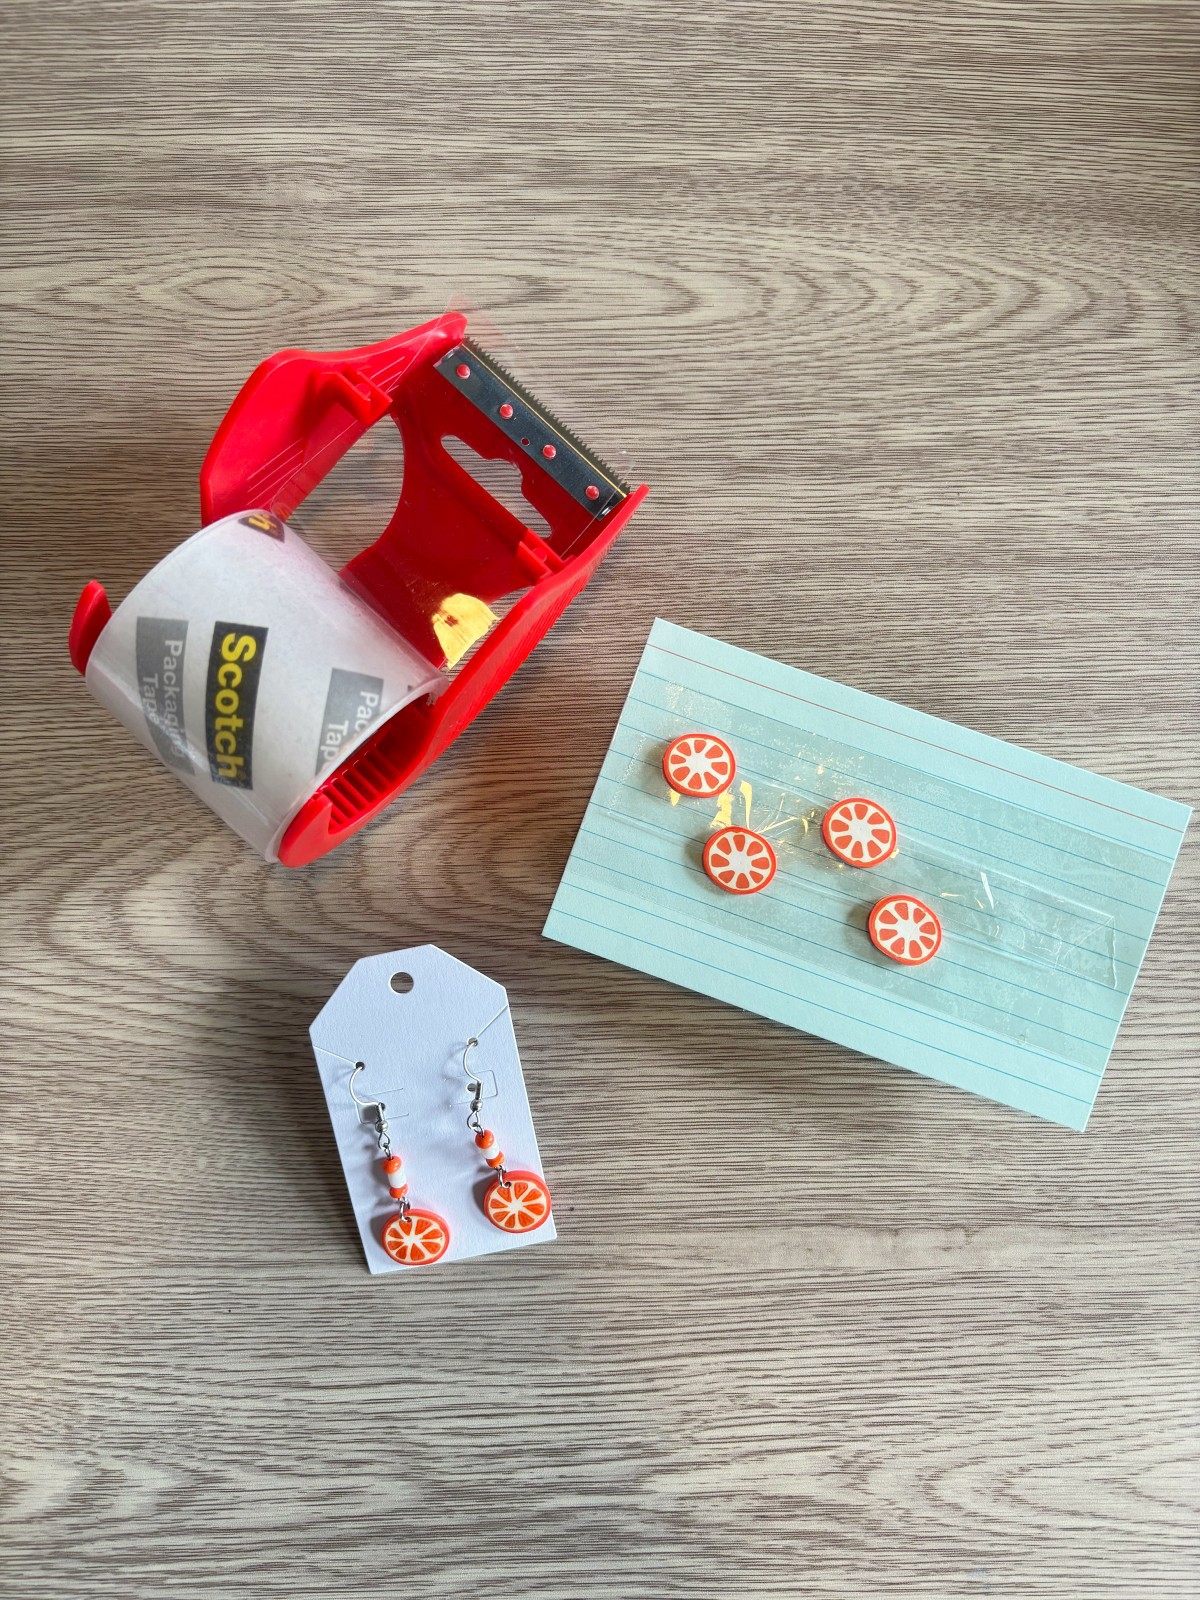
Tip #2: When it comes to putting resin on something flat, such as clay slab earrings, I have found a really easy way to keep them in place using an index card and packing tape. Simply wrap an index card in clear packing tape with a line of folded sticky tape in the middle. Then press each earring in place evenly spaced out.
Packing tape helps if you accidentally drip some resin off the side of the earring because it won’t stick and can be cleaned up after. The index card also works really well to slide each batch of earrings in and out of the UV lamp.
Final thoughts
Resin is not the easiest to use but I love the shinny glass like effect it gives my polymer clay pieces. I think it adds a really nice professional look, seals in any painted details I add, and creates a layer of durability.
You are bound to make a few mistakes in the beginning so don’t be too hard on yourself and remember to have fun. Practice definitely makes perfect when it comes to using resin. I hope you found this post helpful and informative. Good luck on your future resin endeavors and happy crafting.